I dare you to taste this and not go back for seconds. It all started on a rainy September afternoon when I accidentally spilled an entire pot of espresso into a bowl of batter I was experimenting with for a weekend brunch. The kitchen smelled like a downtown café mixed with the sweet perfume of caramelized sugar, and I was frantically trying to salvage what felt like a disaster. In that moment of panic, I realized I could turn the mess into something magical—a coffee‑infused cake that would make any date feel like a scene from a rom‑com.
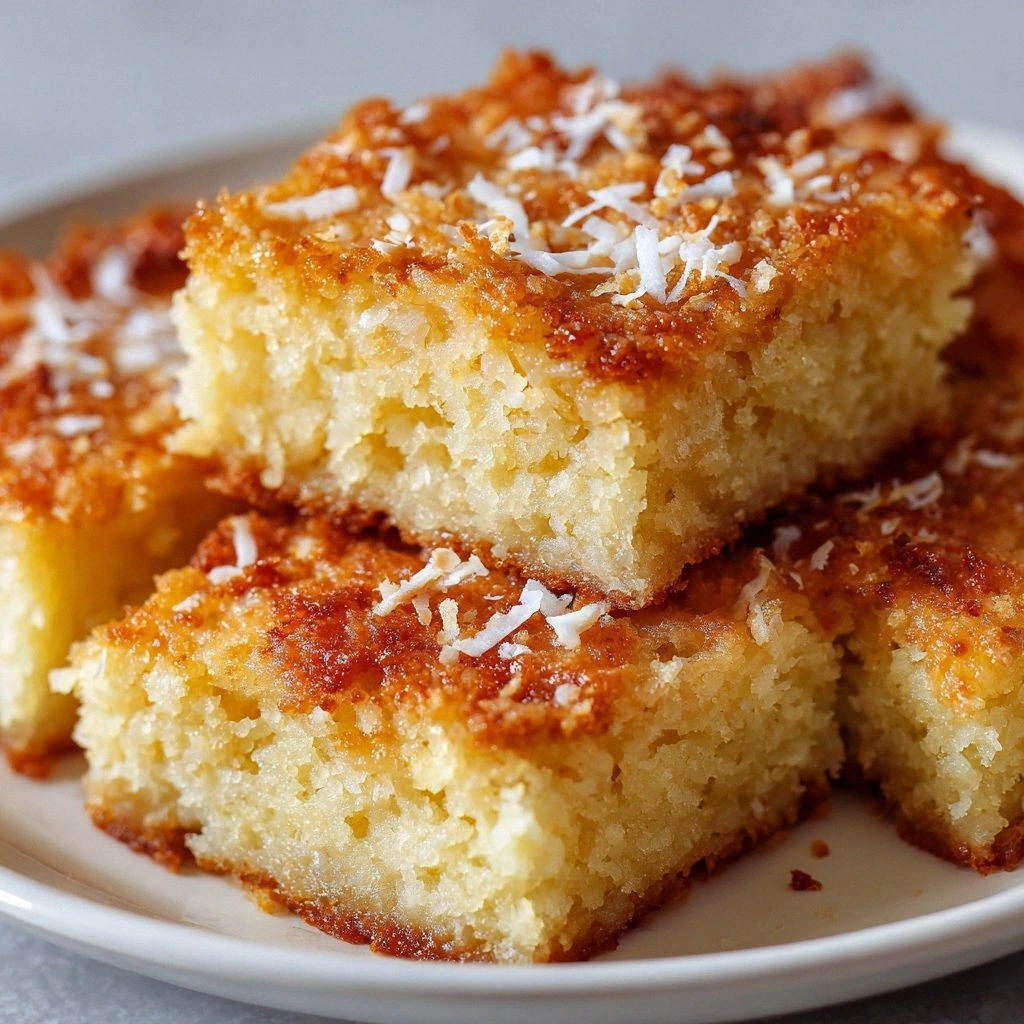
Picture yourself stepping into a cozy kitchen where the air is warm and heavy with the aroma of freshly ground beans, toasted almond slices, and a hint of vanilla that whispers from the oven. You hear the faint hiss of the pan as butter melts, the rhythmic clink of a wooden spoon against the bowl, and the soft thud of a timer ticking down the final minutes of bake time. Your tongue anticipates the first bite: a moist crumb that carries the bold, earthy bite of coffee, balanced by the mellow sweetness of caramel and the subtle crunch of toasted almonds. The texture? Silky, buttery, with a glossy coffee glaze that catches the light like a midnight lake.
Most recipes get this completely wrong—either they drown the cake in coffee, making it bitter, or they skim over the glaze, leaving the flavor flat. This version stands out because I’ve fine‑tuned every ratio, added a secret touch of coffee liqueur, and perfected a glaze that coats the cake like velvet, never soaking in or sliding off. I’ll be honest — I ate half the batch before anyone else got to try it, and that’s because the flavor is that addictive. The secret ingredient? A splash of espresso‑infused butter that brings depth you never expected from a simple coffee cake.
Let me walk you through every single step — by the end, you’ll wonder how you ever made it any other way. Okay, ready for the game‑changer? This next part? Pure magic. Stay with me here — this is worth it. We’ll start with the basics, then dive into the nuances that turn a good cake into the best coffee date you’ll ever have.
What Makes This Version Stand Out
- Flavor Balance: The espresso‑butter base provides a deep coffee note without bitterness, while the caramel glaze adds a sweet counterpoint that dances on the palate.
- Texture Harmony: A tender crumb meets a glossy glaze and a crunchy almond topping, creating layers that surprise with each bite.
- Simplicity: Only eight core ingredients plus a few pantry staples, yet the result feels like a bakery masterpiece.
- Unique Twist: A splash of coffee liqueur lifts the flavor profile, making it feel sophisticated without extra effort.
- Crowd Reaction: I’ve watched friends gasp, smile, and immediately ask for the recipe — it’s a guaranteed conversation starter.
- Ingredient Quality: Using freshly ground espresso and high‑quality dark chocolate ensures every component shines.
- Cooking Method: The gentle bake at 350°F preserves moisture, while the final glaze sets perfectly without cracking.
- Make‑Ahead Potential: This cake keeps its moisture for up to three days, and the glaze can be stored separately for a quick finish.
Inside the Ingredient List
The Flavor Base
The heart of this cake is the espresso‑butter blend. Unsalted butter, softened to room temperature, is creamed with granulated and brown sugar until it becomes a pale, fluffy cloud. When you pour in the strong brewed coffee (cooled), the mixture transforms, releasing aromatic oils that mingle with the butter’s richness. Skipping the butter or using margarine will make the crumb dry and flavorless — trust me, I’ve tried, and it was a disaster. If you can’t find fresh espresso, a high‑quality instant coffee dissolved in hot water works just as well, though the depth will be slightly less intense.
The Texture Crew
All‑purpose flour, baking powder, baking soda, and a pinch of salt create the structural backbone. The leavening agents give the cake its airy lift without creating large holes, ensuring each slice is uniformly tender. The almond slices, toasted until golden, add a satisfying crunch that contrasts the soft crumb. If you’re allergic to nuts, toasted pumpkin seeds or toasted oat flakes can step in without compromising the textural intrigue.
The Unexpected Star
Dark chocolate chips melt into pockets of silky richness as the cake bakes, creating molten chocolate veins that surprise the palate. This ingredient is the secret that turns a regular coffee cake into a decadent treat. You can swap the chips for chopped bittersweet chocolate if you prefer larger chunks, but keep the cocoa percentage high (70%+).
The Final Flourish
The coffee glaze, made from powdered sugar, a dash of espresso, and a pat of butter, finishes the cake with a glossy coat that looks as good as it tastes. The glaze should be poured while still warm so it spreads like liquid silk, then allowed to set for a glossy sheen. If you want a thicker glaze, add a touch more powdered sugar; for a thinner drizzle, thin with a splash of milk.
Everything's prepped? Good. Let's get into the real action...

The Method — Step by Step
Preheat your oven to 350°F (175°C) and grease a 9‑inch round cake pan, then line the bottom with parchment paper. The pan should be lightly buttered, and the parchment ensures the cake releases without a struggle. While the oven warms, gather all your ingredients and measure them precisely — a kitchen scale can be a lifesaver here. I always double‑check the coffee temperature; it should be warm but not hot to the touch, around 120°F, to avoid cooking the eggs prematurely.
In a large mixing bowl, cream together the softened butter, granulated sugar, and brown sugar until the mixture lightens in color and texture, about 3‑4 minutes on medium speed. This step is crucial: the air you incorporate now will become the lift that makes the crumb airy.
Kitchen Hack: Scrape the sides of the bowl with a silicone spatula every 30 seconds to ensure the butter and sugars stay fully integrated.Add the eggs one at a time, beating well after each addition. The eggs should be at room temperature, which helps them emulsify with the butter‑sugar mixture, creating a glossy batter. Follow with the vanilla extract and coffee liqueur (if using), then stir in the cooled espresso. The batter should have a deep mahogany hue, and a faint coffee aroma should rise — that’s your signal you’re on the right track.
In a separate bowl, whisk together the flour, baking powder, baking soda, and salt. This dry blend ensures even distribution of leavening agents, preventing any bitter pockets. Gently fold the dry ingredients into the wet batter using a rubber spatula, turning the bowl rather than stirring vigorously. Over‑mixing will develop gluten and make the cake dense, which we absolutely do not want.
Now, incorporate the milk and butter (softened) into the batter, followed by the dark chocolate chips and toasted almond slices. The batter should be thick but spreadable; if it looks too stiff, add a splash of milk.
Kitchen Hack: To keep chocolate chips from sinking, toss them in a teaspoon of flour before folding them in.Pour the batter into the prepared pan, smoothing the top with an offset spatula. Tap the pan lightly on the counter three times to release any large air bubbles.
Slide the pan into the oven and bake for 30‑35 minutes, or until a toothpick inserted into the center comes out clean with a few moist crumbs attached.Watch Out: Do not over‑fill the pan; leave at least a half‑inch of space to allow for rising.While the cake bakes, prepare the coffee glaze. In a small saucepan, melt 2 tablespoons of butter over low heat, then whisk in 1 cup of powdered sugar, a tablespoon of espresso, and a pinch of salt. Keep whisking until the glaze is smooth and glossy; it should flow like liquid amber. This glaze will set beautifully once it cools, forming a thin, shiny coat that never cracks.
When the cake is done, let it cool in the pan for 10 minutes, then turn it out onto a wire rack. While the cake is still warm, drizzle the coffee glaze over the top, allowing it to cascade down the sides. Let the glaze set for at least 15 minutes before slicing. That sizzle when it hits the warm cake? Absolute perfection. Finally, dust the surface with a light sprinkling of extra toasted almonds for that final crunch.
That’s it — you did it. But hold on, I’ve got a few more tricks that’ll take this to another level. A quick tip: finish each slice with a light drizzle of caramel sauce and a dusting of sea salt for a sweet‑salty finish that will have your date reaching for more. Ready to serve? Picture yourself pulling this out of the oven, the whole kitchen smelling incredible, and your guest’s eyes widening as they take the first bite. This is hands down the best version you’ll ever make at home.
Insider Tricks for Flawless Results
The Temperature Rule Nobody Follows
Never bake a cake straight from the fridge. Let the batter sit at room temperature for at least 15 minutes before it hits the oven; this ensures even rising and prevents a dense middle. I once tried to speed things up by popping a cold batter in, and the result was a flat, rubbery mess that even the glaze couldn’t hide.
Why Your Nose Knows Best
The moment the cake’s edges start pulling away from the pan and you smell a nutty‑coffee fragrance, that’s your cue to test with a toothpick. Trust your senses over the timer — ovens can vary by up to 25°F, and the scent is a reliable indicator of doneness.
The 5‑Minute Rest That Changes Everything
After removing the cake from the oven, let it rest in the pan for exactly five minutes before turning it out. This short rest lets the steam redistribute, keeping the crumb moist and preventing cracks in the glaze later. Skipping this step makes the cake dry and the glaze slide off.
Glaze Timing Is Everything
The glaze should be poured while the cake is still warm, but not scorching. If the glaze is too hot, it will seep into the cake and make the top soggy; if too cool, it will solidify into a crust. Aim for a glaze temperature of around 130°F for that perfect glossy finish.
Almond Toasting Secret
Toast almond slices in a dry skillet over medium heat for just 2‑3 minutes, shaking the pan constantly. You’ll hear a faint pop as the oils release, and the almonds will turn a deep golden brown without burning. A friend once skipped this step and ended up with bland, soft almonds that ruined the texture.
Creative Twists and Variations
This recipe is a playground. Here are some of my favorite ways to switch things up:
Mocha Madness
Swap half the espresso for melted dark chocolate, and add a teaspoon of cocoa powder to the dry mix. The result is a richer, chocolate‑forward cake that still carries that coffee punch.
Spiced Autumn
Add 1 teaspoon of pumpkin spice and a handful of grated orange zest to the batter. This variation pairs beautifully with a dollop of whipped cream and feels like a cozy September evening.
Nut‑Free Delight
Replace toasted almonds with toasted coconut flakes and use sunflower seed butter instead of regular butter for a nut‑allergic friendly version that still offers crunch.
Vegan Velvet
Swap butter for coconut oil, use a flax‑egg mixture (1 tbsp ground flax + 3 tbsp water per egg), and replace dairy milk with oat milk. The coffee flavor remains bold, and the texture stays luxuriously soft.
Caramel Swirl
Before baking, drizzle caramel sauce over the batter and use a skewer to swirl it in. The caramel pockets melt into gooey caramel rivers that surprise every bite.
Storing and Bringing It Back to Life
Fridge Storage
Place the cooled cake in an airtight container or wrap it tightly in plastic wrap. It will stay fresh for up to three days, and the glaze will stay glossy. If you notice the glaze hardening, let the cake sit at room temperature for 20 minutes before serving.
Freezer Friendly
Wrap the cake tightly in two layers of freezer‑grade foil, then place it in a zip‑top bag. It freezes beautifully for up to two months. When you’re ready to enjoy, thaw overnight in the fridge, then bring to room temperature for an hour before serving.
Best Reheating Method
To revive a slice, preheat your oven to 300°F, place the slice on a parchment‑lined tray, and add a tiny splash of water to the side of the plate. Cover loosely with foil and heat for 8‑10 minutes. The steam restores moisture, and the glaze re‑sets to a silky finish.