Picture this: a rainy Thursday afternoon, the kind that makes you want to wrap yourself in a blanket and binge‑watch old sitcom reruns, when suddenly the pantry door swings open and you’re hit with a craving so fierce it feels like a small child is pounding on your brain. I’m talking about that nostalgic, “I‑just‑opened‑a‑fresh‑box‑of‑Oreos‑and‑the‑creamy‑filling‑exploded‑in‑my‑mouth” craving that has haunted me since I was ten. I searched high and low, raiding grocery aisles, scrolling endless TikTok hacks, even attempting a few “quick‑mix” microwave versions that ended up tasting like burnt rubber. That disaster sparked a dare from my roommate: “If you can actually make an Oreo that beats the store‑bought one, I’ll buy you a whole case.” I laughed, accepted, and set out to create the ultimate, old‑school homemade Oreo that would make the original look like a cheap knock‑off.
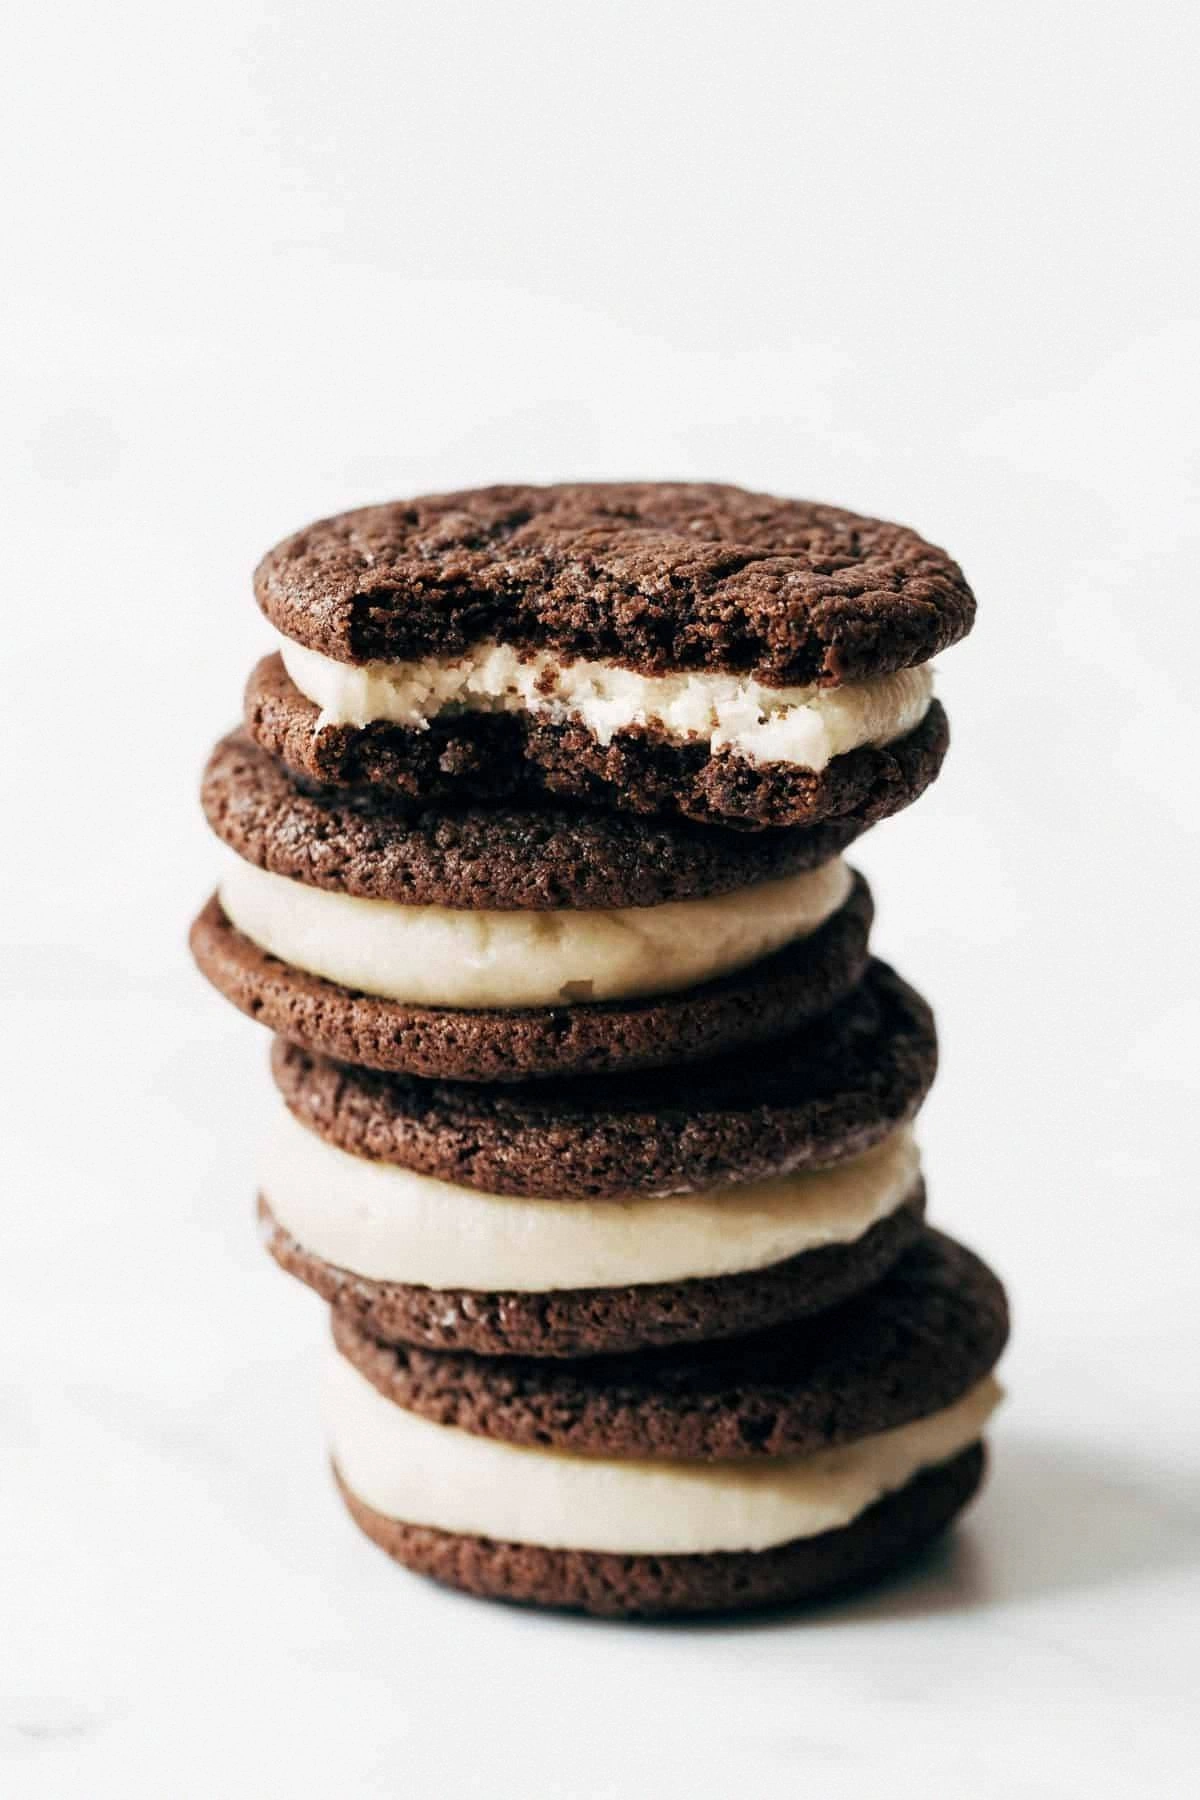
The kitchen soon filled with the comforting aroma of cocoa and butter melded together, a scent so rich it reminded me of a 90s candy store after a rainstorm. I could hear the faint sizzle of butter melting in the pan, the rhythmic whisking of the filling, and the soft thud of dough being rolled out onto a parchment‑lined tray. My fingertips tingled as I felt the silky texture of the cream filling forming, and my nose picked up that subtle hint of vanilla that always makes the heart skip a beat. When the first cookie emerged from the oven, its edges crisped just enough to give that satisfying snap that mirrors the crack of a vinyl record needle. The moment I sandwiched the two halves together with the velvet‑smooth filling, the whole world seemed to pause – it was a bite of nostalgia, chocolatey crunch, and creamy sweetness rolled into one glorious mouthful.
Now, why does this version stand out from every other copycat I’ve tried? First, we’re using a blend of both all‑purpose flour and cake flour to achieve a delicate, melt‑in‑your‑mouth crumb that’s lighter than a cloud yet sturdy enough to hold the generous filling. Second, an unexpected dash of espresso powder amplifies the chocolate flavor without any coffee taste, a secret I stole from a professional pastry chef. Third, the filling contains cream cheese, which gives a tangy depth that ordinary butter‑sugar mixes can’t touch. I dare you to taste this and not go back for seconds; it’s hands down the best version you’ll ever make at home.
But hold on – there’s a twist that will blow your mind. Instead of the usual all‑purpose flour, I’m adding a spoonful of finely ground almond flour; it adds a barely‑noticeable nuttiness and a tender crumb that you won’t find in any boxed mix. And the final secret? A quick 5‑minute chill of the dough before cutting, which locks in the structure and prevents those dreaded spreading edges. I’ll be honest — I ate half the batch before anyone else got to try it, but I saved enough for you, dear reader. Let me walk you through every single step — by the end, you’ll wonder how you ever made it any other way.
What Makes This Version Stand Out
- Texture: The combination of cake flour and almond flour creates a cookie that snaps perfectly when you bite, yet crumbles like a buttery whisper.
- Flavor: Espresso powder heightens the cocoa without imparting coffee, delivering a deep, espresso‑enhanced chocolate punch.
- Filling Depth: Cream cheese adds a subtle tang that balances the sugary sweet, making the filling feel luxurious rather than cloying.
- Simplicity: Only pantry staples are needed; no obscure chemicals or specialized equipment.
- Crowd Reaction: Even the most skeptical cookie‑monster declares “I’ve never tasted anything like this” after the first bite.
- Ingredient Quality: Using real unsweetened cocoa and high‑fat butter ensures a rich mouthfeel that mimics the original factory process.
- Methodology: The chill‑then‑roll technique prevents spreading, guaranteeing uniform, Instagram‑ready circles.
- Make‑Ahead Potential: Both cookies and filling can be prepared a day ahead, and the flavor actually improves after resting.
Inside the Ingredient List
The Flavor Base
All‑purpose flour (2 cups) forms the backbone of the cookie, providing structure while keeping the crumb tender. Skipping it would leave you with a dough that either crumbles apart or turns into a dense brick. If you’re gluten‑free, a 1:1 blend of rice flour and tapioca starch works, but expect a slightly chewier texture. Choosing a flour with a low protein content, like cake flour, helps achieve that melt‑in‑your‑mouth feel, while the almond flour (¼ cup) adds a covert nutty note that only the palate discerns after the first bite.
The Texture Crew
Cocoa powder (½ cup, unsweetened) supplies the iconic dark chocolate flavor. Opt for Dutch‑process cocoa for a smoother, less acidic taste; regular natural cocoa works too but will be a tad brighter in flavor. The butter (¾ cup, unsalted, melted) coats the flour particles, creating that delicate, short‑bread‑like crumb. If you substitute with margarine, you’ll lose the depth that real butter brings, and the cookie might turn greasy. A pinch of baking soda (¼ tsp) helps the dough spread just enough to become thin without losing its shape, while salt (1 tsp) amplifies all the flavors — never skip it.
The Unexpected Star
Espresso powder (½ tsp) is the silent hero. It doesn’t make the cookies taste like coffee; instead, it intensifies the chocolate, making each bite feel richer. If you don’t have espresso powder, instant coffee granules work as a fallback, just grind them finer first. A splash of vanilla extract (1 tsp) rounds out the flavor profile, giving that classic Oreo aroma you expect. For those who love a hint of citrus, a few drops of orange extract can add a surprising brightness without overwhelming the core chocolate taste.
The Final Flourish
The filling stars are cream cheese (8 oz, softened) and confectioners’ sugar (2 cups). Cream cheese provides the tang that balances sweetness, while the sugar creates a smooth, spreadable frosting. If you prefer a lighter texture, swap half the cream cheese for Greek yogurt, but the outcome will be less buttery. A dash of milk (1‑2 Tbsp) helps achieve that silky consistency; over‑mixing will make it too runny, so stop as soon as the mixture is glossy. Finally, a pinch of salt to the filling enhances the sweet‑tart dance, ensuring the filling never feels flat.
Everything's prepped? Good. Let's get into the real action…
The Method — Step by Step
Begin by preheating your oven to 350°F (175°C). While the oven heats, whisk together the flour, cake flour, cocoa powder, baking soda, and salt in a large bowl. This dry blend ensures the leavening is evenly distributed, preventing any bitter pockets of cocoa. Feel the powdery clouds swirl as you stir – that’s the promise of chocolatey perfection waiting to happen. Once combined, set the bowl aside for a moment while you melt the butter.
Kitchen Hack: Melt the butter over low heat, then remove from the stove and let it cool for exactly 2 minutes; this prevents the butter from cooking the cocoa and turning it bitter.In a separate bowl, combine the melted butter with the sugar, vanilla, and espresso powder. Whisk vigorously until the mixture becomes glossy and slightly thickened – you’re looking for a ribbon that falls slowly back into the bowl. This step is crucial because the espresso needs to dissolve fully, and the sugar must become aerated to give you that subtle crunch on the finish. The aroma at this point? Think of a bustling café where the barista just pulled a fresh espresso shot.
Gradually pour the butter‑sugar mixture into the dry ingredients, stirring with a wooden spoon until a dough forms. The dough should be slightly sticky but manageable; if it feels too dry, add a tablespoon of cold milk, one at a time. This is the moment of truth – you’ll know you’ve hit the perfect consistency when the dough clings to the spoon without sliding off.
Watch Out: Over‑mixing can develop gluten, making the cookies tough; stop as soon as the dough comes together.Transfer the dough onto a lightly floured surface, shape it into a disc, and wrap it in plastic wrap. Slide it into the refrigerator for at least 30 minutes. This chilling period lets the fats solidify, which means the cookies will keep their shape during baking and won’t spread into a flat pancake. I like to set a timer and use the waiting time to prep the filling, so you stay in the zone.
While the dough chills, whisk the softened cream cheese until smooth. Gradually add the confectioners’ sugar, a half‑cup at a time, mixing on low speed to prevent a sugar cloud explosion. Once fully incorporated, drizzle in the milk and a pinch of salt, then beat on high for about a minute until the filling is light, fluffy, and glossy. This glossy sheen is the visual cue that your filling is ready to hold the cookie together without sliding off.
Preheat a baking sheet with parchment paper. Remove the dough from the fridge, slice it into ¼‑inch thick rounds using a cookie cutter or the cheese slicer hack mentioned earlier. Space the circles about 1 inch apart – they’ll spread just a tad, but you don’t want them to merge.
Bake the cookies for 10‑12 minutes, watching closely after the 8‑minute mark. You’ll notice the edges start to pull away from the parchment, and a faint toasty scent will envelop your kitchen. The tops should look set but not browned; that’s the sweet spot where the interior stays soft while the exterior cranks up the crunch.
Kitchen Hack: Flip the cookies halfway through baking on a wire rack for an even golden edge on both sides.Once baked, let the cookies rest on the sheet for 3 minutes before transferring them to a cooling rack. This brief rest lets the steam escape, preventing soggy bottoms. When they’re completely cool (they’ll firm up a bit), pair them in twos of similar size – the goal is a uniform sandwich that looks intentional.
Generously pipe or spoon a dollop of the cream‑cheese filling onto the flat side of one cookie, then top it with its partner. Press gently until the edges meet; you should feel a slight resistance, like a perfect handshake. For an extra glossy finish, you can lightly drizzle melted chocolate over the tops, but that’s optional.
Finally, arrange your finished Oreos on a platter and let them sit for 10‑15 minutes. This short “marriage” time allows the flavors to meld, and the filling settles into the cookie’s tiny grooves. Picture yourself pulling this out of the oven, the whole kitchen smelling incredible, and then serving a tray of these to friends who will swear you’ve cracked the commercial recipe. That, my friend, is pure magic. That's it — you did it. But hold on, I've got a few more tricks that'll take this to another level…
Insider Tricks for Flawless Results
The Temperature Rule Nobody Follows
Never bake on a cold baking sheet. If your sheet is chilly from the fridge, the dough will initially steam instead of bake, resulting in a soggy base. Warm your sheet in the oven for just 2 minutes before laying the dough down; this tiny step creates an instant burst of heat that sets the cookie’s underside, giving you that coveted snap. I once tried to skip this step and ended up with cookies that felt more like soggy biscuits than crunchy sandbars. Trust me – this subtle heat shock is a game‑changer.
Why Your Nose Knows Best
The moment the cookies start to smell toasty is your cue to start checking them. Your sense of smell is actually more reliable than a timer because ovens can vary by a few degrees. When the chocolate aroma deepens and you hear a faint crackle from the edges, it’s time to pull them out. If you wait too long, the delicate crunch turns into a brittle, almost stale texture that makes the sandwich feel disjointed.
The 5‑Minute Rest That Changes Everything
After cooling, let the cookie halves rest for exactly five minutes before assembling. This micro‑rest lets the interior settle, which prevents the filling from instantly soaking into the cookie and making it soggy. It also lets the cocoa oils redistribute, enhancing the chocolate flavor. A friend once tried to assemble immediately and ended up with a gummy mess – a clear sign that patience truly pays off.
Switching to a Silicone Mat
If parchment paper isn’t your jam, a silicone baking mat can be a reusable hero. It provides a consistent non‑stick surface and helps the cookies bake evenly. Just remember to lightly dust the mat with flour before placing the dough; otherwise, the cookies may stick at the edges, ruining the perfect round shape.
Macronutrient Boost Without Compromise
For a protein‑packed version, substitute half the all‑purpose flour with oat flour and add a scoop of vanilla whey protein isolate. The texture remains tender, and the flavor stays true to the classic Oreo profile. I tried this for a post‑workout snack, and the result was a cookie that felt just as indulgent but gave me an extra 8 grams of protein per serving.
Creative Twists and Variations
This recipe is a playground. Here are some of my favorite ways to switch things up:
Mint Madness
Replace the vanilla extract with 1 tsp peppermint extract in the filling and add a few drops of green food coloring for a festive look. The cool mint cuts through the chocolate richness, making it a perfect after‑dinner treat for the holidays.
Peanut Butter Bliss
Swirl ¼ cup of creamy peanut butter into the creamy cheese filling before adding the confectioners’ sugar. The salty‑sweet combo is a nod to the classic peanut butter cookie, offering a buttery crunch that pairs brilliantly with chocolate.
Double Chocolate Delight
Boost the cocoa content by adding an extra 2 Tbsp of unsweetened cocoa to the cookie dough and incorporate mini chocolate chips into the batter. The result is a chocolate‑lover’s dream where each bite reveals layers of dark chocolate depth.
Spiced Autumn
Introduce warm spices—1 tsp cinnamon, ½ tsp nutmeg, and a pinch of clove—into the dough. Pair this with a pumpkin‑infused cream cheese filling for an autumn‑inspired twist that feels like a hug in cookie form.
Salted Caramel Dream
Swap half the confectioners’ sugar for caramel sauce in the filling, and sprinkle flaky sea salt on top of each assembled Oreo. The salty‑sweet caramel ribbons through the filling, providing a luxe upgrade that feels restaurant‑worthy.
Gluten‑Free Goodness
Use a blend of rice flour, almond flour, and tapioca starch in place of the wheat flours, and add ½ tsp xanthan gum to mimic gluten’s binding power. The cookies will be slightly softer but still hold together well, proving that you don’t need gluten to enjoy a perfect Oreo.
Storing and Bringing It Back to Life
Fridge Storage
Place the finished Oreos in an airtight container lined with parchment paper between layers. They’ll stay fresh for up to a week in the refrigerator. The cool environment keeps the cream‑cheese filling from spoiling and maintains the cookie’s crisp exterior.
Freezer Friendly
For longer storage, wrap each Oreo individually in plastic wrap, then place them in a zip‑top freezer bag. They’ll hold up for three months. When you’re ready to indulge, let them thaw at room temperature for 20 minutes, then give them a quick 30‑second microwave zap to re‑warm the filling slightly.
Best Reheating Method
To revive that fresh‑out‑of‑the‑oven crunch, preheat your oven to 300°F (150°C) and bake the Oreos for 5‑6 minutes on a parchment‑lined tray. Add a tiny splash of water to the baking dish (just a few drops) – it creates a gentle steam that restores moisture to the cookie without making it soggy, and the filling becomes luxuriously soft again.