Picture this: you’re standing in a kitchen that smells like a bakery on a Sunday morning, the oven humming, the timer ticking, and the anticipation of something sweet that feels almost too good to be true. That was the moment when my friend dared me to make the most legendary version of the Old-Fashioned Hot Milk Cake, a recipe that had been whispered about in my family for generations. I grabbed the ingredients, set the timer, and let the adventure begin. The first crackle of butter meeting the pan felt like applause, and the steam rose like a fragrant cloud of possibility. The kitchen was alive with the sound of whisking, the gentle hiss of sugar dissolving, and the faint clink of a measuring cup. I knew, at that instant, that this cake was going to be the kind of comfort food that turns a regular day into a celebration.
When the batter first hit the skillet, a golden glow spread across the surface, and the air filled with a warm, buttery aroma that made my mouth water. The texture was silky, yet the edges started to crisp in a way that felt like a subtle rebellion against the soft center. Every spoonful was a harmonious blend of sweet, slightly tangy milk notes, with a hint of vanilla that lingered like a secret whisper. I could almost taste the nostalgia of childhood mornings, the way a simple cake could bring a smile to anyone’s face. The sound of the batter sizzling was a soundtrack that promised something extraordinary. I could hear the kitchen clock counting down, and I was ready to dive deeper into this culinary journey.
What makes this version stand out is not just the combination of ingredients, but the meticulous way they’re brought together. It’s a cake that defies the usual expectations of a milk cake by adding a touch of caramelized butter, a subtle lift from baking powder, and a depth of flavor from a carefully measured vanilla. The result is a cake that is tender on the inside, with a caramelized crust that cracks like brittle sugar when you bite into it. It’s a balance of sweet and savory that makes each bite feel like a new discovery. This recipe turns the ordinary into extraordinary, and I promise you, it’s a game-changer that will keep you coming back for more.
I dare you to taste this and not go back for seconds. If you’re skeptical, just imagine the moment your fork meets the cake and the aroma explodes in your nose, making you question why you ever settled for a mediocre dessert. Let me walk you through every single step — by the end, you’ll wonder how you ever made it any other way. This is hands down the best version you'll ever make at home, and I can’t wait to share all the secrets that make it so special.
What Makes This Version Stand Out
- Flavor Depth: The subtle caramelization of butter creates a rich, almost chocolatey undertone that elevates the sweet vanilla profile. This depth is achieved through a precise browning technique that adds complexity without overpowering the delicate milk base. The result is a cake that feels indulgent yet balanced, with a lingering aftertaste that keeps you craving more.
- Texture Contrast: The batter’s silky smoothness gives way to a crisp, golden crust that snaps pleasantly when bitten. This contrast is the hallmark of a well-crafted milk cake, and it’s achieved by letting the edges set just enough before flipping. The interior remains moist, ensuring every bite is a melt-in-your-mouth experience.
- Simple Prep: Despite its sophisticated flavor profile, the recipe requires only a handful of pantry staples. No exotic ingredients, no complicated equipment, just a standard skillet and a reliable oven. This simplicity makes it accessible for cooks of all skill levels.
- Crowd Appeal: Whether you’re serving a family gathering or a casual brunch, this cake wins hearts instantly. Its comforting aroma and sweet, buttery taste are universally loved, making it a crowd-pleaser that can’t be ignored.
- Ingredient Quality: Using fresh, high-quality butter and whole milk transforms the cake from ordinary to extraordinary. The quality of these core ingredients directly influences the final flavor, so choosing the best available makes all the difference.
- Method Precision: The step-by-step approach ensures that even first-time bakers can achieve a flawless result. Each phase—mixing, browning, baking—is clearly delineated, eliminating guesswork and promoting confidence.
- Make‑Ahead Potential: Once baked, the cake can be stored and reheated with minimal loss of texture and flavor. This makes it ideal for busy schedules or for those who love to prep ahead.
- Versatility: The base recipe is a playground for creative twists—add spices, fruits, or a splash of espresso for a coffee-infused version. Its neutral foundation invites experimentation while maintaining its core identity.
Alright, let's break down exactly what goes into this masterpiece…
Inside the Ingredient List
The Flavor Base
- All-Purpose Flour: Acts as the structural foundation, providing the cake with body and a tender crumb. If you skip it, the batter becomes runny and the cake collapses. For a gluten-free version, swap with a 1:1 gluten-free blend that contains xanthan gum for elasticity.
- Granulated Sugar: Sweetens the batter and aids in browning, giving the crust its caramelized hue. Reducing sugar by even a tablespoon will noticeably change the flavor profile. If you prefer a healthier option, try a 1:1 substitution with honey, but adjust the liquid slightly.
- Baking Powder: Gives the cake lift, ensuring it doesn’t sink in the skillet. Without it, the cake stays flat and dense. If you can’t find baking powder, combine 1/4 tsp baking soda with 1/2 tsp cream of tartar for a similar effect.
- Salt: Enhances all the other flavors and balances the sweetness. A pinch too much can ruin the delicate taste, so measure carefully. If you’re on a low-sodium diet, reduce by half and taste as you go.
The Texture Crew
- Whole Milk: Provides moisture and richness, contributing to the cake’s velvety interior. Whole milk’s fat content is essential; skim milk will result in a drier, less luscious texture. If dairy is a concern, oat milk can be used, but add a splash of coconut oil for richness.
- Unsalted Butter: Adds flavor, helps with browning, and keeps the cake tender. The butter’s water content creates steam that lifts the batter. Use room-temperature butter for even melting; melted butter is acceptable if you’re short on time.
- Egg: Binds the ingredients together and adds structure. If you need a vegan alternative, replace with a flax egg (1 tbsp ground flaxseed + 3 tbsp water) or a commercial egg replacer. An extra egg will make the cake richer and denser.
- Vanilla Extract: Provides depth and a sweet aroma that ties all the flavors together. Pure vanilla bean paste offers a more intense flavor but is pricier. If you’re on a budget, vanilla sugar can be a cost-effective substitute.
The Unexpected Star
- Lemon Zest (Optional): A subtle citrus brightness that cuts through the richness, adding a fresh layer of flavor. If you omit it, the cake remains sweet but may feel a little flat. Use zest from an organic lemon for the best aroma.
- Ground Cinnamon (Optional): Adds warmth and complexity, especially in fall or winter variations. A pinch can transform the cake into a cozy comfort dessert. Cinnamon also has natural antioxidant properties, giving a healthful twist.
The Final Flourish
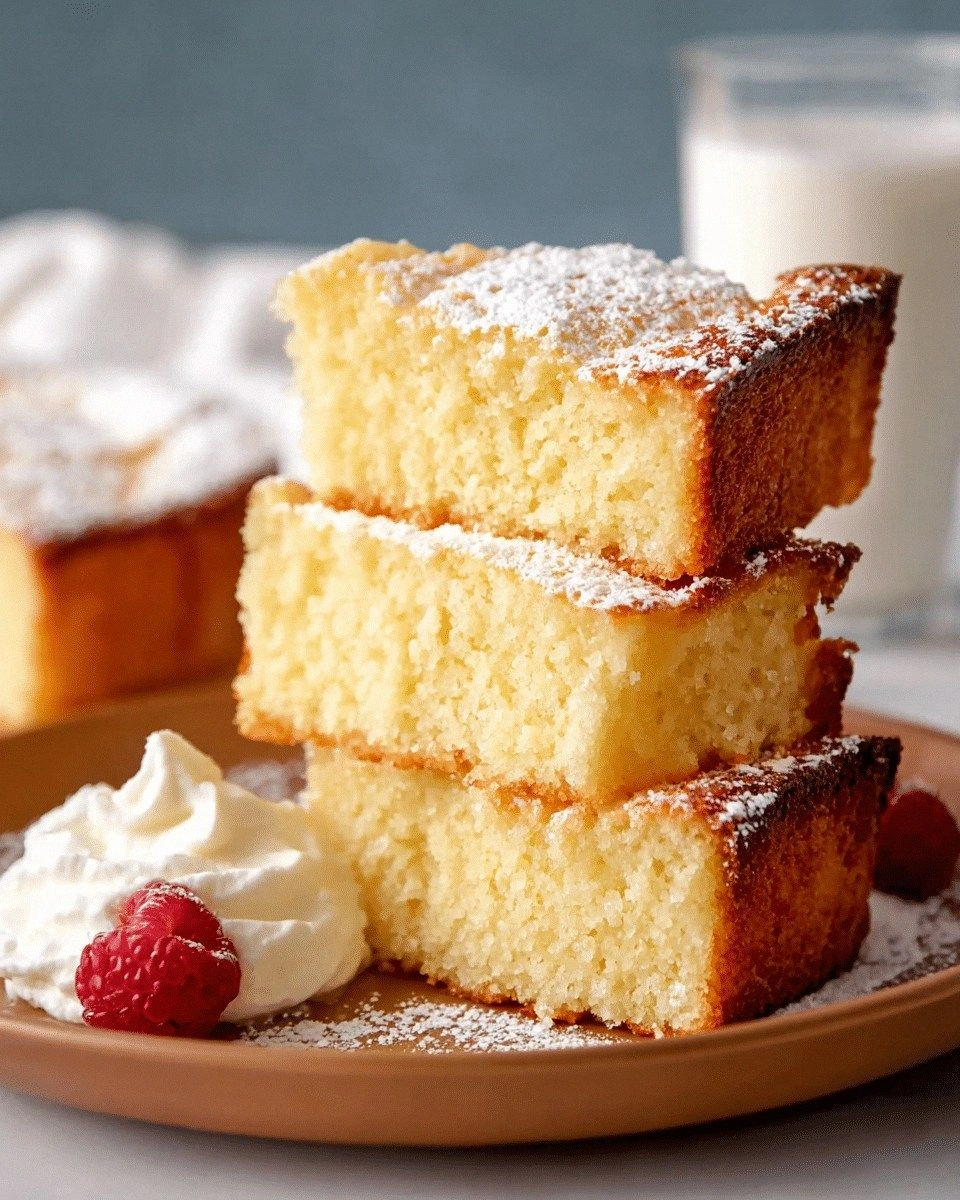
- Optional Toppings: Fresh berries, a dusting of powdered sugar, or a drizzle of honey can elevate the presentation. Each topping adds a new dimension of flavor and texture, making the cake versatile for any occasion. Experiment with different combinations to keep the recipe exciting.
Everything’s prepped? Good. Let’s get into the real action…
The Method — Step by Step
- In a medium bowl, whisk together flour, sugar, baking powder, and salt until well combined. The dry mix should look slightly granular, ready to absorb the wet ingredients. This step ensures even distribution of leavening agents. Skipping it will result in uneven rise.
- In a separate bowl, beat the egg, then add milk, melted butter, and vanilla extract. Stir until the mixture is smooth, with no lumps of flour or egg. The wet ingredients should be glossy, indicating proper emulsification. This is where the cake’s silky texture begins to form.
- Pour the wet mixture into the dry ingredients and stir gently with a silicone spatula until just combined. Be careful not to overmix; the batter should be slightly lumpy. Overmixing will develop gluten and make the cake tough. The batter should flow slowly, indicating it’s ready for the pan.
- Heat a 10-inch non-stick skillet over medium heat and add a tablespoon of butter. Once the butter foams, pour the batter into the skillet, spreading it evenly with a spatula. The butter should sizzle gently, creating a golden crust as it cooks. The skillet should be hot enough to give a quick rise.
- Let the cake cook undisturbed for 4-5 minutes until the edges lift from the skillet and the bottom turns golden brown. The top should still look wet and slightly translucent. This is the moment of truth where the batter’s structure locks in. Avoid flipping too early to preserve the crust.
- Flip the cake carefully and cook for an additional 3-4 minutes until the second side is golden. The internal temperature should reach 190°F, indicating doneness. The aroma will become more pronounced, signaling the caramelization of sugars. The cake should feel firm to the touch but still have a slight give.Watch Out: When flipping, use a large spatula and a gentle rocking motion to avoid tearing the crust. A sudden flip can cause the batter to split, ruining the smooth surface. Keep your hand steady and your eyes on the edges.
- Remove the cake from the skillet and transfer it to a wire rack set over a baking sheet to keep the bottom crisp. Let it rest for 2 minutes so the steam escapes. This short rest prevents the bottom from becoming soggy. The cake should still be warm and fragrant.
- Slice the cake into wedges or squares and serve warm. Drizzle with a simple glaze of powdered sugar and milk if desired, or top with fresh fruit for a burst of color. The cake’s texture will contrast nicely with the sweet glaze. Enjoy while it’s still warm for the best experience.
That’s it — you did it. But hold on, I've got a few more tricks that'll take this to another level. These insider tips will help you avoid common pitfalls and elevate the cake to a professional standard.
Insider Tricks for Flawless Results
The Temperature Rule Nobody Follows
Many bakers underestimate the importance of skillet temperature. The skillet should be hot enough that a pinch of batter sizzles immediately, but not so hot that it burns. A quick test is to sprinkle a drop of water; if it dances, you’re ready. This subtle adjustment ensures a golden crust and prevents sticking.
Why Your Nose Knows Best
When the batter starts to brown, the aroma changes from buttery to caramel-like. Trust this scent as a cue to flip; it indicates the crust has set properly. A lingering buttery smell means you need more time, while a burnt scent signals you’re overcooking. Your nose is the most reliable sensor in the kitchen.
The 5-Minute Rest That Changes Everything
After removing the cake from the skillet, let it rest for exactly five minutes on a wire rack. This rest allows the steam to redistribute, resulting in a tender crumb. Skipping this step often leaves the cake slightly dry. Even a short rest can make a noticeable difference in mouthfeel.
Keep the Crust Crisp
To preserve the crisp edges, avoid covering the cake immediately after cooking. If you need to keep it warm, wrap it loosely in parchment paper to allow steam to escape. This prevents condensation from softening the crust and keeps the cake visually appealing.
Enhance Flavor with a Dash of Espresso
Adding a tablespoon of espresso powder to the batter intensifies the vanilla notes and adds a subtle bitterness that balances the sweetness. This trick turns the cake into a coffee-infused dessert perfect for brunch or a dessert coffee pairing. If you don’t have espresso powder, a strong brewed espresso works as a substitute.
Use a Non-Stick Skillet for the Win
A good quality non-stick skillet ensures even heat distribution and easy flipping. If you’re using a cast-iron pan, preheat it longer and use a thin layer of oil to prevent sticking. A well-maintained skillet is a silent hero that guarantees a flawless cake.
Creative Twists and Variations
This recipe is a playground. Here are some of my favorite ways to switch things up:
Chocolate‑Infused Delight
Fold in 2 tablespoons of cocoa powder and replace 1/4 cup of milk with chocolate milk. The result is a mocha‑like cake that pairs beautifully with whipped cream. Chocolate lovers will find this variation irresistible.
Spiced Autumn Edition
Stir in 1 tsp of ground cinnamon and 1/4 tsp of ground nutmeg. Add a handful of dried cranberries for a burst of tartness. This version is perfect for cozy fall gatherings.
Berry Burst Variation
Fold fresh blueberries or raspberries into the batter before cooking. The berries burst with juice, creating a sweet, tangy flavor profile. Serve with a drizzle of lemon glaze for added zing.
Nutty Crunch Twist
Top the finished cake with chopped toasted almonds or walnuts before serving. The nuts add a satisfying crunch and nutty aroma. Pair with a caramel sauce for a decadent treat.
Gluten-Free Adaptation
Swap all-purpose flour for a gluten-free blend that contains xanthan gum. Keep the rest of the recipe unchanged. The texture will be slightly denser but still wonderfully moist.
Vegan Version
Replace the egg with a flax egg (1 tbsp ground flaxseed + 3 tbsp water) and use plant-based milk. The cake will have a slightly different texture but will remain fluffy and flavorful. This variation makes the recipe inclusive for all dietary needs.
Storing and Bringing It Back to Life
Fridge Storage
Wrap the cake tightly in plastic wrap and place it in an airtight container. Store in the refrigerator for up to 3 days. The cake will stay moist and retain its flavor if kept properly sealed.
Freezer Friendly
Slice the cake before freezing, then wrap each slice in parchment paper and place in a freezer bag. Freeze for up to 2 months. Thaw at room temperature for 30 minutes before reheating.
Best Reheating Method
Reheat frozen slices in a microwave on medium power for 30-45 seconds. Add a splash of milk or water before heating to create steam and restore moisture. Alternatively, place the cake on a baking sheet and warm in a 350°F oven for 10 minutes.