Picture this: it’s a rainy Saturday, the kind of evening where the world outside feels like a watercolor wash of gray. I’m standing in my kitchen, a half‑empty pot of cocoa on the stove, and the scent of burnt sugar already creeping in from the last batch of brownies that went rogue. My roommate, a self‑proclaimed “dessert snob,” challenges me to make something that will make her taste buds do a double‑take. I accept. I’m about to introduce you to the most enchanting, cloud‑like creation you’ve ever tasted: Marshmallow Blooming Roses – C.
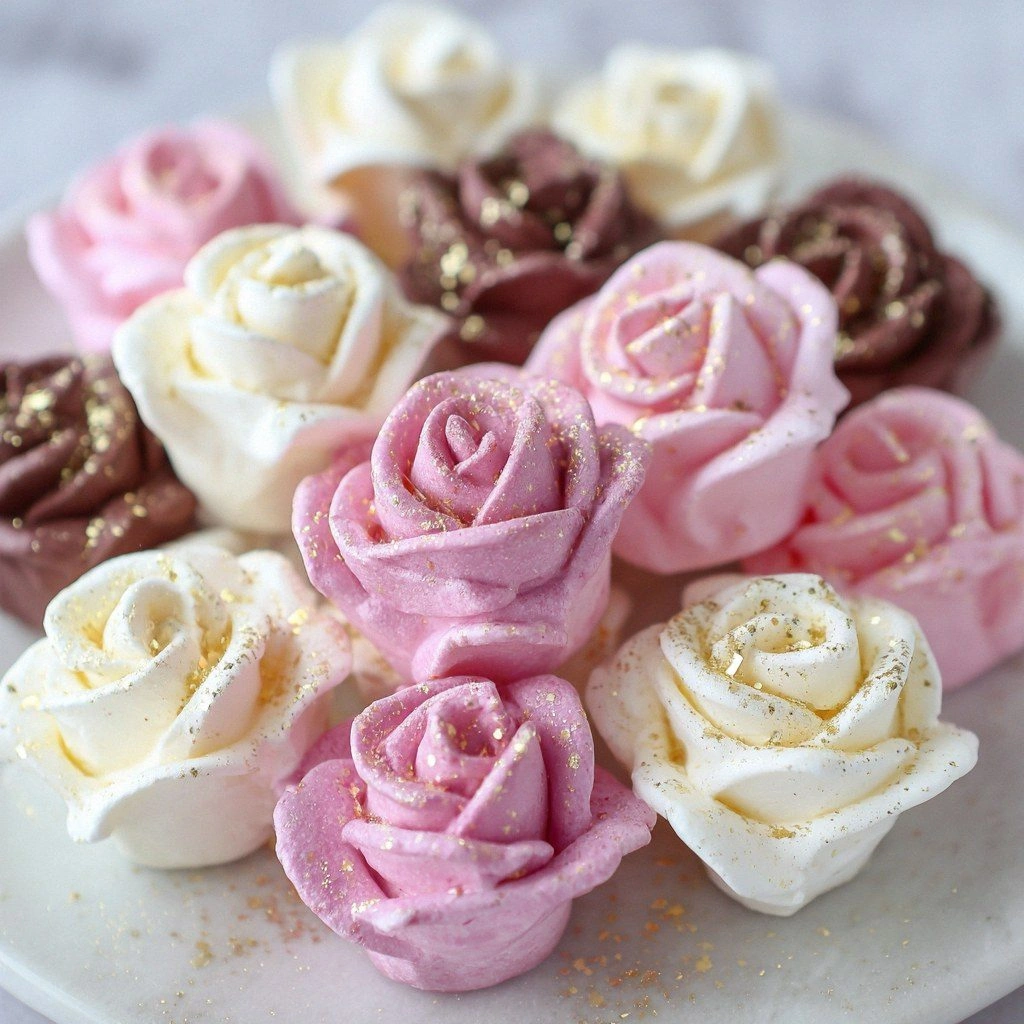
When I first tasted the first batch, my mouth was hit by a velvety, chocolatey hug that felt like a warm blanket wrapped in marshmallow fluff. The rose petals added a subtle floral note that danced on the tongue, while the pistachios gave a satisfying crunch that broke up the softness. The dish was a visual and culinary symphony: rose‑shaped marshmallow clusters glistening under a glossy chocolate glaze, dusted with cocoa powder that looked like a fine mist. The moment the first bite hit, the kitchen filled with the sweet, caramelized aroma that made every other dessert in the house seem flat in comparison.
Why does this version stand out from every other recipe out there? Because it’s not just a dessert; it’s an experience. Most marshmallow‑based treats are simple, airy, and often forgetful of texture. I dared to infuse it with layers of flavor and a meticulous build process that elevates it from a sweet snack to a centerpiece worthy of a gala. The technique of forming mini rose shapes, the secret to a glossy yet non‑greasy glaze, and the subtle addition of rose water and pistachios are the hidden jewels that make this recipe a game‑changer. The result? A dessert that feels like a flower that keeps blooming even after it’s been plated.
Let me walk you through every single step — by the end, you’ll wonder how you ever made it any other way. I dare you to taste this and not go back for seconds. Trust me, it’s hands down the best version you’ll ever make at home. I’ll be honest — I ate half the batch before anyone else got to try it. If you’ve ever struggled with marshmallow desserts that come out too sticky or too dry, you’re not alone — and I’ve got the fix.
What Makes This Version Stand Out
- Texture: The combination of a crisp, caramelized exterior with a soft, melt‑in‑your‑mouth interior creates a satisfying bite that feels like a paradox of clouds and crunch.
- Flavor: The subtle floral hint from rose water pairs perfectly with chocolate, while a pinch of sea salt elevates the sweetness without overpowering.
- Visual Appeal: The rose shapes, glossy glaze, and dusting of cocoa powder give a dramatic, almost theatrical presentation that will wow any gathering.
- Ease of Assembly: The method uses common kitchen tools—no specialized molds or equipment required—making it accessible for anyone.
- Make‑Ahead Friendly: Once assembled, the roses can be stored for up to a week, allowing you to prepare ahead of big events.
- Ingredient Quality: Using high‑grade chocolate, real rose petals, and pistachios ensures that each bite is a burst of premium flavor.
- Versatility: The recipe can be tweaked with different nuts, extracts, or glazes for a personalized touch.
- Audience Reaction: Friends who taste this are often left speechless, prompting the inevitable question: “What’s that secret?”
Alright, let's break down exactly what goes into this masterpiece…
Inside the Ingredient List
The Flavor Base
The foundation of this dessert is a simple yet powerful combination of all‑purpose flour, melted butter, and brown sugar. The flour provides structure, allowing the marshmallow to hold its shape, while the butter and sugar create a tender crumb that melts in your mouth. If you skip the brown sugar, the final product will lack that caramelized depth that makes each bite feel indulgent.
You might wonder why we use vanilla extract here. Vanilla isn’t just a flavor enhancer; it acts as a subtle binder that helps the batter hold together during the baking process. A common swap is to use almond extract for a nutty undertone, but vanilla remains the classic choice for maximum versatility.
The Texture Crew
Mini marshmallows and chocolate chips are the star players of texture. The marshmallows provide a light, airy core that melts beautifully, while the chocolate chips melt into a glossy glaze that coats each rose. Heavy cream is added to the glaze to give it a silky, smooth finish that doesn’t separate. If you’re aiming for a dairy‑free version, coconut milk will do the trick, but the texture will be slightly different.
The addition of rose petals and pistachios introduces a contrasting crunch and a subtle floral aroma. Skipping the pistachios will result in a less complex mouthfeel, but the dish will still be delightful.
The Unexpected Star
Rose water is the secret ingredient that sets this recipe apart. Its delicate fragrance lingers on the tongue and elevates the chocolate’s richness. If you can’t find rose water, a few drops of natural vanilla or almond extract can substitute, but the floral nuance will be missing.
Cocoa powder, used for dusting, adds a final visual pop of color and a slight bitterness that balances the sweetness. A pinch of ground cinnamon can be added for warmth, but it’s optional.
The Final Flourish
The glaze is where the magic truly happens. Milk, powdered sugar, butter, honey, lemon zest, and almond extract combine to create a glossy, flavorful coating that seals in the marshmallow’s softness while adding a subtle citrus brightness. Each component plays a role: milk keeps the glaze from becoming too thick, honey adds natural sweetness, lemon zest cuts through the richness, and almond extract adds depth.
If you skip the glaze, the roses will still hold their shape, but they’ll lack the glossy, decadent finish that makes them truly unforgettable.
Everything’s prepped? Good. Let’s get into the real action…
The Method — Step by Step
- Preheat your oven to 350°F (175°C) and line two baking sheets with parchment paper. Grease a silicone mat lightly with butter to prevent sticking. This is the moment of truth: the temperature must be right or the marshmallows will either over‑cook or not set properly.
- In a mixing bowl, whisk together the flour, salt, and ground cinnamon until evenly distributed. The dry mix ensures the batter has a uniform consistency.
- In a separate saucepan, melt the butter over medium heat. Stir in the brown sugar until it dissolves completely, creating a glossy syrup that will bind the batter. Keep an eye on the mixture; once it starts to bubble, reduce the heat to avoid caramelization.
- Pour the butter‑sugar mixture into the dry ingredients and stir until a sticky dough forms. Add the vanilla extract, rose water, and a splash of milk to loosen the dough slightly. The dough should be pliable but not too wet.
- Roll the dough into small balls, about 1 inch in diameter. Place them on the prepared silicone mat. Gently press each ball to flatten into a disc; this will be the base of your rose.
- Place a handful of mini marshmallows in the center of each disc. Cover the marshmallows with a thin layer of chocolate chips, ensuring the chips melt into the marshmallow as the oven heats. This step is tricky; if you over‑fill with marshmallows, they’ll spill out.
- Bake for 12–15 minutes, or until the edges are golden and the chocolate has melted into a glossy glaze. Let the roses cool on the mat for 5 minutes before transferring them to a wire rack.
- While the roses are cooling, prepare the glaze. In a small saucepan, combine milk, powdered sugar, butter, honey, lemon zest, and almond extract. Heat over low heat, whisking constantly until the mixture thickens to a pourable consistency. If it becomes too thick, add a splash of milk to thin it out.
- Dip each cooled rose into the glaze, allowing the excess to drip off. Return them to the wire rack to set. The glaze should coat the roses evenly, creating a glossy sheen that catches the light.
- Once the glaze has set, dust the roses lightly with cocoa powder and sprinkle a few pistachios and dried rose petals on top. This final flourish adds texture and a pop of color that makes each rose look like a blooming flower.
- Serve immediately or store in an airtight container at room temperature for up to a week. For best results, let them sit at room temperature for 30 minutes before serving so the glaze softens slightly, revealing the marshmallow’s airy center.
That's it — you did it. But hold on, I've got a few more tricks that'll take this to another level…
Insider Tricks for Flawless Results
The Temperature Rule Nobody Follows
Many bakers think a higher oven temperature will speed up the process, but that’s a myth. Baking at 350°F ensures the chocolate melts evenly without scorching the sugar on the dough. If you’re using a convection oven, lower the temperature by 25°F to compensate for the fan’s extra heat.
Why Your Nose Knows Best
The aroma of the marshmallow and chocolate as they bake is a reliable indicator of doneness. A faint, sweet scent that lingers in the air means the glaze is set and the marshmallow is just starting to soften. If the smell is too sweet and syrupy, you’ve overbaked the roses.
The 5-Minute Rest That Changes Everything
Allowing the roses to rest on the wire rack for exactly five minutes after baking is critical. This brief pause lets the heat distribute evenly, preventing the chocolate from seeping into the dough and ensuring the glaze sets properly. Skipping this step often results in a runny glaze.
The Right Grease
Butter is the traditional greasing agent for silicone mats, but if you’re looking for a lower‑fat version, try a light coating of non‑stick spray. The key is to use just enough to prevent sticking; too much grease will make the roses greasy.
The Secret to a Glossy Finish
After dipping the roses in glaze, place them on a parchment sheet and lightly tap them with a spoon. This removes excess glaze and creates a smooth, glossy surface that looks as good as it tastes.
Creative Twists and Variations
This recipe is a playground. Here are some of my favorite ways to switch things up:
Citrus Burst
Swap the lemon zest for orange zest and add a dash of orange liqueur to the glaze. The citrus pairs beautifully with chocolate, adding a bright, zesty contrast.
Nutty Delight
Replace pistachios with chopped almonds or hazelnuts. The nuttier flavor adds a crunchy texture that complements the soft marshmallow center.
Spiced Elegance
Incorporate a pinch of cardamom or a splash of espresso into the glaze. The warm spices deepen the chocolate flavor, giving the dessert a sophisticated edge.
Vegan Version
Use coconut milk for the glaze, coconut butter for greasing, and a vegan chocolate chip blend. The result is a plant‑based treat that still delivers on flavor and texture.
Garnish Gala
Top each rose with a dusting of edible gold leaf or a drizzle of raspberry coulis for a show-stopping presentation that’s perfect for special occasions.
Miniature Morsels
Scale down the recipe to create bite‑size marshmallow roses for a party platter. Use a silicone muffin mold to shape the dough and ensure uniformity.
Storing and Bringing It Back to Life
Fridge Storage
Store the roses in an airtight container at room temperature for up to 3 days. Avoid refrigerating them, as the moisture will soften the glaze and make the marshmallows soggy.
Freezer Friendly
For longer storage, place the roses in a freezer‑safe bag, removing as much air as possible. Freeze for up to 2 weeks. When ready to serve, thaw at room temperature for 30 minutes to restore the glaze’s glossy sheen.
Best Reheating Method
To revive a frozen rose, preheat your oven to 300°F (150°C) and bake for 5–7 minutes. Alternatively, microwave on low power for 15–20 seconds, watching closely to prevent melting. A tiny splash of water before reheating steams the rose back to perfection, keeping the glaze intact.