Picture this: you’re in the middle of a Sunday brunch, the kitchen smells like warm cinnamon and fresh coffee, and you’re staring at an empty fridge that’s been a silent witness to a week of bland leftovers. Suddenly, a craving bursts through the silence—a craving for something sweet, creamy, and unapologetically indulgent. That’s when I decided to turn a simple banana pudding into a cheesecake‑style masterpiece. I grabbed the ingredients, set my timer, and the kitchen transformed into a symphony of aromas. The air filled with the buttery scent of toasted Nilla wafers, the sweet tang of ripe bananas, and the rich, velvety perfume of cream cheese melting into a silky custard.
I’ll be honest—you’re not going to find a recipe like this on the first page of a cookbook. Most banana puddings are a quick, single‑layer affair, but this version is a layered, no‑bake cheesecake that packs a flavor punch and a texture that’s both crunchy and creamy. It’s the kind of dessert that makes you feel like you’re indulging in a guilty pleasure, yet you’ll tell yourself it’s a healthy treat because it’s loaded with fruit. The secret? A combination of fresh bananas, a buttery Nilla wafer base, and a luscious cream cheese filling that’s thickened with instant pudding and heavy cream.
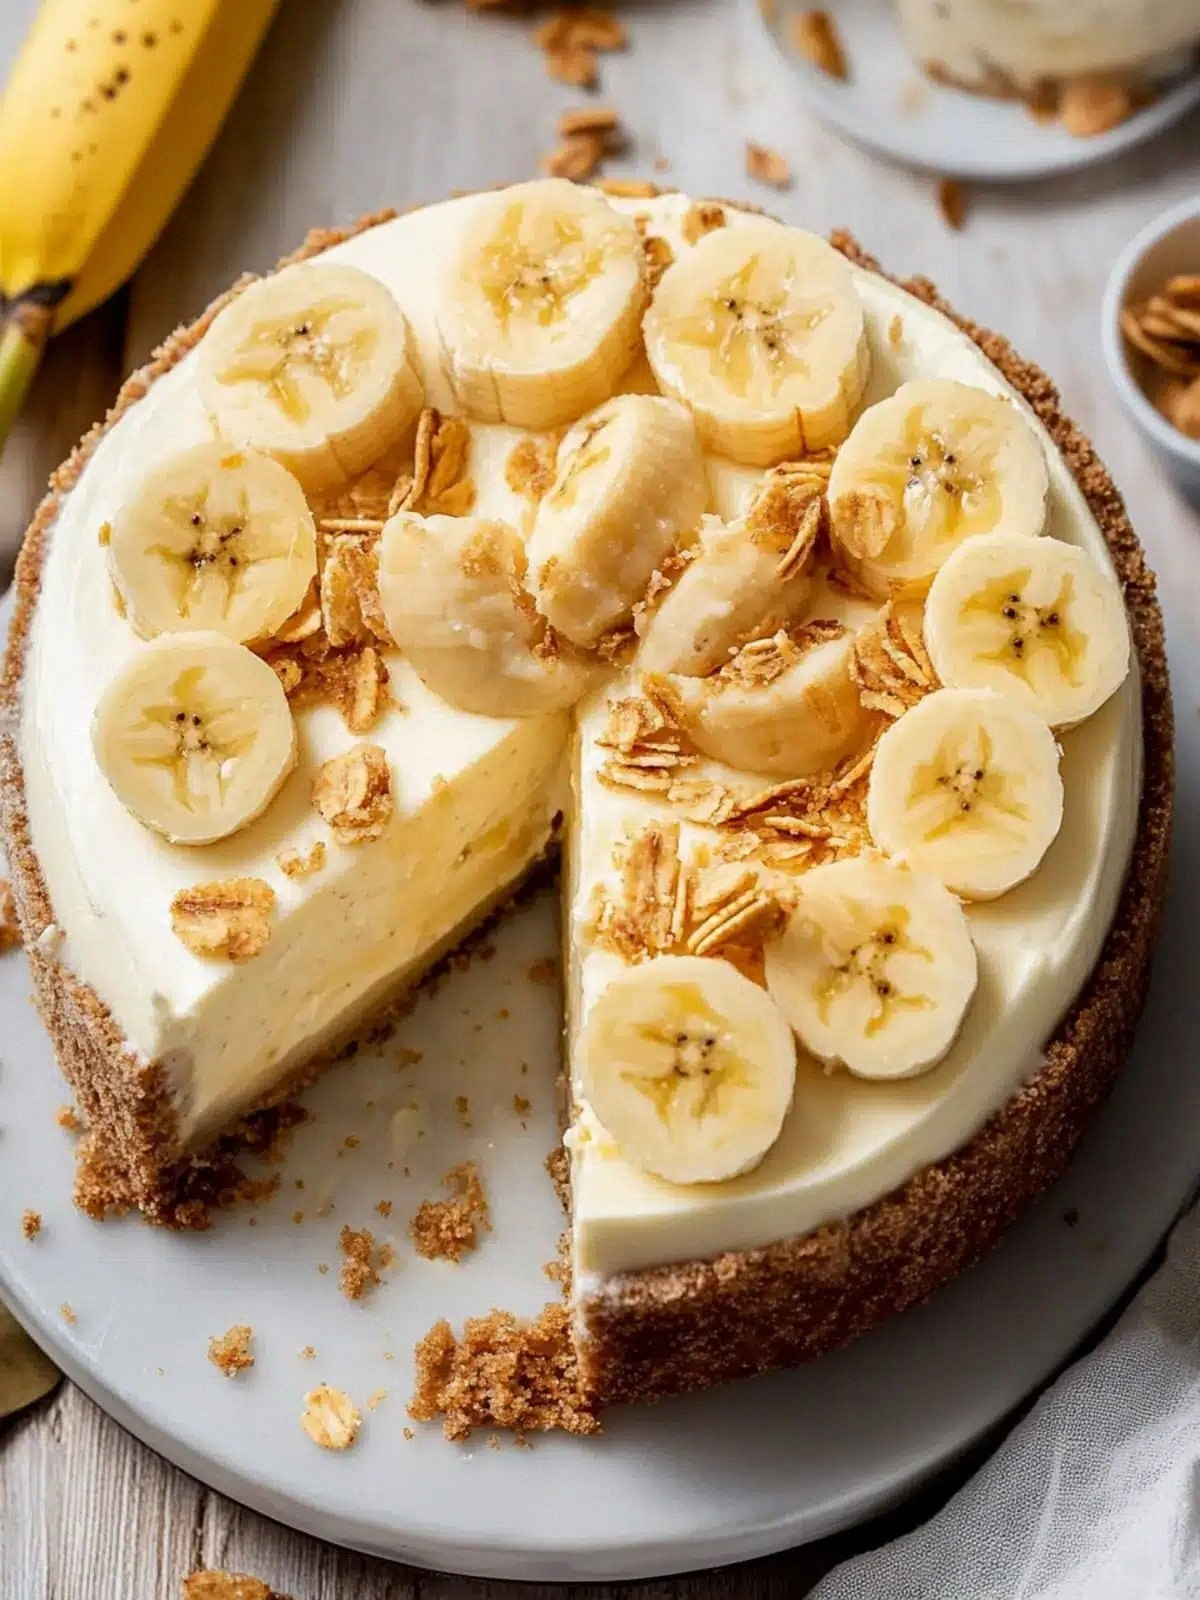
What sets this recipe apart is not just the ingredients, but the way they interact. The Nilla wafers are toasted to a golden brown, giving a subtle crunch that contrasts with the silky interior. The instant vanilla pudding provides a smooth, custard‑like consistency without the need for a pot on the stove, saving you time and reducing the risk of burning. The bananas are mashed to a perfect puree, adding natural sweetness and a hint of banana aroma that permeates every bite. And the final touch— a dusting of crushed wafers on top—adds a delightful crunch and a visual appeal that turns this into a showstopper at any gathering.
I dare you to taste this and not go back for seconds. The first bite will melt in your mouth, releasing layers of creamy custard, banana, and buttery wafer. The second bite will hit a different chord—more texture, a subtle crunch, and a sweet, buttery finish. By the end of it, you’ll be wondering how you ever made banana pudding the old way. Let me walk you through every single step—by the end, you’ll wonder how you ever made it any other way.
What Makes This Version Stand Out
- Flavor: The combination of ripe bananas, creamy cream cheese, and vanilla pudding creates a flavor profile that’s sweet, rich, and perfectly balanced.
- Texture: The toasted Nilla wafer base provides a satisfying crunch that contrasts with the silky interior.
- Time Efficiency: No oven required—just a few minutes of prep and a chill in the fridge.
- All‑Day Freshness: The no‑bake nature means it stays fresh longer, making it ideal for brunches or dinner parties.
- Make‑Ahead Friendly: Assemble the layers ahead of time, refrigerate, and it’s ready to serve whenever the mood strikes.
- Kid‑Friendly: The sweet, mild flavor and fun texture make it a hit with children and adults alike.
- Ingredient Quality: Using premium cream cheese and fresh bananas elevates the dish beyond a standard dessert.
- Versatility: The base can be swapped for chocolate wafers or graham crackers for a different twist.
Alright, let’s break down exactly what goes into this masterpiece...
Inside the Ingredient List
The Flavor Base
At the heart of this dessert is the creamy custard. The instant vanilla pudding powder, when mixed with milk and heavy cream, creates a smooth, velvety texture that’s the foundation of the cheesecake filling. The cream cheese adds richness and a slight tang that balances the sweetness from the bananas and sugar. Pure vanilla extract amplifies the overall flavor profile, making each bite feel like a luxurious vanilla dream.
The Texture Crew
The Nilla wafers are the unsung heroes of this dessert. They form the crunchy base and also act as a structural layer that holds the custard in place. Crushed Nilla wafers sprinkled on top add a final crunch and a visual pop that makes the dish look as good as it tastes. Butter, when melted and folded into the wafer base, keeps the wafers moist and prevents them from crumbling too quickly.
The Unexpected Star
Bananas are the star that ties everything together. Fresh bananas provide natural sweetness, a subtle banana aroma, and a creamy texture that blends seamlessly with the custard. When mashed to a puree, they become the perfect vehicle for the flavors, ensuring each bite delivers a burst of fruitiness. Skipping them would leave the dessert feeling flat and overly sweet.
The Final Flourish
Sour cream adds a slight tang and helps stabilize the custard, giving it a smooth mouthfeel. The brown sugar sprinkled on the wafer base caramelizes slightly during toasting, adding depth and a hint of caramel flavor. The final touch of crushed wafers on top creates a delightful crunch that’s hard to resist.
Everything’s prepped? Good. Let’s get into the real action...
The Method — Step by Step
- Prepare the Base: In a medium bowl, combine 2 cups of Nilla wafers, 1/4 cup brown sugar, and 1/2 cup melted unsalted butter. Stir until the wafers are evenly coated. Spread the mixture evenly in the bottom of a 9-inch springform pan. Place the pan in the refrigerator to chill while you prepare the filling. The base should be firm and set before adding the custard.
- Toast the Crushed Wafers: Toast 1/2 cup of crushed Nilla wafers in a dry skillet over medium heat for about 2 minutes, stirring constantly until they’re lightly golden. Set aside to cool. This step enhances the flavor and ensures a crisp top layer.
- Mash the Bananas: Peel and mash 3 large bananas with a fork until smooth. The puree should be free of lumps; if you prefer a silkier texture, blend in a blender for a few seconds. The mashed bananas will be folded into the custard later.
- Make the Custard: In a mixing bowl, beat 16 ounces of softened cream cheese until fluffy. Add 3/4 cup granulated sugar and 1 tablespoon pure vanilla extract; continue beating until smooth. Stir in 1 cup sour cream, 1/2 cup heavy cream, and 3 large eggs one at a time, ensuring each egg is fully incorporated before adding the next. The mixture should be thick and creamy.
- Incorporate the Pudding: Dissolve 1 package of instant vanilla pudding in 2 cups of milk, whisking until smooth. Fold this pudding mixture into the cream cheese custard until fully blended. The custard should be silky, with no lumps. This step thickens the filling and adds a subtle vanilla flavor.
- Add the Bananas: Gently fold the mashed bananas into the custard mixture. The bananas should be evenly distributed, giving the filling a subtle fruit flavor and a natural sweetness. The custard should be light and airy.
- Assemble: Spoon the custard over the chilled wafer base, spreading it evenly with a spatula. Sprinkle the toasted crushed wafers over the top, pressing lightly to create a firm layer. The top should be smooth and even.
- Chill: Cover the pan with plastic wrap and refrigerate for at least 4 hours, preferably overnight. The dessert will firm up, making it easier to slice.
- Serve: Remove the springform ring, slice the cheesecake, and serve chilled. The texture should be creamy on the inside with a crisp wafer base, and the banana flavor should be prominent. Enjoy with a drizzle of caramel or a dusting of powdered sugar if desired.
That’s it— you did it. But hold on, I’ve got a few more tricks that’ll take this to another level...
Insider Tricks for Flawless Results
The Temperature Rule Nobody Follows
Keep all dairy ingredients at room temperature before mixing. Cold cream cheese or eggs can cause the custard to split. If you’re in a hurry, let them sit on the counter for about 20 minutes. This simple step ensures a silky, lump‑free filling.
Why Your Nose Knows Best
As you fold in the bananas, trust your nose. A subtle banana aroma indicates the bananas are perfectly mashed and integrated. If the aroma feels weak, add a little more mashed banana or a splash of banana extract to intensify the flavor.
The 5-Minute Rest That Changes Everything
After adding the pudding mixture, let the custard rest for 5 minutes before folding in the bananas. This short pause allows the pudding to hydrate fully, resulting in a smoother texture and deeper vanilla flavor.
The Crumb Crust Trick
For an extra crunchy base, sprinkle a pinch of sea salt on the wafer mixture before chilling. The salt enhances the caramelization during toasting and adds a savory contrast to the sweet custard.
The Chill Time Secret
Refrigerate the cheesecake for at least 6 hours, not just 4. The longer chill time allows the flavors to meld and the custard to set fully, making slicing cleaner and the dessert more cohesive.
Creative Twists and Variations
This recipe is a playground. Here are some of my favorite ways to switch things up:
Chocolate Cookie Crunch
Swap Nilla wafers for chocolate cookies and use a chocolate pudding mix instead of vanilla. The result is a rich, chocolatey cheesecake that’s a hit with cocoa lovers.
Berry Burst
Add a layer of fresh blueberries or strawberries between the base and custard. The berries add a burst of tartness that balances the sweetness.
Caramel Swirl
Drizzle caramel sauce over the top before chilling. The caramel adds a sweet, buttery glaze that enhances the banana flavor.
Almond Delight
Replace the Nilla wafers with crushed almond biscotti and sprinkle toasted almond slivers on top. The nutty flavor pairs wonderfully with the creamy custard.
Minty Fresh
Add a teaspoon of fresh mint extract to the custard and garnish with chopped mint leaves. The mint adds a refreshing contrast to the banana sweetness.
Tropical Twist
Incorporate shredded coconut into the base and add a splash of coconut milk to the custard. The tropical notes elevate the dessert to a beach‑side treat.
Storing and Bringing It Back to Life
Fridge Storage
Store the cheesecake in the refrigerator for up to 5 days in an airtight container. The custard will remain firm, and the wafer base will keep its crunch.
Freezer Friendly
Wrap the cheesecake tightly in plastic wrap and aluminum foil before freezing. It can be stored for up to 2 months. Thaw overnight in the fridge before serving.
Best Reheating Method
When reheating, place the cheesecake in a preheated oven at 300°F (150°C) for 10 minutes. Add a splash of water to the pan to create steam, which keeps the custard moist and prevents it from drying out.