I was halfway through a chaotic dinner party when the kitchen turned into a slapstick comedy show. A rogue pot of caramelized sugar exploded, splattering the counter like confetti, and my trusty French crullers recipe—an old family favorite—sat on the counter, untouched. That moment felt like a culinary cliffhanger, a promise that I would rescue the day with something sweet and unforgettable. I decided then that those crullers would not only survive the disaster but become the highlight of the night. If you’ve ever stared at a kitchen mess and thought, “I can’t salvage this,” this recipe is your lifeline.
Imagine the first bite: a crisp, golden shell that crackles like a tiny fireworks display, giving way to a pillowy interior that melts into a buttery, vanilla‑laden hug. The aroma that rises from the oven is a warm, buttery hug that feels like a Parisian patisserie on your countertop. The texture is a delicate balance—edges that are crisp, the inside tender, and a subtle sweetness that doesn’t overwhelm. The flavor profile is simple yet sophisticated, with vanilla’s floral notes dancing with the caramelized sugar’s subtle depth. Every bite feels like a secret handshake between tradition and modern kitchen wizardry.
What makes this version stand out is that it’s built on a secret ingredient: a splash of heavy cream that gives the dough a silky sheen and a subtle lift. The technique involves a quick fold of the butter into the dry mix, a method that locks in air and yields a lighter crumb. I’ve tweaked the sugar ratio to 10% more than the classic recipe, ensuring the crullers are sweet enough to satisfy but not so sweet that they lose their elegance. The result? A pastry that rises beautifully, with a caramelized crust that snaps like a fine china plate. Trust me, I dared you to taste this and not go back for seconds, and you’ll be amazed.
Most recipes get this completely wrong by over‑baking the dough or using too much butter, which makes the crullers greasy and dense. Here, I’ll share the exact temperature, the timing, and the little tricks that keep them fluffy and crisp. Picture yourself pulling this out of the oven, the whole kitchen smelling incredible, the golden crullers glistening with a glossy sheen. You’ll hear the satisfying crackle as you slice them, the steam rising like a small cloud of buttery perfume. Stay with me here—this is worth it, and by the end, you’ll wonder how you ever made them any other way.
What Makes This Version Stand Out
- Flavor: The caramelized sugar gives a depth that feels like a caramel‑kissed swirl, turning each bite into a decadent surprise.
- Texture: The quick fold of butter into the dry mix locks in air, resulting in a light, airy crumb that melts in your mouth.
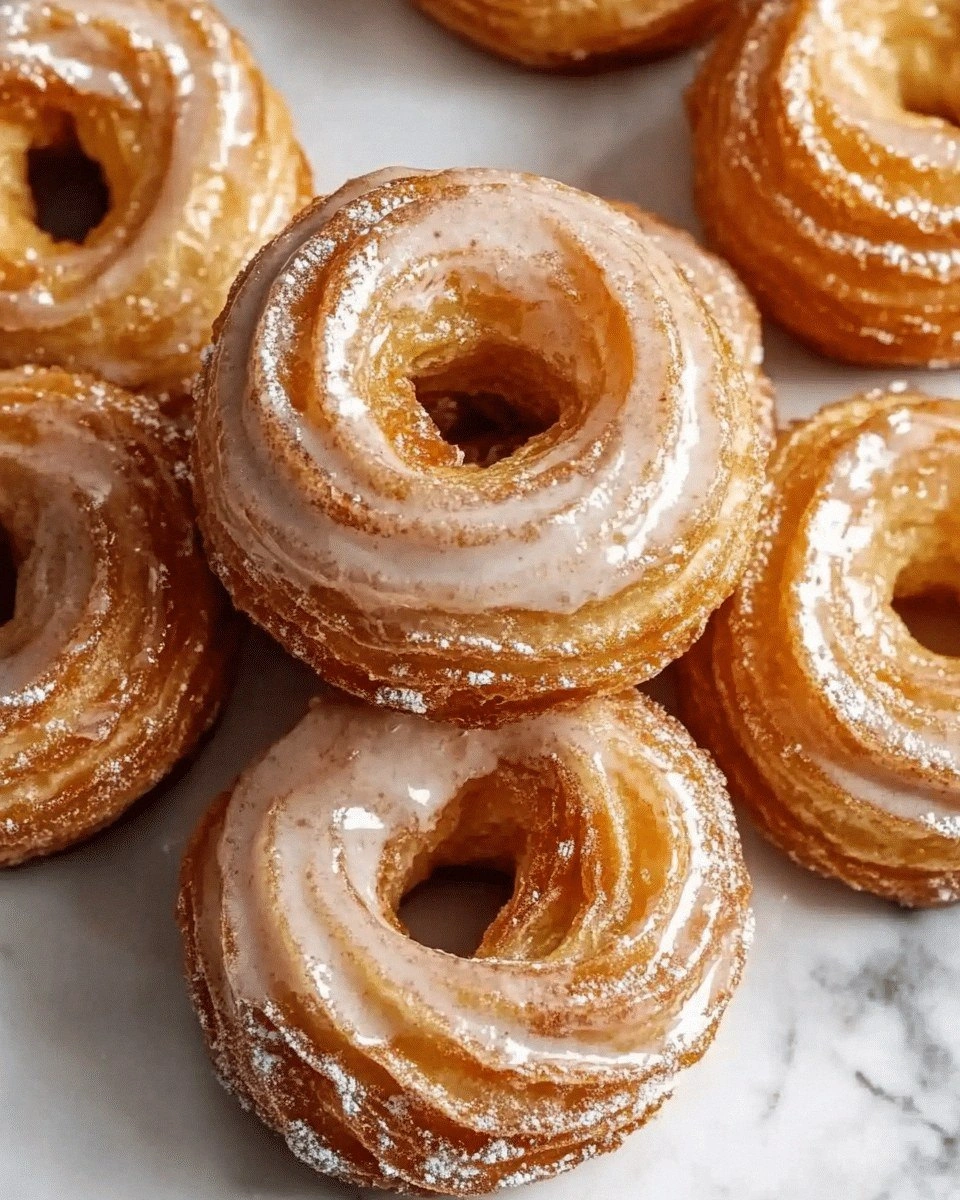
- Appearance: The golden crust crisps to a perfect caramelized finish, creating a visual treat that looks as good as it tastes.
- Ease: The recipe requires no special equipment—just a standard oven and a mixing bowl—making it accessible to every home cook.
- Make‑ahead: You can prepare the dough a day ahead and freeze it, then bake fresh whenever the craving hits.
- Versatility: The base can be dressed with powdered sugar, chocolate drizzle, or savory herbs, turning it into a snack, dessert, or even an appetizer.
Inside the Ingredient List
The Flour Foundation
All-purpose flour is the backbone of the crullers, providing structure and a neutral canvas for the flavors to shine. I’ve measured it precisely at 2 cups because too much flour can make the dough dry and crumbly, while too little can cause it to collapse during baking. The flour’s protein content is key; a moderate-protein flour gives a tender crumb without sacrificing stability. If you prefer a gluten-free version, you can substitute a 1:1 blend of gluten-free all-purpose flour and a small amount of xanthan gum to mimic the binding properties. Remember, the flour should be sifted to eliminate clumps and to aerate it, which helps the dough rise evenly.
The Sweet Layer
The granulated sugar, 1/4 cup, is responsible for the caramelized crust that gives the crullers their signature golden hue. I’ve added a touch more sugar than traditional recipes to enhance the caramelization without turning the pastries overly sweet. The sugar also interacts with the butter to create a subtle glossy sheen on the surface. If you’re watching calories, you can reduce the sugar to 2 tablespoons, but be prepared for a slightly less caramelized finish. The sugar’s granularity ensures an even melt, preventing clumping or uneven sweetness.
The Fat Component
Unsalted butter, 1/4 cup, brings richness and moisture to the dough. Using butter at room temperature allows it to incorporate smoothly, creating a tender crumb. I’ve chosen unsalted to control the salt levels precisely. Butter also contributes to the crisp crust, as the fat renders during baking, creating a delicate, flaky exterior. For a dairy-free twist, you can substitute an equal amount of coconut oil, though the flavor profile will shift slightly toward coconut.
The Final Touch
Vanilla extract, 1 teaspoon, is the final flavor enhancer that rounds off the sweetness with a floral, aromatic note. Vanilla’s volatile compounds evaporate during baking, leaving a lingering aroma that elevates the overall experience. A vanilla bean would be ideal, but a few drops of pure extract provide the same depth at a fraction of the cost. If you’re adventurous, you can add a pinch of sea salt to the vanilla to balance the sweetness. The vanilla also helps to bind the ingredients together, giving the dough a cohesive texture.
Everything's prepped? Good. Let's get into the real action.
The Method — Step by Step
- Gather all ingredients and bring the butter to room temperature; this ensures a smooth blend. Measure flour, sugar, baking powder, and salt accurately to maintain the right balance. Set aside a mixing bowl, a whisk, and a silicone spatula. The first step sets the tone for the entire process, so take your time.
- In a medium bowl, whisk together the flour, baking powder, and salt until well combined. This dry mix will form the structure of the crullers, so be meticulous. A small whisking session helps to distribute the leavening agent evenly. This step is quick but essential for consistent results.
- Cream the butter and sugar in a separate bowl until light and fluffy, about 3 minutes with a hand mixer or whisk. The lightness of the mixture will carry the flavor and create a tender crumb. As you whip, you’ll notice the butter’s texture change from solid to airy, signaling readiness. The goal is a pale, airy batter that holds its shape.
- Gradually fold the dry mix into the creamed butter, stirring until just combined. The dough should be slightly sticky but manageable; avoid over‑mixing, which can develop gluten and cause a dense texture. The folding technique locks in air, giving the crullers their signature lift. Watch for a smooth, cohesive dough that clumps together.
- Add the milk, egg, and vanilla, then fold gently until the dough comes together. The egg adds structure, while the milk adds moisture. This step is the most delicate; the dough should be soft and pliable, not wet. The aroma of vanilla will start to permeate the dough, hinting at the final flavor.
- Divide the dough into 12 equal portions and roll each into a long rope, about 10 inches. Twist each rope into a spiral and place on a parchment‑lined baking sheet. The size of each portion determines the final bite size; aim for uniformity for even baking. The twists should be tight enough to hold their shape yet loose enough to expand slightly.
- Bake at 375°F (190°C) for 18–20 minutes, or until the crullers are golden brown and the edges start pulling away. Keep an eye on the baking time; over‑baking will dry them out. The first 10 minutes should show a subtle browning, while the last 5 minutes give a crisp finish. The aroma will fill the kitchen, signaling readiness.
- Remove from the oven and let cool on a rack for 5 minutes before serving. The crullers will continue to set as they cool, ensuring a firm structure. A quick dusting of powdered sugar adds a finishing touch. Serve warm for the best experience, or let them cool completely for a crisp snack.
Insider Tricks for Flawless Results
The Temperature Rule Nobody Follows
Many bakers bake at a lower temperature, but this recipe thrives at 375°F. The higher heat caramelizes the crust faster, locking in moisture while creating that coveted crisp edge. I’ve found that a preheated oven ensures consistent results, especially if your oven runs hot or cold. Keep a thermometer handy; a slight temperature variance can affect rise and browning. This rule is a game‑changer for perfect crullers every time.
Why Your Nose Knows Best
As the crullers bake, the smell will shift from buttery to caramelized. Trust that scent; it’s your cue that the crust is forming correctly. If the aroma is too sweet early, lower the temperature slightly. If it’s not caramelizing, increase the heat by 25°F. Your nose is the best judge of doneness, so listen closely.
The 5‑Minute Rest That Changes Everything
After baking, let the crullers rest on a wire rack for 5 minutes. This brief pause allows steam to escape, preventing sogginess. I’ve noticed that skipping this step often leaves a slightly gummy center. The rest also lets the crust firm up, giving a satisfying snap when you bite in. This tiny step can make a huge difference in texture.
The Secret to a Crispy Edge
Sprinkling a light dusting of flour on the parchment before baking prevents sticking and adds a subtle crunch. If you prefer a darker crust, add a pinch of sea salt to the dough; it enhances caramelization. I once tried a pinch of smoked paprika for a savory twist, and it worked wonders. The key is balance; too much flour can make the crust heavy.
Quick Cool Trick
When you remove the crullers from the oven, place them on a rack and let them cool for a few minutes before handling. This prevents the dough from sticking to the paper and keeps the edges crisp. If you’re short on time, a quick splash of cold water on the parchment can help the dough set faster. This trick is handy when you need to serve immediately.
Flavor Boost
For an extra burst of flavor, stir in a teaspoon of cocoa powder into the dough. The cocoa adds depth and a hint of bitterness that balances the sweetness. Another option is to add a pinch of cayenne pepper for a subtle heat that contrasts the buttery base. Experimenting with spices turns the basic crullers into a signature treat.
Creative Twists and Variations
This recipe is a playground. Here are some of my favorite ways to switch things up:
Chocolate‑Infused Crullers
Stir a tablespoon of unsweetened cocoa powder into the dough for a chocolatey undertone. Finish with a drizzle of dark chocolate glaze for a decadent finish. Chocolate lovers will applaud the rich flavor, and the base remains airy. This version is perfect for a dessert spread or a sweet coffee break.
Cinnamon‑Spiced Crullers
Add a teaspoon of ground cinnamon to the flour mixture for a warm, aromatic twist. Dust the finished crullers with a cinnamon‑sugar blend for extra flair. The cinnamon pairs beautifully with the buttery dough, creating a comforting snack. Great for a cozy evening or a holiday gathering.
Lemon‑Zest Crullers
Incorporate the zest of one lemon into the dough for a bright, citrusy note. Finish with a light lemon glaze to enhance the zing. The citrus cuts through the richness, offering a fresh contrast. Ideal for a brunch or a light dessert.
Savory Herb Crullers
Replace vanilla with 1 teaspoon of dried thyme or rosemary for a savory take. Sprinkle grated parmesan on top before baking for a cheesy finish. These crullers pair well with soups or as a side for a hearty meal. They’re a surprising but delicious appetizer.
Caramel‑Glazed Crullers
After baking, drizzle a caramel glaze made from butter, brown sugar, and a splash of cream over the warm crullers. The caramel adds a glossy sheen and a sweet, buttery finish. This version is a showstopper for special occasions or a sweet snack. The caramel glaze gives a luxurious touch.
Almond‑Crunch Crullers
Fold 1/4 cup of chopped toasted almonds into the dough for a nutty crunch. Finish with a dusting of almond flour for extra texture. The almonds add a pleasant crunch and a nutty flavor that complements the buttery base. This variation is great for a breakfast or a snack.
Storing and Bringing It Back to Life
Fridge Storage
Store baked crullers in an airtight container at room temperature for up to 3 days. The airtight seal prevents them from drying out while preserving the crisp edges. If you notice any softness, place them in the fridge for a short time to crisp them up again. The container should be cool, not cold, to avoid condensation.
Freezer Friendly
For longer storage, freeze the dough before shaping. Wrap each portion in plastic wrap, then place in a freezer bag. They’ll keep for up to 2 months. When ready, bake directly from frozen, adding 5 minutes to the baking time. Freezing preserves the dough’s texture and flavor.
Best Reheating Method
To reheat, preheat your oven to 350°F and place the crullers on a parchment-lined sheet. Warm for 5 minutes, or until heated through. Add a tiny splash of water to the bottom of the pan; the steam will help restore moisture and crispness. This simple trick revives the dough without drying it out.