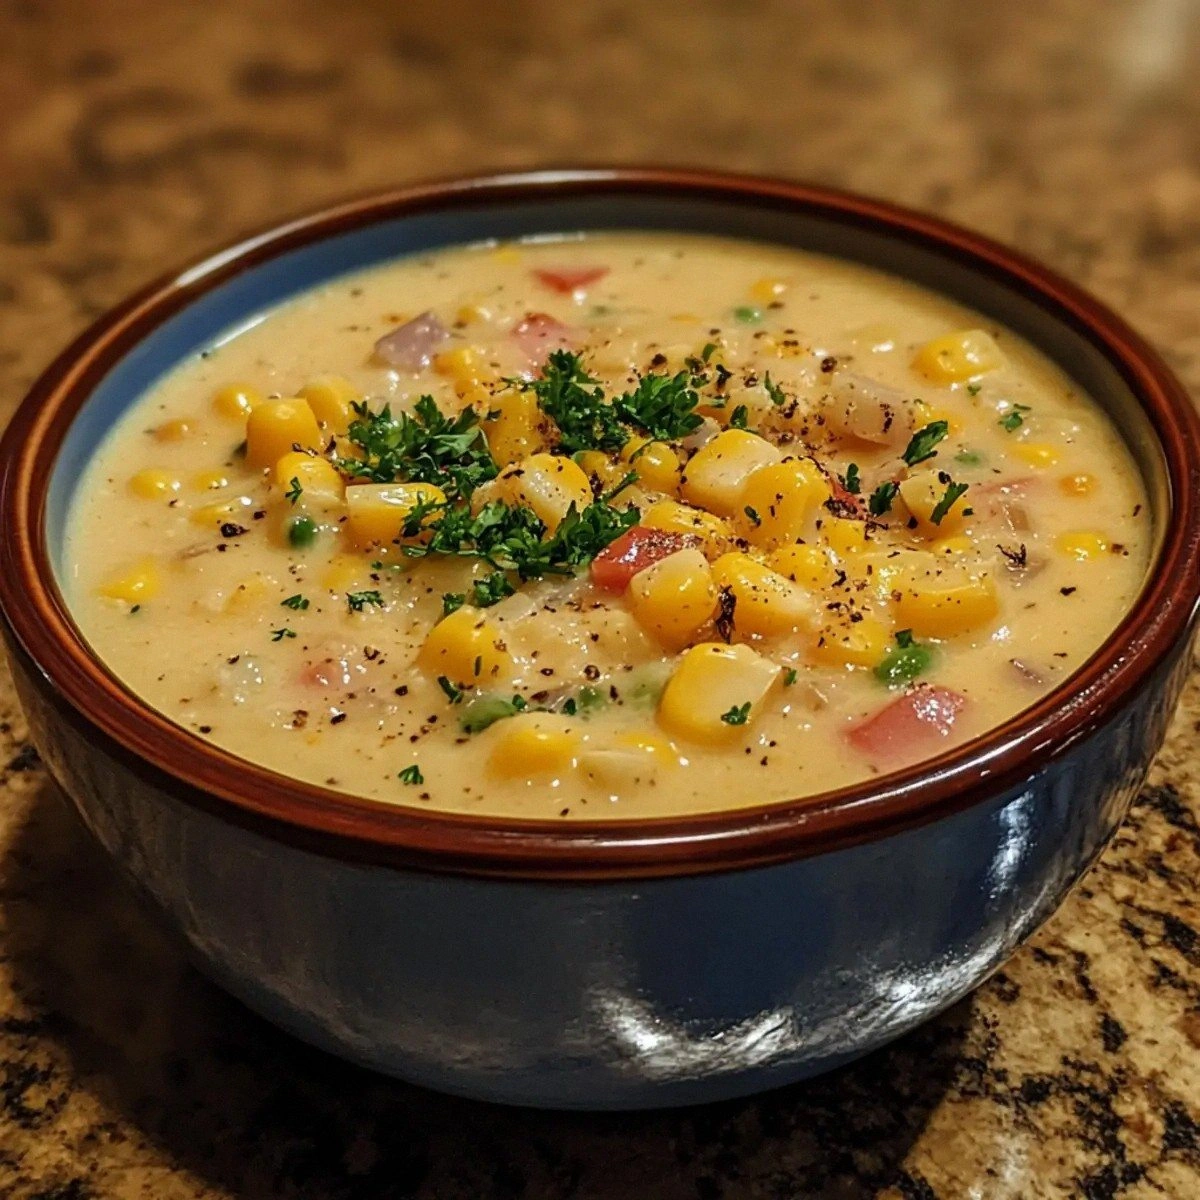
I was in a kitchen crisis one rainy Saturday when I realized my pantry was empty of anything that could salvage my dinner plans. The only thing left was a packet of puff pastry, a couple of chicken breasts, and a bag of spices that smelled like a forgotten spice rack in a Bollywood set. I stared at the ingredients, then decided to flip the script: why not turn that disaster into a buttery, fragrant masterpiece? That night, I dove into a recipe that would later earn the nickname “Butter Chic” among my friends because it was so decadently smooth, so richly spiced, and so unexpectedly simple. I swear, if you’re still wondering how to turn a pantry emergency into a crowd‑pleaser, you’re in the right place.
Picture the scene: a sizzling pan, the aroma of onions caramelizing into amber, garlic and ginger dancing in a fragrant steam, and the gentle hiss of butter melting into a glossy base. Your senses are hit in a crescendo— the crackle of the pan, the earthy scent of cumin, the sweet kiss of sugar, the subtle heat from paprika, and the metallic tang of a fresh egg. The visual is a golden, glossy sauce that clings to the chicken like velvet, each bite promising a burst of warmth. The texture is a harmony of tender meat, silky sauce, and flaky pastry that shatters like thin ice when you bite. It’s the kind of dish that turns an ordinary weeknight into a culinary celebration.
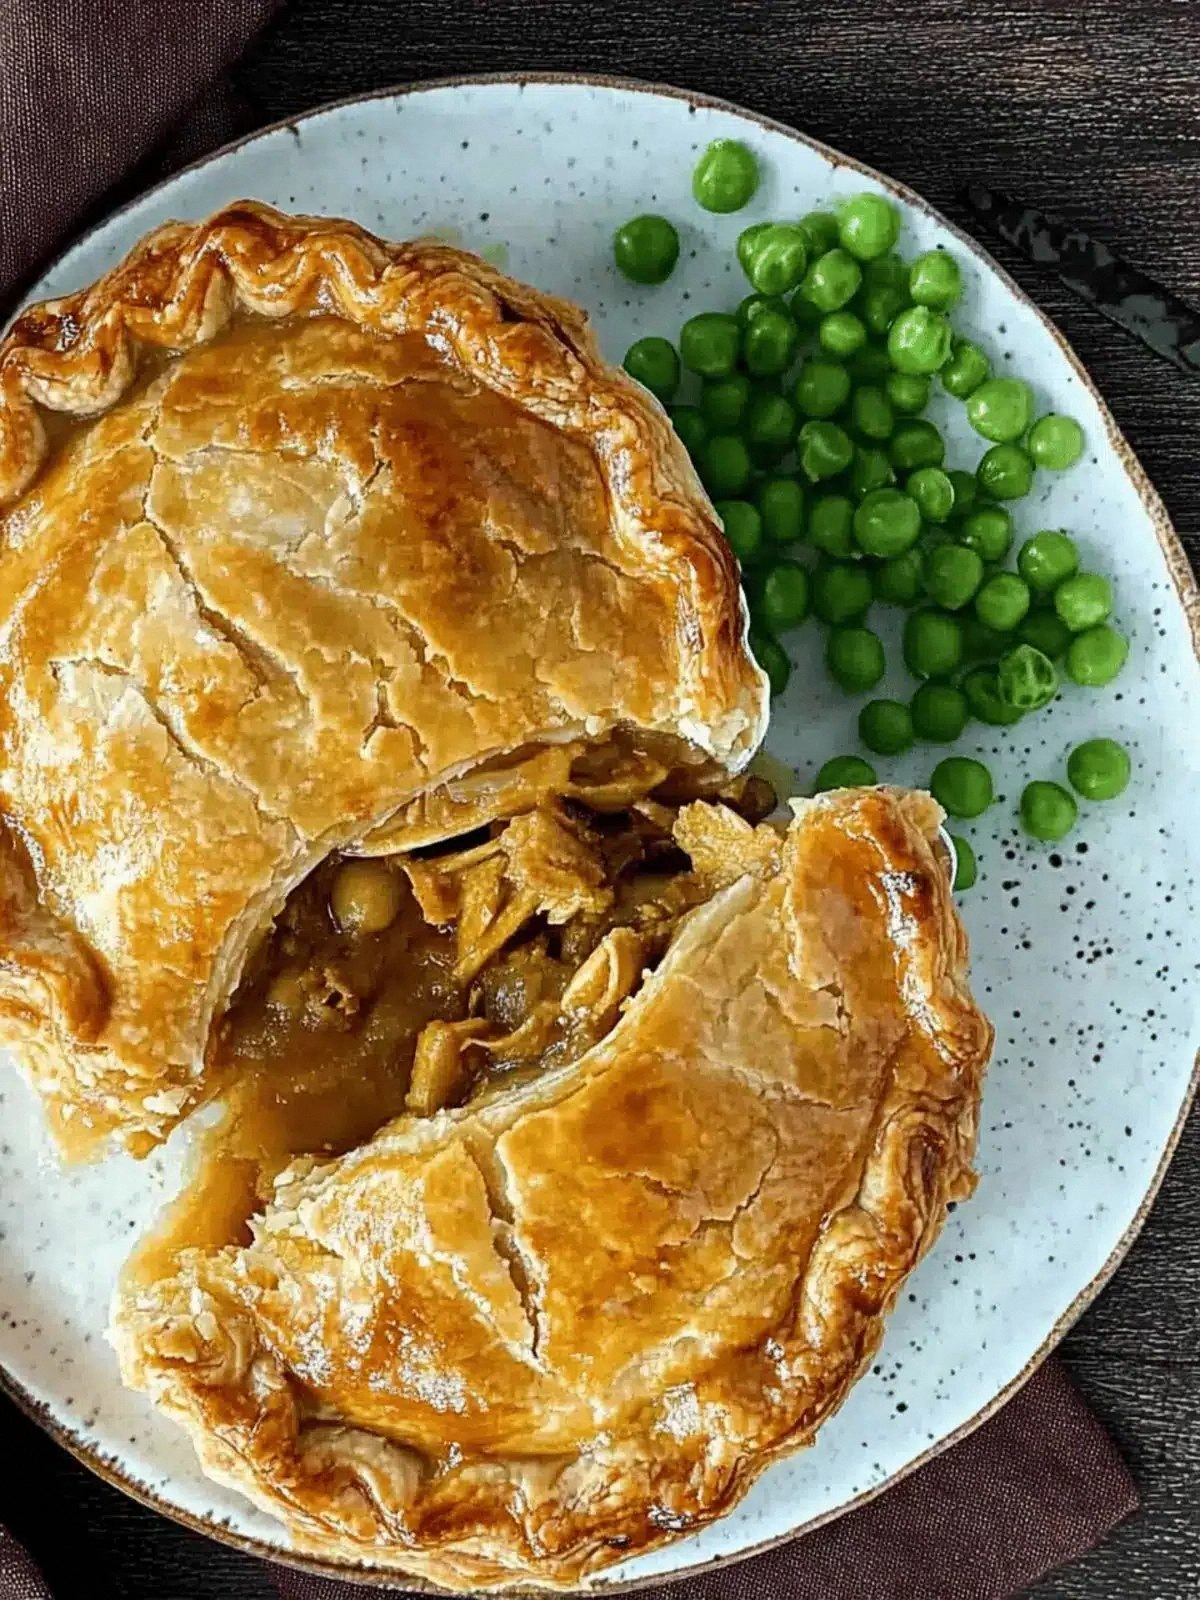
What makes this version stand out is that it marries the comforting familiarity of butter chicken with the elegance of a puff pastry pocket, creating a dish that’s both hearty and sophisticated. I’m talking about a sauce that coats the chicken in a silky, spice‑laden blanket, a pastry that crisps to a buttery golden edge, and a finish that’s both creamy and slightly tangy. This isn’t just a recipe; it’s a culinary experience that transforms ordinary ingredients into something that feels like a special occasion. Most butter chicken recipes get this completely wrong— they either overcook the chicken or drown the spices in too much cream. Here, I’ve found the sweet spot where each element sings.
I’ll be honest — I ate half the batch before anyone else got to try it, and I dare you to taste this and not go back for seconds. The secret? A touch of cinnamon that adds a whisper of warmth, a dash of sugar that balances acidity, and the boldness of garam masala that makes the sauce sing. Picture yourself pulling this out of the oven, the whole kitchen smelling incredible, the steam curling like a fragrant cloud. That moment is pure magic, and it’s the culmination of every step we’re about to walk through. Let me walk you through every single step — by the end, you’ll wonder how you ever made it any other way.
What Makes This Version Stand Out
- Flavor: The sauce is a symphony of garam masala, cumin, and paprika, balanced by a hint of cinnamon and a touch of sugar. Each spice layer builds depth without overwhelming the chicken’s natural sweetness. The result is a sauce that coats the chicken like velvet, leaving a lingering warmth.
- Texture: The puff pastry crisps to a buttery golden edge while staying flaky inside. The chicken stays tender because it’s seared first, then simmered in the sauce. The cream adds a silky finish that doesn’t make the dish feel heavy.
- Simplicity: With fewer than a dozen ingredients and a straightforward method, you can whip this up in under an hour. No elaborate marinades or pre‑soaking steps— just chop, sear, simmer, and bake.
- Uniqueness: The combination of butter chicken with a puff pastry pocket is a playful twist that surprises guests. It’s a dish that feels both comforting and fancy, perfect for a cozy night or a casual dinner.
- Crowd Reaction: Friends who’ve tried other butter chicken recipes rave that this one is “hands down the best version you’ll ever make at home.” The buttery pastry is a crowd‑pleaser, and the sauce is rich enough to satisfy even the most discerning palates.
- Ingredient Quality: Fresh spices and high‑quality butter make a noticeable difference. Using real butter instead of margarine gives the sauce a richer, more authentic flavor.
- Make‑Ahead Potential: The dish can be assembled a day ahead and refrigerated or frozen, then baked straight from the fridge or freezer. This makes it ideal for meal prep or entertaining on short notice.
Inside the Ingredient List
The Flavor Base
The foundation of this dish starts with aromatics: a medium onion, crushed garlic, and freshly grated ginger. These three work together to create a fragrant base that carries the spices. If you skip the onion, the sauce will feel flat and lack depth. A good rule of thumb is to let the onions soften for at least five minutes before adding the garlic and ginger.
Garlic and ginger are the unsung heroes of any Indian-inspired dish. They bring warmth, brightness, and a subtle heat that balances the richness of the butter and cream. Freshly grated ginger is preferable to powdered, as it releases a bright, citrusy note that complements the cumin and coriander.
When selecting onions, choose a sweet variety like Vidalia or a yellow onion for the best caramelization. They’ll develop a deep amber color that signals readiness. If you’re in a hurry, a quick sauté in olive oil and butter will bring out their natural sweetness.
The Texture Crew
Plain flour is used to thicken the sauce, giving it body without making it gloopy. It’s added after the spices have cooked, allowing it to bloom and release a nutty aroma. If you’re avoiding gluten, a cornstarch slurry works just as well.
Cream is the secret to that silky finish. It balances the acidity from the tomato paste and adds a luxurious mouthfeel. If you prefer a lighter version, replace half the cream with Greek yogurt; it will keep the sauce thick but cut the fat slightly.
The puff pastry is the final textural element. It must be kept cold until you’re ready to use it to prevent it from melting during baking. Store it in the freezer until the last minute, then thaw on the counter for about 10 minutes before rolling out.
The Unexpected Star
Garam masala is the star spice that ties everything together. It’s a blend of cumin, coriander, cardamom, cinnamon, cloves, and pepper. The subtle warmth of cinnamon and the aromatic depth of cardamom elevate the dish from ordinary to extraordinary.
Cinnamon is a game‑changer in savory dishes. It adds a sweet, woody note that balances the heat from the paprika and the richness of the butter. A half teaspoon is enough to make a difference.
Paprika adds a gentle smokiness that complements the cumin and coriander. Choose a smoked paprika for an extra layer of depth, or stick with a sweet variety if you prefer a milder flavor.
The Final Flourish
The egg wash on the pastry gives it a golden, glossy finish and helps seal the edges. Whisk the egg with a splash of water to keep it from running too thick. A light brush is all you need.
Olive oil is used to sear the chicken, ensuring a caramelized exterior. It also adds a subtle fruity note that complements the spices. Use a high‑smoke‑point oil if you’re worried about burning.
Butter, meanwhile, is the heart of the sauce. It enriches the flavor and gives the sauce that classic buttery sheen. Melt it with the olive oil to create a flavorful base before adding the aromatics.
Everything’s prepped? Good. Let’s get into the real action.
The Method — Step by Step
- Preheat the oven to 200°C (400°F). While the oven warms, lay out your puff pastry on a lightly floured surface. Cut it into four equal squares, each about 10 cm on a side. This ensures even baking and a uniform shape for each pie.
- Season the chicken. Pat the chicken breasts dry with paper towels. Sprinkle both sides with salt, pepper, and a pinch of garam masala. The seasoning will seep into the meat during the searing process, locking in flavor.
- Sear the chicken. In a large skillet, heat olive oil over medium‑high heat. Add the chicken breasts and sear for 2–3 minutes on each side until a golden crust forms. Remove the chicken and set aside; the sear is what gives the dish its savory depth.
- Build the sauce. In the same skillet, add a tablespoon of butter. Once melted, toss in the chopped onion, minced garlic, and grated ginger. Sauté until the onions turn translucent and start to caramelize, about 5 minutes. The butter infuses the aromatics with richness, setting the stage for the spices.
- Introduce the spices. Sprinkle in the ground coriander, cumin, paprika, and cinnamon. Stir constantly for 1 minute to toast the spices, releasing their essential oils. This step is critical; it transforms the raw spices into a fragrant, flavorful base.
- Add tomato paste and flour. Stir in the tomato paste until it’s fully incorporated, then whisk in the plain flour to thicken the sauce. Cook for another 2 minutes, allowing the flour to develop a nutty aroma. The flour acts as a binder, ensuring the sauce clings to the chicken.
- Simmer with liquids. Pour in half a cup of water and half a cup of cream, then stir in the sugar. Bring the mixture to a gentle simmer, then return the seared chicken to the pan. Let everything cook together for 8–10 minutes, allowing the flavors to meld and the chicken to finish cooking.
- Assemble the pies. Place a spoonful of the chicken and sauce mixture in the center of each pastry square. Fold the pastry over to form a semi‑closed pocket, pressing the edges with a fork to seal. Brush each pie with the beaten egg for a golden, glossy finish.
- Bake to perfection. Transfer the assembled pies to a baking sheet lined with parchment. Bake for 18–20 minutes, or until the pastry is puffed, golden, and crisp. The aroma that fills the kitchen will have you running back for seconds.
That's it — you did it. But hold on, I've got a few more tricks that'll take this to another level. These insider tips will help you avoid common pitfalls and elevate the dish to a restaurant‑quality experience.
Insider Tricks for Flawless Results
The Temperature Rule Nobody Follows
Many cooks bake at the lowest temperature that will cook the pastry, but this can leave the filling under‑cooked. I always bake at 200°C (400°F) for a crisp, golden top and perfectly cooked chicken inside. If you’re using a convection oven, reduce the temperature by 20°C to avoid over‑browning.
Why Your Nose Knows Best
Trust your sense of smell when judging doneness. A rich, buttery aroma indicates that the spices have released their oils, while a faint scent might mean you need more time. If the sauce still tastes raw, give it an extra 5 minutes on the stove.
The 5-Minute Rest That Changes Everything
After baking, let the pies rest for five minutes before cutting. This allows the filling to set, preventing it from spilling out and keeping the pastry intact. A quick rest also lets the flavors meld further.
Seal the Edges Like a Pro
When folding the pastry, use a fork to press the edges firmly. This creates a watertight seal that keeps the filling from leaking. A loose edge can result in a soggy pastry and a messy filling.
Fresh Spices Are the Secret
Freshly ground spices bring a brighter, more vibrant flavor than pre‑ground. If you can, grind your own garam masala and cumin at home. The aroma alone will elevate the dish, making it feel like a gourmet creation.
Creative Twists and Variations
Smoky Chipotle Version
Swap the paprika for chipotle powder and add a dash of adobo sauce. This gives the dish a smoky, slightly sweet heat that pairs beautifully with the creamy sauce. It’s perfect for fans of Tex‑Mex flavors.
Vegetarian Delight
Replace the chicken with diced butternut squash or cauliflower florets. Cook them until tender before adding the sauce. The result is a hearty, plant‑based pie that’s just as comforting.
Low‑Carb Take
Use a cauliflower crust instead of puff pastry. Blend cauliflower florets with a bit of egg and cheese, roll into a thin sheet, and bake before filling. This keeps the dish low in carbs without sacrificing flavor.
Herb‑Infused Variation
Add fresh cilantro and mint to the sauce just before the final simmer. The herbs bring a bright, fresh contrast to the richness of the butter and cream. It’s a refreshing twist that’s especially welcome in hot weather.
Breakfast‑Style Breakfast
Serve the pies with a side of scrambled eggs and toast. The savory filling pairs wonderfully with the morning light. This is a hearty breakfast that will keep you full through a busy day.
Storing and Bringing It Back to Life
Fridge Storage
Store uncooked pies in an airtight container in the refrigerator for up to 2 days. If you’ve already baked them, keep them in a sealed container for up to 3 days. The pastry will remain crisp if you reheat it in a toaster oven.
Freezer Friendly
Freeze uncooked pies in a freezer bag for up to 3 months. Thaw overnight in the refrigerator before baking. The dough will rise just as well after freezing, giving you a convenient make‑ahead option.
Best Reheating Method
Reheat in a preheated oven at 180°C (350°F) for 10 minutes. Add a splash of water to the bottom of the pan to create steam, keeping the filling moist. This simple trick restores the sauce’s silky texture and the pastry’s crispness.