Picture this: I’m standing in a cramped kitchen, the counter littered with half‑peeled berries, a jar of maple syrup, a handful of chia seeds, and a lemon that has seen better days. I had just pulled a batch of fruit preserves from the oven and, to my horror, the glaze was too thin, the flavor flat, and the texture more syrup than jam. I was about to give up when a friend dared me to try a new twist—add chia seeds to the mix. The moment I tossed the seeds into the bubbling mixture, the jam thickened like velvet, the berries burst with brightness, and the whole kitchen smelled like summer in a jar. That was the genesis of the most unforgettable chia seed jam I’ve ever made.
From the first stir to the final swirl, every sense is on a high‑octane ride. The bright ruby of the berries glistens under the stove light, the maple syrup’s amber glow promises sweetness, and the lemon’s citrusy perfume cuts through the sweetness like a bright, fresh note. When the mixture starts to bubble, a faint hiss fills the air, and you can almost hear the seeds whispering their promise of texture. The moment you taste it, the jam’s silky body coats your tongue, the natural sugars dance, and the subtle crunch of chia seeds provides a delightful contrast that lingers. If you’ve ever tried a plain berry jam and felt it was missing something, this is the missing piece you didn’t know you needed.
What makes this version stand out is not just the ingredients but the philosophy behind it. I’ve taken the classic idea of fruit preserves and infused it with a modern, health‑centric twist that still honors the flavor of the berries. The result is a jam that’s naturally thickened, packed with antioxidants, and has a texture that feels both indulgent and wholesome. I dare you to taste this and not go back for seconds, because once you experience the silky, seed‑laden bite, you’ll never settle for ordinary preserves again.
Let me walk you through every single step—by the end, you’ll wonder how you ever made it any other way. The recipe is simple enough for a beginner, yet sophisticated enough to impress a seasoned foodie. No fancy equipment, no obscure ingredients, just fresh berries, maple syrup, chia seeds, and a splash of lemon. It’s a perfect blend of sweet, tart, and nutty, with a texture that’s smooth, slightly crunchy, and utterly irresistible.
What Makes This Version Stand Out
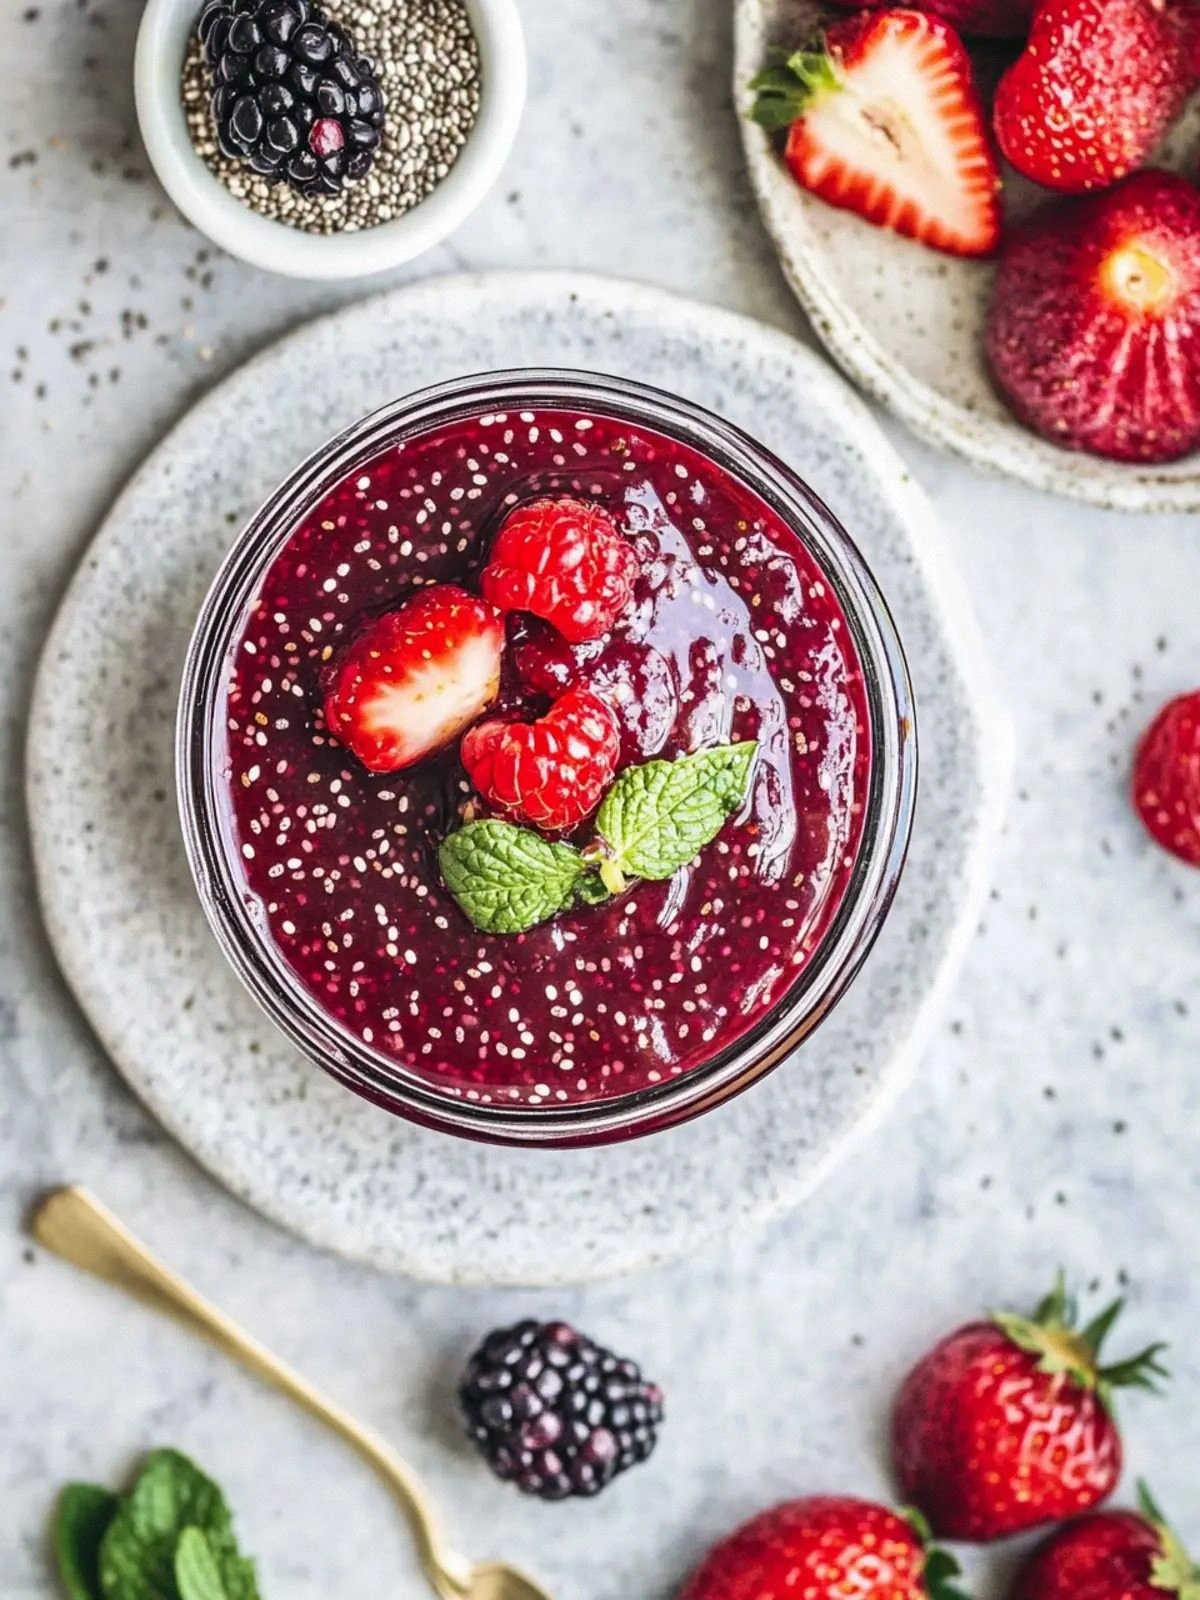
- Texture: The chia seeds act as a natural thickener, creating a jam that’s velvety yet slightly crunchy, a delightful contrast that sets it apart from typical syrupy jams.
- Flavor: The maple syrup brings a subtle caramel note, while the lemon juice adds a bright, zesty lift that keeps the jam lively and fresh.
- Health: Chia seeds add omega‑3 fatty acids, fiber, and protein, turning a dessert into a nutrient‑dense treat that can complement a balanced diet.
- Speed: The entire process takes less than an hour from start to finish, making it a quick win for busy mornings or last‑minute dessert ideas.
- Versatility: This jam works as a spread on toast, a topping for yogurt or oatmeal, a glaze for pancakes, or a sweet accent to savory dishes.
- Make‑ahead: It stores beautifully in the fridge for up to two weeks and freezes well, giving you a ready‑made sweetener for any occasion.
- Minimal Cleanup: With just one pot and a blender or food processor, you’ll have minimal dishes to wash afterward.
- Flavor Depth: The natural fermentation of the seeds and the slight caramelization of the berries add layers of depth that ordinary preserves lack.
Alright, let's break down exactly what goes into this masterpiece…
Inside the Ingredient List
The Flavor Base
Fresh berries are the star of the show—choose a mix of strawberries, blueberries, raspberries, or blackberries for a complex profile. They provide natural sweetness, acidity, and a burst of color that makes the jam visually stunning. If you skip berries, the jam loses its core identity, becoming a bland, seed‑heavy spread. For best results, use berries that are ripe but not overripe; they should be firm enough to hold their shape during cooking.
Swap Tip: If berries are out of season, try frozen berries; just thaw them before cooking and drain excess liquid to avoid a watery jam.
The Texture Crew
Chia seeds are the secret weapon that transforms liquid into a luscious, gel‑like consistency. They absorb liquid quickly, swell, and release a subtle nutty flavor that complements the fruit. Skipping the seeds means you’ll need to add a thickening agent like pectin or cornstarch, which can alter the jam’s natural character.
Swap Tip: For a vegan-friendly version, replace maple syrup with agave nectar or a drizzle of honey if you’re not strictly vegan.
The Unexpected Star
Maple syrup is not just a sweetener; it brings depth and a hint of caramel that elevates the jam’s flavor profile. It also contains antioxidants and minerals that add nutritional value. If you’re avoiding refined sugars, use a natural sweetener like raw honey or a sugar substitute that doesn’t break down under heat.
Swap Tip: For a lower‑calorie option, reduce the maple syrup by a tablespoon and increase the lemon juice slightly to balance the sweetness.
The Final Flourish
Lemon juice is the bright, acidic counterpoint that cuts through the sweetness and brightens the overall flavor. It also helps prevent the jam from becoming overly thick or sticky. A half‑lemon’s worth of juice (about 30ml) is enough to brighten the taste without overpowering the berries.
Swap Tip: If you’re sensitive to acidity, use a splash of orange juice for a milder, sweeter finish.
Everything's prepped? Good. Let's get into the real action…
The Method — Step by Step
- Step 1: Prepare the Fruit — Start by washing the berries under cold running water, then pat them dry with a clean towel. Gently remove stems from strawberries and cut them into halves or quarters depending on size. The goal is to have uniformly sized pieces that cook evenly. If you prefer a smoother jam, you can lightly mash the berries with a fork after chopping.
- Step 2: Combine with Sweetener — In a medium saucepan, combine the chopped berries, maple syrup, and filtered water. The water helps the berries release their juices without diluting the jam. Stir the mixture gently, ensuring the syrup coats every berry. Heat over medium heat, bringing the mixture to a gentle simmer.
- Step 3: Add the Lemon Juice — Once the berries start to break down, squeeze in the juice of half a lemon. The acidity will brighten the flavor and help the jam set. Watch for the mixture to thicken slightly; you’ll hear a faint crackling as the natural pectin in the berries activates.
- Step 4: Introduce the Chia Seeds — Sprinkle the chia seeds over the simmering jam, stirring continuously to prevent clumping. The seeds will begin to absorb liquid within minutes, creating a thick, gel‑like texture. Keep the heat low to avoid scorching the seeds. This is a good moment for a quick kitchen hack: cover the pot with a lid for the first 5 minutes to trap steam and speed up thickening.
- Step 5: Simmer and Stir — Continue to simmer the jam for about 20 minutes, stirring frequently to prevent sticking. The mixture should reduce by roughly a third, and the seeds will have fully absorbed the liquid. Watch for the edges to pull away from the pot, indicating thickening. This is the trickiest part; keep a close eye and adjust heat as needed. If the jam thickens too quickly, lower the heat or add a tiny splash of water.
- Step 6: Check the Consistency — To test thickness, place a small spoonful on a chilled plate and let it sit for a minute. If it holds its shape without running, it’s ready. If it’s still runny, continue simmering for a few more minutes. Remember, the jam will thicken slightly as it cools. A good rule of thumb: it should be thick enough to coat the back of a spoon but still pourable.
- Step 7: Cool and Store — Once the jam reaches the desired thickness, remove the pot from heat and let it cool for a few minutes. Transfer the jam into sterilized glass jars, leaving a small headspace. Seal the jars tightly; the jam can be stored in the fridge for up to two weeks.
- Step 8: Enjoy! — Spread the jam on toast, swirl it into yogurt, or drizzle it over pancakes. The seeds add a delightful crunch, and the jam’s natural sweetness makes it a healthier alternative to store‑bought spreads. If you’re feeling adventurous, add a pinch of cinnamon or a splash of vanilla extract for a new flavor dimension. The possibilities are endless.
That's it — you did it. But hold on, I've got a few more tricks that'll take this to another level…
Insider Tricks for Flawless Results
The Temperature Rule Nobody Follows
Many people think you can just throw the ingredients in and let them simmer, but the key is maintaining a low, steady heat. Too high a temperature will scorch the berries, locking in bitterness, while too low will prolong cooking time. Use a thermometer and keep the pot between 185°F and 195°F; this range ensures optimal gelatinization of the chia seeds and the natural pectin in the fruit.
Why Your Nose Knows Best
Before you even taste the jam, give it a good sniff. A sweet, fruity aroma with a hint of caramel signals that the sugars have caramelized just enough. If the smell is overly sharp or metallic, the jam may have been overcooked. Trust your nose; it’s a reliable indicator of flavor balance.
The 5-Minute Rest That Changes Everything
After removing the pot from heat, let the jam sit covered for five minutes. This resting period allows the chia seeds to fully hydrate and the flavors to meld. Skipping this step often results in a jam that feels unevenly thick, with pockets of liquid. Give it that brief pause, and you’ll notice a smoother, more cohesive texture.
Stirring Technique for Uniform Texture
Stirring clockwise with a wooden spoon or heat‑resistant spatula ensures that the jam moves in a consistent direction, preventing clumps from forming. A quick, gentle stir every two minutes is enough. Over‑stirring can break down the seeds, making the jam gummy.
Cooling to Perfection
Let the jam cool to room temperature before sealing the jars. If you seal it while hot, condensation can form, leading to mold growth. Once cooled, you can refrigerate immediately. The jam will thicken further as it cools, so it’s best to test consistency at room temperature.
Freezing Without Compromise
When freezing, divide the jam into small portions and add a tablespoon of water per cup before sealing. This prevents the seeds from clumping together in the freezer. Thaw in the fridge overnight, then stir well before serving.
Creative Twists and Variations
This recipe is a playground. Here are some of my favorite ways to switch things up:
Berry‑Mint Fusion
Add a handful of fresh mint leaves during the simmer. The mint provides a cooling contrast that pairs beautifully with the sweet, thick jam. It’s a refreshing option for summer breakfasts.
Spiced Citrus Explosion
Stir in a pinch of ground ginger and a splash of orange zest. The warmth of ginger and the bright citrus notes elevate the jam’s complexity, making it a perfect companion for oatmeal.
Chocolate Chia Delight
Fold in a tablespoon of unsweetened cocoa powder after simmering. The chocolate enriches the jam’s flavor profile, turning it into a decadent spread for croissants or toast.
Almond Butter Swirl
Blend a spoonful of almond butter into the jam once it’s cooled. The nutty butter adds creaminess and a protein boost, creating a luxurious spread for toast or bagels.
Herbal Honey Infusion
Replace maple syrup with raw honey and add a sprig of rosemary during simmer. The herbal undertone offers a sophisticated twist, ideal for a brunch spread.
Peanut Butter & Berry Blend
Stir in a tablespoon of natural peanut butter after cooling. The peanut butter’s richness pairs with the jam’s fruitiness, creating a balanced, protein‑rich spread.
Storing and Bringing It Back to Life
Fridge Storage
Store the jam in sterilized glass jars, sealed tightly, in the refrigerator. It will keep for up to two weeks. The seeds will settle at the bottom; give the jar a gentle shake before using. For the freshest flavor, consume within the first week.
Freezer Friendly
Divide the jam into single‑serving portions and place them in freezer‑safe containers or zip‑lock bags. Add a teaspoon of water to each portion to prevent seed clumping. The jam will stay good for up to three months. Thaw in the refrigerator overnight before using.
Best Reheating Method
Reheat the jam gently in a saucepan over low heat, stirring frequently. Add a splash of water or a little lemon juice to loosen the texture if it’s too thick. Let it warm through until it reaches a pourable consistency. This method preserves the jam’s natural flavor and prevents scorching.