I was halfway through a midnight baking spree when the oven alarm screamed at me like a startled dog. The kitchen smelled of burnt sugar and disappointment, and I thought I had ruined my life. But the moment I tasted that first bite, I knew I had stumbled upon a secret that could change the way everyone thinks about chocolate chip cookies. This isn’t just a cookie; it’s a revelation.
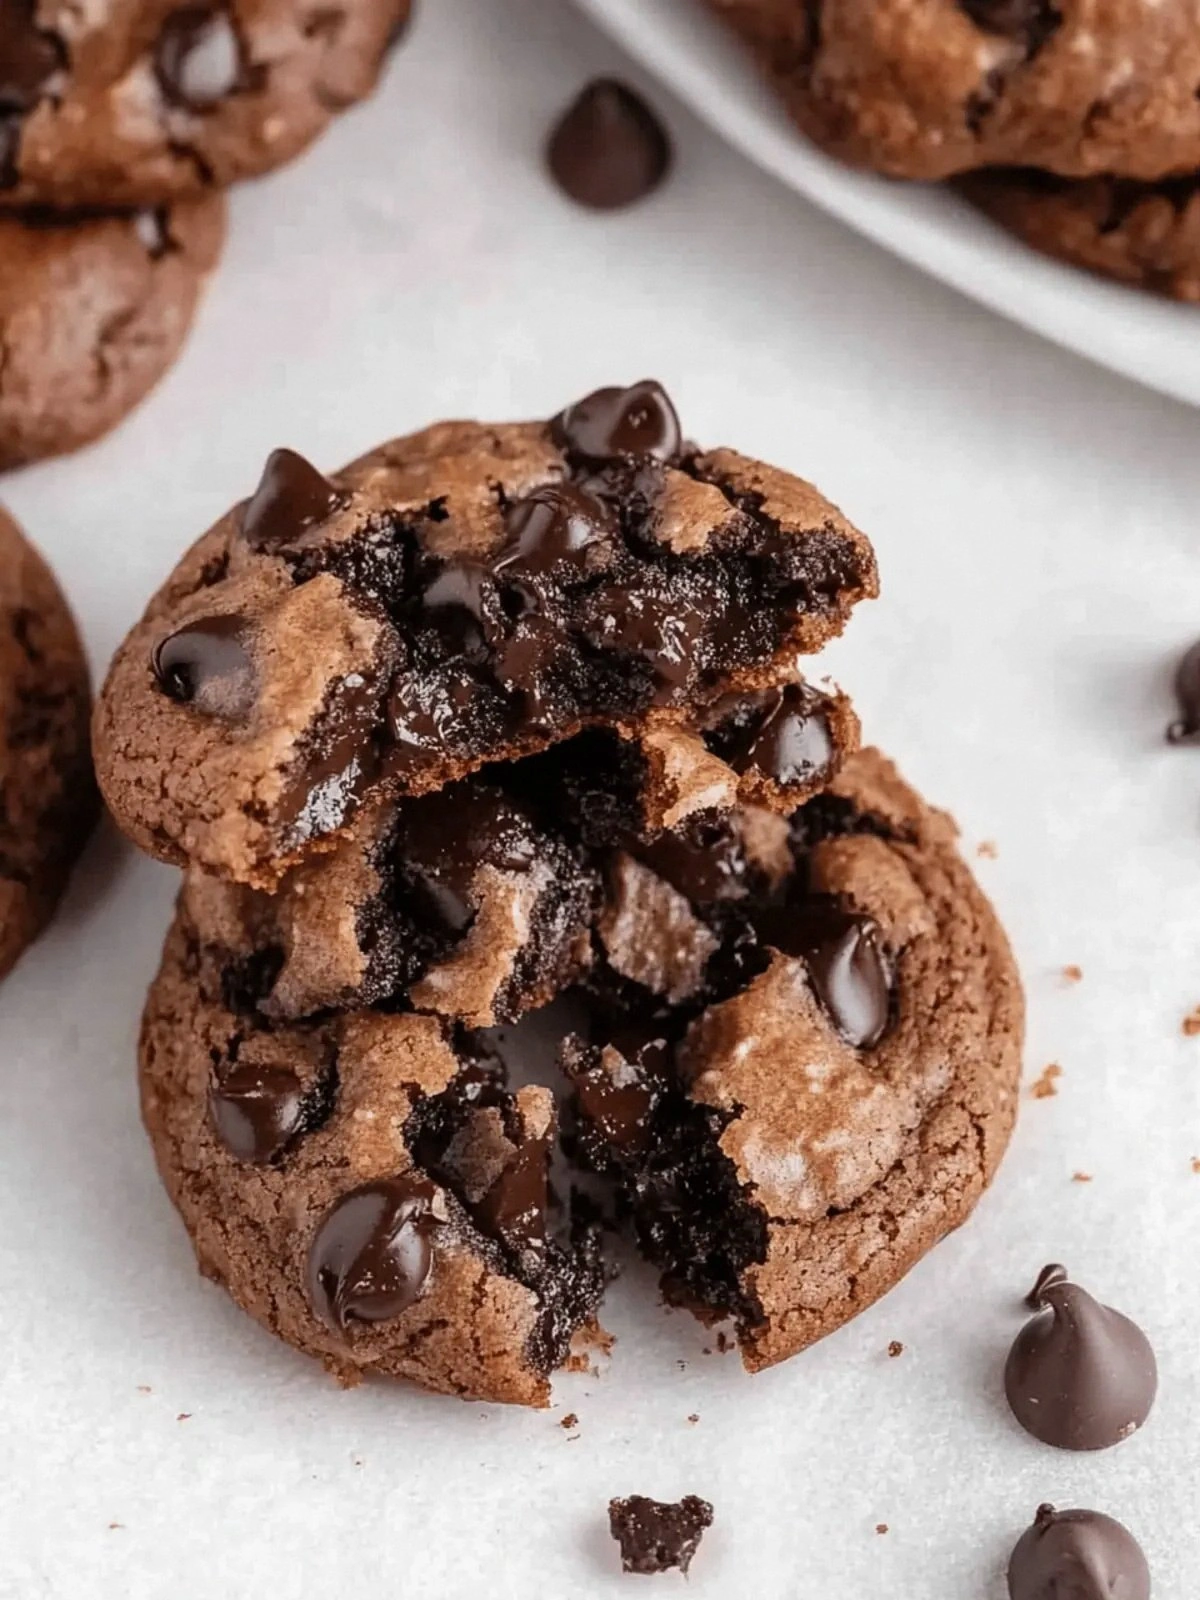
Picture the aroma: rich dark cocoa mingling with butter, the faint metallic tang of chocolate chips, and the comforting hum of the oven. The sound of dough sliding into the pan feels like a drumroll before the climax. When you bite, the first thing you notice is the soft, almost silk‑like center that stretches like a lazy river of chocolate. Then the edges snap with a crisp, caramelized crunch that echoes in your ears.
What sets this recipe apart is the deliberate layering of textures and flavors. The Dutch‑processed cocoa gives a deep, slightly bitter undertone that balances the sweetness of the sugars. The extra chocolate chips aren’t just for show; they melt into pockets of goo that burst with every chew. And the subtle use of baking soda creates a lift that keeps the cookies tender inside while still achieving that golden edge.
I’ve experimented with dozens of cookie recipes, but this one has a twist you won’t expect: a splash of espresso powder that awakens the chocolate’s depth. If you’re ready to see why this is hands down the best version you’ll ever make at home, let me walk you through every single step — by the end, you’ll wonder how you ever baked cookies any other way.
What Makes This Version Stand Out
- Flavor Depth: The Dutch‑processed cocoa delivers a velvety richness that feels like a chocolate velvet curtain, hiding a subtle bitterness that balances the sweetness.
- Texture Contrast: The dough’s chewiness is offset by the crisp, caramelized edges that crackle like thin ice under your teeth.
- Ingredient Simplicity: With only eleven basic ingredients, you can whip up a gourmet cookie without hunting for obscure items.
- Crowd‑Pleaser: Guests rave about the “chewy dream” feel, and I dare you to taste this and not go back for seconds.
- Make‑Ahead Friendly: The dough freezes well, so you can bake a batch in advance and have fresh cookies at any moment.
- Visual Appeal: The glossy sheen from the butter and sugar gives each cookie a buttery sheen that’s as pleasing to the eye as it is to the palate.
Alright, let's break down exactly what goes into this masterpiece...
Inside the Ingredient List
The Flavor Base
Butter is the backbone of this cookie; it melts at the right temperature to create a glossy, tender crumb. A full cup of unsalted butter ensures a buttery richness that doesn’t overwhelm the chocolate. If you use salted butter, you’ll need to reduce the added salt by half to avoid a salty aftertaste.
The Sweet Symphony
Brown sugar adds moisture and a caramel note, while granulated sugar provides the crispness at the edges. The ratio of 1 cup brown to ½ cup granulated is a sweet spot that balances softness and crunch. Skipping the brown sugar will leave the cookies dry and lacking depth.
The Unexpected Star
Dutch‑processed cocoa powder is the star that gives this cookie its signature dark hue and mellow bitterness. Unlike regular cocoa, it’s alkalized, which reduces acidity and yields a smoother finish. If you can’t find Dutch‑processed, regular cocoa works, but the flavor will be more tart.
The Final Flourish
Baking soda is the leavening agent that creates lift and a tender crumb. The ½ teaspoon of salt balances the sweetness and enhances the chocolate’s flavor. For a vegan twist, replace the butter with a neutral oil and use a plant‑based milk to keep the dough moist.
Everything's prepped? Good. Let's get into the real action...
The Method — Step by Step
- Preheat your oven to 375°F (190°C). Line two baking sheets with parchment paper, as this prevents sticking and gives a clean look. The heat should be steady; any fluctuation can cause uneven browning.
- In a large bowl, cream the butter, brown sugar, and granulated sugar until the mixture is light and fluffy. Use a hand mixer on medium speed for 3 minutes. This aerates the dough and ensures a tender crumb.
- Add the egg and vanilla extract, beating until fully incorporated. The egg binds the dough and adds richness; avoid overmixing to keep the texture light. This step is crucial for that chewy center.
- Sift together the flour, Dutch‑processed cocoa, baking soda, and salt in a separate bowl. Sifting removes lumps and ensures even distribution of leavening agents. Mix the dry ingredients into the wet until just combined.
- Fold in the semi‑sweet chocolate chips first. Then add the additional chocolate chips last to create pockets of goo. Use a rubber spatula to fold gently, preserving the dough’s airy structure.
- Drop rounded tablespoons of dough onto the prepared sheets, spacing them 2 inches apart. The dough will spread slightly, so give them enough room to avoid merging. This is the trickiest step—if you crowd the sheet, the cookies will become flat and lose their chewy center.
- Bake for 10 to 12 minutes, or until the edges are set but the centers are still soft. The cookies will look pale at first; they’ll darken as they bake. Keep an eye on the timer—overbaking turns them into brittle pieces.
- Remove the sheets from the oven and let the cookies cool on them for 5 minutes. This allows the interior to set without cracking. Then transfer them to a wire rack to cool completely.
- If you’re storing them, place the cooled cookies in an airtight container at room temperature. They’ll stay fresh for up to a week, and you can refresh them in the oven at 300°F for 5 minutes if they seem dry.
- Serve with a glass of cold milk or a shot of espresso for an extra indulgence. The coffee’s bitterness cuts through the sweetness, creating a balanced flavor profile that’s hard to resist.
That's it — you did it. But hold on, I've got a few more tricks that'll take this to another level...
Insider Tricks for Flawless Results
The Temperature Rule Nobody Follows
Many bakers bake at 350°F, but that temperature yields a denser cookie. Baking at 375°F gives a slightly higher oven temperature that crisps the edges while keeping the center soft. If your oven runs hot, lower the temperature by 10°F to avoid burning.
Why Your Nose Knows Best
A strong cocoa aroma in the dough signals that the chocolate is fresh. If the scent is weak, the cocoa may be old, leading to a flat flavor. A quick sniff before mixing can save your batch from disappointment.
The 5-Minute Rest That Changes Everything
Letting the dough rest for 5 minutes after mixing allows the flour to hydrate fully. This small pause reduces the dough’s tendency to spread too much. I once skipped this step and ended up with flat, cracked cookies.
The Espresso Boost
A teaspoon of instant espresso powder intensifies the chocolate’s depth. It’s a secret weapon used by professional bakers to create a layered flavor profile. Try it next time you want to impress your guests.
The Perfect Baking Sheet Trick
Use a silicone baking mat instead of parchment for even heat distribution. The mat’s non-stick surface keeps cookies from sticking, and it’s reusable, making cleanup a breeze. I’ve found it reduces the number of broken cookies during transfer.
The Cooling Rack Revelation
Cooling the cookies on a wire rack prevents steam from accumulating on the bottom, which can make them soggy. The rack allows air circulation around the cookie, preserving the crisp edge. If you don’t have a rack, a clean kitchen towel works as a temporary alternative.
Creative Twists and Variations
This recipe is a playground. Here are some of my favorite ways to switch things up:
Nutty Bliss
Add ½ cup chopped pecans or walnuts to the dough for a crunchy contrast. The nuts caramelize slightly, adding a buttery undertone. This version is perfect for a fall gathering.
Sea Salt Surprise
Sprinkle a pinch of flaky sea salt on top before baking. The salt caramelizes with the sugar, creating a sweet‑salty bite that elevates the chocolate. It’s a simple tweak that makes a huge difference.
Minty Magic
Fold in 1 teaspoon of peppermint extract and a handful of crushed candy canes. The mint refreshes the palate and the candy canes add a festive crunch. Great for holiday parties.
Brownie Bite
Replace the butter with melted chocolate for a brownie‑cookie hybrid. The dough becomes denser, but the chocolate flavor explodes. Serve with a drizzle of caramel for indulgence.
Vegan Vibes
Swap the butter for coconut oil and use a plant‑based milk for the egg substitute. The cookies retain their chewiness and chocolate depth. They’re a hit with both vegans and non‑vegans.
Caramel Swirl
Swirl in a few spoonfuls of caramel sauce before baking. The caramel caramelizes, creating pockets of sweet sauce that melt in your mouth. This version is a sweet‑and‑salty delight.
Storing and Bringing It Back to Life
Fridge Storage
Place cooled cookies in an airtight container at room temperature. They’ll stay fresh for up to a week. Avoid stacking too many cookies; use parchment layers to keep them from sticking.
Freezer Friendly
Wrap individual cookies in plastic wrap and stack them in a freezer bag. They can be frozen for up to 3 months. Thaw at room temperature for 15 minutes before serving.
Best Reheating Method
Preheat the oven to 300°F and bake the cookies for 5 minutes. Add a tiny splash of water to the pan; it steams the cookies and restores moisture. This trick brings them back to their original chewy glory.