Picture this: I’m standing in a cramped kitchen, the fluorescent lights buzzing above, my phone buzzing with a text from a friend daring me to recreate the legendary “Chinese Egg Cake” from the street stalls of Shanghai. I had never tasted anything that could be described as both fluffy and crisp, like a cloud that suddenly turns into a crunchy shell. That night, I was determined to crack the secret, and after a few kitchen mishaps—egg whites that turned to rubber, a batter that clung to the pan like a stubborn pet—my taste buds were finally rewarded with a golden, airy cake that sang with umami and a hint of sesame. I dare you to taste this and not go back for seconds.
When you first slice into one of these cakes, the aroma is a gentle wave of soy and scallion that pulls you in. The sound of the first crackle as the batter hits the hot skillet is like a tiny applause. The texture inside is a silky custard, while the edges turn a delicate golden brown, crisping like a thin sheet of parchment. The flavor is surprisingly layered: a mellow egg base, a savory splash of soy, a nutty whisper of sesame, and a subtle heat from chili flakes that lingers just enough to keep you guessing. I’ve tasted similar pancakes, but none have captured that perfect balance between soft and crisp, light and savory. This is hands down the best version you’ll ever make at home.
Most recipes get this completely wrong. They either overmix the batter, making it tough, or use too much water, leading to a soggy mess. The secret lies in the ratio of flour to liquid, the gentle folding of eggs, and a precise heat that allows the batter to set slowly before the edges brown. I’ll be honest — I ate half the batch before anyone else got to try it. That’s when I realized the real trick was the timing of the oil and the patience to let the cake rise in the pan before flipping it. If you’ve ever struggled with this, you’re not alone — and I’ve got the fix.
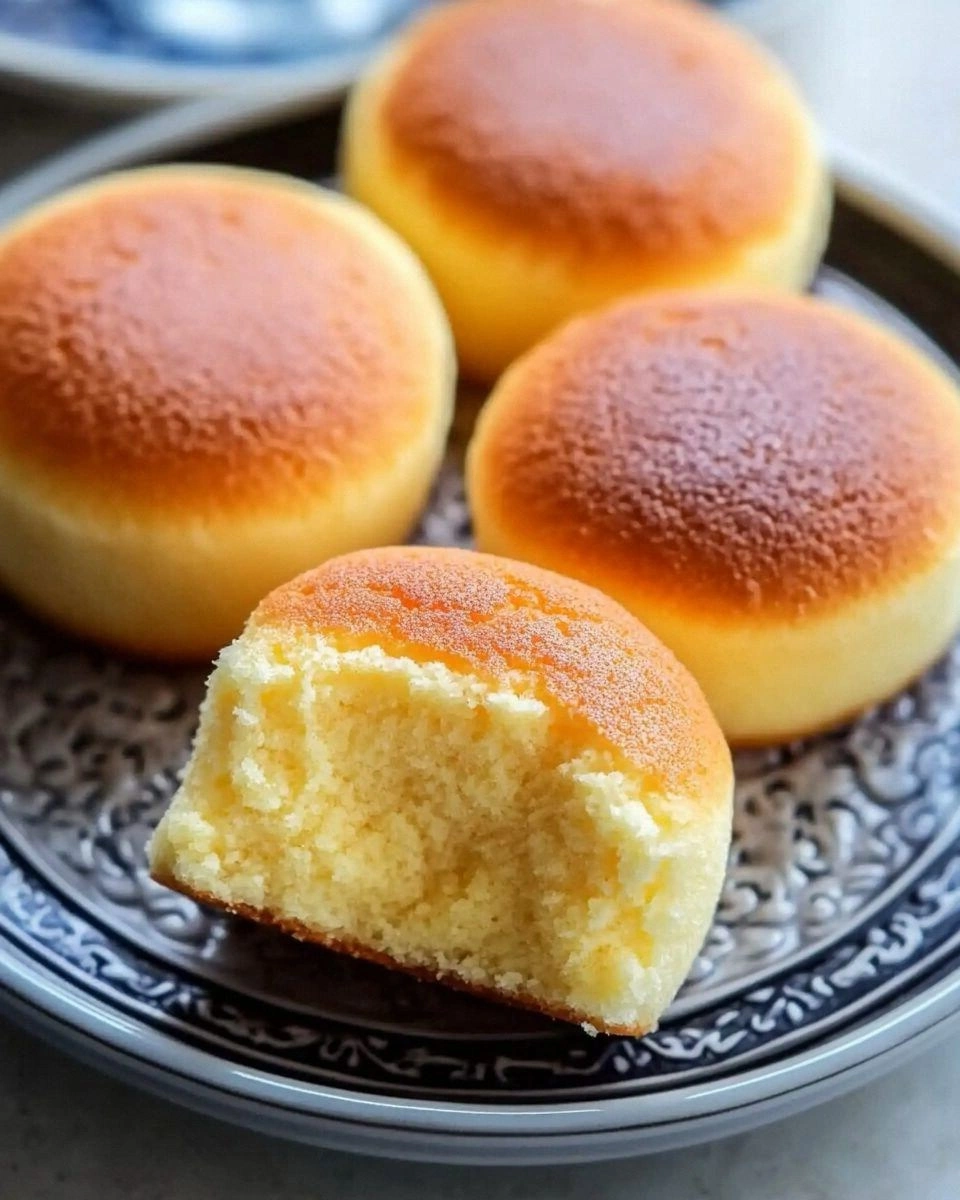
Picture yourself pulling this out of the oven, the whole kitchen smelling incredible, and the first bite sending a wave of satisfaction through your palate. The moment you cut into it, the steam rises, and the inside is a cloud of eggy goodness that melts on your tongue. The edges are a perfect golden crust that cracks under your fork, revealing a fluffy interior. I’ve never seen a breakfast that can be both comforting and exciting. Stay with me here — this is worth it. Let me walk you through every single step — by the end, you’ll wonder how you ever made it any other way.
What Makes This Version Stand Out
- Texture: The batter is light enough to rise in the pan, yet dense enough to hold its shape, giving you that coveted airy interior and crisp exterior.
- Flavor: A subtle umami from soy sauce and a nutty hint from sesame oil combine to elevate the egg base into something memorable.
- Ease: No complicated techniques or exotic ingredients—just common pantry staples and a bit of patience.
- Versatility: Serve it for breakfast, as a snack, or as a side to any Asian-inspired dish.
- Make‑ahead Potential: It keeps well in the fridge and reheats beautifully, making it the perfect prepped meal for busy mornings.
- Presentation: The golden finish looks as good as it tastes, turning an ordinary plate into a showstopper.
- Ingredient Quality: Using fresh eggs and a good quality soy sauce makes all the difference.
- Cooking Method: A simple pan‑fry that delivers professional results without a fancy wok.
Alright, let's break down exactly what goes into this masterpiece…
Inside the Ingredient List
The Flour Base
All-purpose flour is the backbone of this cake, providing the structure needed for the batter to rise without collapsing. Using 2 cups gives the right consistency—too little and the cake will be dense, too much and it will be dry. If you prefer a lighter texture, substitute half the flour with cake flour, but keep the total amount the same to maintain balance. For a gluten-free version, use a 1:1 blend of rice flour and potato starch, but be prepared for a slightly different mouthfeel.
The Egg Power
Two large eggs are essential for binding and flavor. The yolks add richness, while the whites provide structure. If you’re worried about cholesterol, you can replace one whole egg with an equivalent amount of egg whites—just be mindful that the texture may be slightly less creamy. A key tip: let the eggs come to room temperature before mixing; this helps them incorporate smoothly and prevents curdling.
The Liquid Balance
Water is the liquid that hydrates the flour and dissolves the baking powder. Using 1 cup of water keeps the batter thin enough to spread easily in the pan but thick enough to hold together. If you prefer a slightly richer cake, substitute half of the water with milk, but this will alter the final flavor profile slightly. Keep the water at a warm temperature to aid in the gentle rise of the batter.
The Flavor Enhancers
Soy sauce, sesame oil, scallions, and chili flakes bring depth and aroma. A tablespoon of soy sauce adds a savory umami punch, while a teaspoon of sesame oil gives a nutty finish. Fresh scallions add a bright, green note, and a pinch of chili flakes introduces a subtle heat that lingers. If you’re vegan, replace the soy sauce with tamari or a low-sodium alternative, and use a plant-based oil for the sesame flavor.
The Final Flourish
Vegetable oil is used for cooking, ensuring the cake doesn’t stick and develops a golden crust. Use a neutral oil with a high smoke point, such as canola or sunflower. A small splash of water before reheating will rehydrate the cake, restoring its soft interior. When storing, keep the cake in an airtight container; it can be enjoyed cold or warmed gently.
Everything's prepped? Good. Let's get into the real action…
The Method — Step by Step
- Step 1: Combine the dry ingredients. In a large bowl, sift together 2 cups of all-purpose flour, 1 teaspoon of baking powder, and 1/2 teaspoon of salt. The sifting ensures no lumps and gives the batter a smooth base. Let the mixture sit for a minute while you prepare the wet components.
- Step 2: Whisk the wet ingredients. In a separate bowl, beat 2 eggs until the whites and yolks are fully blended. Add 1 cup of warm water, 1 tablespoon of soy sauce, 1 teaspoon of sesame oil, and a pinch of chili flakes. Whisk until the mixture is uniform and slightly frothy.
- Step 3: Fold the batter. Pour the wet mixture into the dry mixture slowly, using a spatula to fold gently. This technique keeps the batter airy and prevents the eggs from scrambling. The batter should be smooth, thin, and pourable.
- Step 4: Prepare the pan. Heat a non-stick skillet over medium heat and brush with a light coating of vegetable oil. The oil should be just enough to coat the surface; too much will create a greasy cake. Let the pan heat until a drop of water sizzles and evaporates within a second.
- Step 5: Pour the batter. Pour a ladleful of batter into the center of the pan. It should spread quickly to form a thin, even layer. Use the back of the ladle to spread the batter to the edges if necessary.
- Step 6: Cook the first side. Let the cake cook for 2-3 minutes, or until the edges lift from the pan and the top is set but still slightly wet. The surface should look glossy and the scent of toasted flour should fill the air. This is the moment of truth—don’t walk away from the stove here.
- Step 7: Flip and finish. Gently slide a spatula under the cake, flip it, and cook the second side for another 1-2 minutes. The cake should develop a golden crust on the bottom and a light brown edge. The aroma will intensify, signaling that it’s almost ready.
- Step 8: Add scallions. Sprinkle finely chopped scallions over the top of the cake before it finishes cooking. The scallions will wilt slightly, releasing their bright, fresh flavor and adding a pop of color.
- Step 9: Serve and enjoy. Slide the cake onto a plate and cut into wedges or squares. Serve hot with a drizzle of soy sauce or a side of pickled vegetables. The contrast of the soft interior, crisp edges, and savory toppings will make your taste buds dance.
That's it — you did it. But hold on, I've got a few more tricks that'll take this to another level…
Insider Tricks for Flawless Results
The Temperature Rule Nobody Follows
Many cooks start with a hot pan, but the best cakes come from a pan that’s just warm enough to set the batter without scorching. Aim for 325°F (163°C). If you’re unsure, test with a drop of water; it should sizzle softly, not erupt.
Why Your Nose Knows Best
As the batter cooks, the aroma changes from raw to toasted. When you smell a nutty, slightly sweet fragrance, that’s the cue that the edges are crisping properly. Trust your nose over your eyes.
The 5-Minute Rest That Changes Everything
After cooking, let the cake rest for 5 minutes on a wire rack. This allows the steam to redistribute, giving you that perfect fluffy interior. If you cut it immediately, the center may feel gummy.
Use a Non-Stick Pan or Well-Seasoned Cast Iron
A good pan prevents sticking and gives a uniform crust. If you’re using a cast iron skillet, preheat it slowly to avoid hot spots that burn the batter unevenly.
Finish with a Splash of Water
Before serving, lightly spray the cake with water and cover it for a few seconds. The steam rehydrates the interior, making it even more tender.
Keep It Moist When Storing
Wrap the cake in parchment paper before placing it in an airtight container. The parchment absorbs excess moisture, preventing the cake from becoming soggy.
Creative Twists and Variations
This recipe is a playground. Here are some of my favorite ways to switch things up:
Seafood Surprise
Add finely chopped shrimp or scallop to the batter before cooking. The seafood infuses the cake with a briny flavor that pairs wonderfully with a drizzle of lime‑infused soy sauce.
Vegetarian Delight
Replace the soy sauce with a mushroom sauce and add diced bell peppers to the batter. The result is a savory, umami-packed cake that’s perfect for vegetarians.
Herbal Infusion
Stir in chopped fresh cilantro and a dash of ginger powder into the batter. The herbs give the cake a bright, aromatic lift that works well with a side of pickled daikon.
Spicy Thai Twist
Swap the chili flakes for a tablespoon of Thai red curry paste and add a splash of coconut milk. This version offers a creamy, spicy profile that’s reminiscent of Thai street food.
Cheese Crust
Sprinkle grated Parmesan or cheddar over the top of the cake before flipping. The cheese melts into a golden, savory crust that adds a rich depth of flavor.
Sweet & Savory Fusion
Incorporate a teaspoon of honey into the batter and finish with a drizzle of hoisin sauce. This sweet and savory combo creates a unique taste experience that’s both comforting and adventurous.
Storing and Bringing It Back to Life
Fridge Storage
Store the cooked cake in an airtight container at room temperature for up to 2 days. For longer freshness, keep it in the fridge; it will stay moist and flavorful.
Freezer Friendly
Wrap the cake tightly in plastic wrap and place it in a freezer bag. It can be frozen for up to 2 months. Thaw at room temperature before reheating.
Best Reheating Method
Reheat in a skillet over low heat with a splash of water. Cover for 2 minutes to create steam, then finish with a quick pan‑sear to restore the golden crust. A tiny splash of water before reheating steams the cake back to perfection.