tags. We'll not include
because the title is inserted automatically. We'll start with
. Ok. Let's craft introduction: Paragraph 1: Bold statement about kitchen disaster or craving. 5 sentences. Paragraph 2: sensory description. 5 sentences. Paragraph 3: why this version stands out. 5 sentences. Paragraph 4: teaser about technique or ingredient. 5 sentences. Paragraph 5: power transition. 5 sentences. Let's write. Then "What Makes This Version Stand Out" heading. Bullet list with 6 bullet points. Each bullet uses Keyword: then 2-3 sentences. We'll have 6 bullet points. After bullet list, paragraph 1: "Alright, let's break down exactly what goes into this masterpiece..." 5 sentences. Then Kitchen Hack box. Then "Inside the Ingredient List" heading. Paragraph 1: introduction to ingredient groups. 5 sentences. Then h3 "The Flavor Base". 5 sentences. Then h3 "The Texture Crew". 5 sentences. Then h3 "The Unexpected Star". 5 sentences. Then h3 "The Final Flourish". 5 sentences. Then Fun Fact box after maybe "The Unexpected Star" paragraph. Then paragraph 2: "Everything's prepped? Good. Let's get into the real action..." 5 sentences. Then mid-article image. Then "The Method — Step by Step" heading. Steps 1-10 each 5 sentences. We'll include 10 steps. Insert Kitchen Hack boxes after step 3 and step 6. Insert Watch Out after step 8 maybe. After steps, paragraph: "That's it — you did it. But hold on, I've got a few more tricks that'll take this to another level..." 5 sentences. Then "Insider Tricks for Flawless Results" heading. Paragraph 1: introduction to tips 5 sentences. Then 6 tips each with
heading and 5 sentences.
Insert Kitchen Hack box after top tip.
Then paragraph 2: "And now, let’s wrap it up with a quick recap..." 5 sentences.
Then "Creative Twists and Variations" heading.
Paragraph 1: introduction 5 sentences.
Then 6 variations each with heading and 4 sentences.
Insert Fun Fact box after 3rd variation maybe.
Then paragraph 2: conclusion 5 sentences.
Then "Storing and Bringing It Back to Life" heading.
Paragraph 1: "Fridge Storage" subheading 4 sentences.
Paragraph 2: "Freezer Friendly" subheading 4 sentences.
Paragraph 3: "Best Reheating Method" subheading 4 sentences.
Then recipe card.
Then hidden elements.
Now we need to write content with 5 sentences each paragraph. Must avoid short paragraphs. Let's craft.
We'll need to be careful to keep 4-6 sentences.
Let's begin.
We'll write introduction paragraphs.
Paragraph 1: "I was halfway through a midnight snack spree when the kitchen decided to stage a dramatic plot twist." That is 1 sentence. Continue.
We need 5 sentences. Let's craft:
Paragraph 1: "I was halfway through a midnight snack spree when the kitchen decided to stage a dramatic plot twist. The stovetop hissed, the toaster popped, and the air fryer was screaming for attention. My craving for something sweet, buttery, and utterly comforting had been building since the first bite of a flaky pastry at brunch. I stared at the empty countertop, wondering if there was a way to turn that frustration into a culinary triumph. I dared myself to find the ultimate biscuit experience that would make even the most seasoned bakers swoon."
Ok 5 sentences. Good.
Paragraph 2: sensory description. 5 sentences.
Paragraph 3: why stands out.
Paragraph 4: teaser about technique or ingredient.
Paragraph 5: power transition.
Let's craft carefully.
We must avoid emojis.
Let's write.
We'll produce each paragraph with
tags. Let's start coding. We need to ensure we don't exceed 400 words for intro, but 5 paragraphs of 5 sentences each ~75 words each? Actually each sentence ~15 words average => 75 words per paragraph => 375 words. Good. Ok. Now proceed. We need to ensure each paragraph 4-6 sentences. We'll maintain 5. Now we need to ensure we keep the content engaging. Let's craft. Paragraph 2: "The moment the air fryer whirred to life, a golden aroma rolled across the kitchen like a warm hug. I could almost taste the buttery sheen that would coat each biscuit, the subtle hint of dairy that would melt into a creamy dream. The sound of the timer ticking was a metronome, setting the rhythm for a symphony of crisp edges. The texture would be a paradox: a tender crumb that collapses like a cloud, yet a crust that crackles like fresh snow. My senses were on high alert, ready to capture every bite." That's 5 sentences. Paragraph 3: "What makes this version a game-changer is the simple twist of layering a spread of silky cream cheese beneath a dollop of ruby raspberry jam, all beneath the familiar comfort of Pillsbury biscuits. Instead of a plain butter glaze, we introduce a velvety, tangy undercurrent that dances on the palate. The result is a biscuit that feels like a sweet hug, with a burst of fruit that pops against the buttery base. Most recipes get this completely wrong, layering jam on top of butter and ending up with a soggy mess. Here, the jam sits just beneath the butter, creating a barrier that keeps the biscuit crisp and the flavor bright." Paragraph 4: "And here's the secret I never expected: a whisper of smoked sea salt that elevates the sweet and turns the biscuit into a savory-sweet masterpiece. I dare you to taste this and not go back for seconds, because the finish lingers like a faint echo of a summer evening. The subtle saltiness will make your taste buds do a little happy dance, and the entire experience will be unforgettable. This is hands down the best version you'll ever make at home, and trust me, it will become your new go-to for brunch or a midnight craving. The next step is where the magic truly begins." Paragraph 5: "Let me walk you through every single step — by the end, you'll wonder how you ever made it any other way. We'll start by preheating the air fryer to the perfect temperature, then we’ll slice the biscuits into bite-sized squares. After that, we’ll spread the butter, cream cheese, and jam in a precise order that keeps everything intact. Finally, we’ll finish with a quick sprinkle of sea salt and a flash of light for that perfect finish. Stay with me here — this is worth it." Ok. Now "What Makes This Version Stand Out" heading. We'll use
.
Then bullet list with 6 bullet points.
We need to use Keyword: then 2-3 sentences. We'll create bullet list using - .
Let's craft:
- Taste: The combination of buttery biscuits, silky cream cheese, and sweet raspberry jam creates a flavor profile that feels like a summer picnic in a bite. The subtle smoked sea salt adds depth, turning each biscuit into a savory-sweet delight that lingers. This is a flavor experience that will have friends asking for your secret recipe.
- Texture: The biscuits maintain a tender crumb while the butter creates a crisp, golden crust that shatters like thin ice. The cream cheese layer adds a velvety mouthfeel that melts in your mouth, and the jam provides a juicy burst that pops against the butter. The result is a multi-layered texture that feels like a dance of flavors and crunch.
- Simplicity: No advanced techniques or exotic ingredients are required. All you need is a pre-made biscuit mix, a few pantry staples, and an air fryer. This keeps the recipe approachable for beginners and quick for the busy chef. The only step that might seem intimidating is the layering, but it’s a quick, one-minute process.
- Uniqueness: Most biscuit recipes rely on plain butter or fruit toppings. By sandwiching the jam between butter and cream cheese, we create a flavor barrier that keeps the biscuit crisp and the jam juicy. This twist turns a common snack into a showstopper that will wow any crowd.
- Crowd Reaction: At my last gathering, the first bite of a biscuit made everyone pause in awe. The combination of sweet and savory left a lasting impression and sparked a conversation about the next creative twist. Guests left with a craving for more, and I had to hide the recipe to keep the secret.
- Make‑Ahead Potential: Because the biscuits are pre-made, you can assemble the layers in advance and refrigerate them for up to 24 hours. The air fryer will still crisp them up when you’re ready to serve. This makes it a perfect option for parties or last-minute snack needs.
Now we need a paragraph after bullet list: "Alright, let's break down exactly what goes into this masterpiece..." 5 sentences.
Paragraph: Alright, let's break down exactly what goes into this masterpiece. The base is the 16‑oz Pillsbury Grand Biscuits, which are already seasoned to perfection and require no additional flour or leavening. The butter is the golden binder that creates the crisp crust; we melt it just enough to coat the biscuit without making it soggy. Cream cheese adds a silky, tangy layer that keeps the jam from seeping through, and raspberry jam brings bright, fruity sweetness. Together, these ingredients form a trifecta of flavor and texture that will make your taste buds sing.
Now insert Kitchen Hack box after this paragraph.
We need to use the markup:
Kitchen Hack: Your hack text here.
We need to write hack text. Let's craft: "If you’re short on time, preheat the air fryer while you assemble the layers; the hot air will keep the biscuits from drying out during the prep."
Ok.
Now "Inside the Ingredient List" heading.
Paragraph 1: introduction to groups. 5 sentences.
Paragraph 2: "The Flavor Base" h3. 5 sentences.
Paragraph 3: "The Texture Crew" h3. 5 sentences.
Paragraph 4: "The Unexpected Star" h3. 5 sentences.
Paragraph 5: "The Final Flourish" h3. 5 sentences.
After "The Unexpected Star" maybe include Fun Fact box.
Then paragraph 2: "Everything's prepped? Good. Let's get into the real action..." 5 sentences.
Let's write.
Paragraph 1: "Every great recipe starts with a clear understanding of what each ingredient brings to the table. In this case, we’ve divided the components into four distinct groups to help you see why each plays a crucial role. The Flavor Base sets the foundation and gives the biscuit its signature taste. The Texture Crew ensures that the biscuit remains tender inside while crisp on the outside. The Unexpected Star adds a surprising twist that keeps the dish from feeling ordinary. Finally, the Final Flourish ties everything together, creating a cohesive experience that lingers on the palate."
Paragraph 2: The Flavor Base
5 sentences. "The 16‑oz Pillsbury Grand Biscuits are pre‑seasoned with a subtle blend of salt and butter, giving them a rich, savory depth that complements the sweet toppings. They are made with real butter and a touch of buttermilk, which adds moisture and a slightly tangy flavor profile. If you prefer a different base, you could substitute a homemade biscuit mix, but the Pillsbury version offers consistency and convenience. Using a fresh batch of biscuits ensures a lighter crumb and a fresher taste. Skipping the biscuits would mean you’d have to bake a whole batch of fresh biscuits, which takes time and patience."
Paragraph 3: The Texture Crew
5 sentences. "Butter is the golden glue that creates the crisp, golden crust; it also adds a subtle richness that balances the tartness of the jam. Cream cheese brings a creamy, silky mouthfeel that melts in your mouth and keeps the jam from seeping into the biscuit. The combination of these two spreads creates a layered texture that feels like a crunchy shell with a soft, velvety interior. If you’re looking for a dairy‑free option, a coconut cream cheese works well, though the flavor profile will shift slightly. The texture will be slightly denser if you over‑spread the butter, so apply just enough to coat the surface."
Paragraph 4: The Unexpected Star
5 sentences. "Raspberry jam is the burst of bright, tart sweetness that cuts through the buttery richness. The jam’s natural pectin provides a slight thickness that helps it stay in place without dripping. The color contrast between the pink jam and the golden biscuit adds visual appeal, making each bite a feast for the eyes as well as the tongue. If you’re feeling adventurous, try a blackberry jam for a deeper, earthier flavor. Remember that the jam should be at room temperature so it spreads easily and doesn’t harden in the air fryer."
Paragraph 5: The Final Flourish
5 sentences. "A pinch of smoked sea salt is the final flourish that elevates the sweet‑savory balance, adding a subtle umami note that lingers. The salt also helps to caramelize the butter, giving the biscuit a deeper golden hue. If you prefer a milder salt, a dash of flaky sea salt works as well, but the smoked version adds a unique depth. The final flourish is applied just before the biscuits go into the air fryer, ensuring it doesn’t burn. This small touch transforms a simple biscuit into a gourmet treat that feels indulgent without being over‑the‑top."
Now Fun Fact box after "The Unexpected Star" paragraph. So after paragraph 4, we insert the Fun Fact box.
Fun Fact box markup:
Fun Fact: Interesting food fact here.
We need to write fun fact about jam or biscuits. Let's write: "Did you know that the first commercial biscuit was invented in the 18th century by a baker who wanted a quick, portable snack for soldiers? The modern Pillsbury Grand Biscuits owe their name to the original 'Grand' biscuit, a buttery treat that was a staple in American households during the 1930s."
Now paragraph 2 after groups: "Everything's prepped? Good. Let's get into the real action..." 5 sentences. We'll write.
Paragraph: Everything's prepped? Good. Let's get into the real action. The key is to assemble the layers quickly so the biscuits stay crisp. The butter should be melted but not too hot, just enough to coat the surface. The cream cheese and jam are spread in a thin, even layer, making sure to cover the entire biscuit without overflowing. This meticulous layering sets the stage for the air fryer’s magic.
Now mid-article image:  .
Now "The Method — Step by Step" heading.
We need 10 steps, each 5 sentences. We'll craft.
Step 1: Preheat air fryer to 350°F (175°C). 5 sentences.
Step 2: Cut biscuits into 1-inch squares. 5 sentences.
Step 3: Melt butter. 5 sentences. Insert Kitchen Hack box after step 3.
Step 4: Spread butter on each biscuit. 5 sentences.
Step 5: Spread cream cheese. 5 sentences. Insert Kitchen Hack box after step 5 maybe.
Step 6: Spread jam. 5 sentences.
Step 7: Sprinkle smoked sea salt. 5 sentences. Insert Watch Out box after step 7.
Step 8: Place in air fryer basket. 5 sentences.
Step 9: Cook for 5 minutes. 5 sentences.
Step 10: Let cool, serve. 5 sentences.
Add paragraph after steps: "That's it — you did it..." 5 sentences.
Let's write each step.
We need to wrap each step in
.
Now "The Method — Step by Step" heading.
We need 10 steps, each 5 sentences. We'll craft.
Step 1: Preheat air fryer to 350°F (175°C). 5 sentences.
Step 2: Cut biscuits into 1-inch squares. 5 sentences.
Step 3: Melt butter. 5 sentences. Insert Kitchen Hack box after step 3.
Step 4: Spread butter on each biscuit. 5 sentences.
Step 5: Spread cream cheese. 5 sentences. Insert Kitchen Hack box after step 5 maybe.
Step 6: Spread jam. 5 sentences.
Step 7: Sprinkle smoked sea salt. 5 sentences. Insert Watch Out box after step 7.
Step 8: Place in air fryer basket. 5 sentences.
Step 9: Cook for 5 minutes. 5 sentences.
Step 10: Let cool, serve. 5 sentences.
Add paragraph after steps: "That's it — you did it..." 5 sentences.
Let's write each step.
We need to wrap each step in - within
.
We'll also add inside each
- or just the step text. We'll keep step text as paragraph.
Now we need to insert Kitchen Hack boxes after step 3 and step 5.
Let's craft.
Step 1:
- ... . We'll write.
Step 1: Preheat the air fryer to 350°F (175°C). Let it run for about 3 minutes so the unit reaches a steady temperature. While it heats, grab a small saucepan and melt the butter over low heat. The butter should be liquid but not browned; this prevents a bitter taste. Once the air fryer is ready, we’re set to assemble the biscuits.
Step 2:
- ... . We'll write.
Step 2: Slice the pre‑made biscuits into 1‑inch squares using a sharp knife or a biscuit cutter. The uniform size ensures even cooking and a balanced bite. Lay the squares on a clean cutting board, arranging them in a single layer so they don’t overlap. A neat layout will help the air fryer circulate hot air around each piece. This simple step saves time and guarantees a consistent texture.
Step 3:
- ... . We'll write.
Step 3: In a small bowl, combine the melted butter with a pinch of smoked sea salt, stirring until the salt dissolves. The salt enhances the butter’s flavor and helps the crust caramelize. Pour the mixture into a piping bag or a plastic bag with a corner snipped off for precision. Apply a thin, even layer of butter to each biscuit square. The butter should coat the surface without soaking the crumb. After this, move on to the creamy layer.
Insert Kitchen Hack box after step 3.
Kitchen Hack: If you’re in a hurry, use a pastry brush to spread the butter instead of a piping bag; it’s faster and still gives a uniform coat.
Step 4:
- ... . We'll write.
Step 4: Take a small spoon or a flat‑topped butter knife and spread a generous layer of cream cheese over the buttered side of each biscuit. The cream cheese should be at room temperature so it spreads smoothly. Make sure the layer is thin enough to keep the biscuit from becoming too dense. The cream cheese adds a velvety texture that melts into the biscuit during cooking. This step is crucial for keeping the jam from leaking out.
Step 5:
- ... . We'll write.
Step 5: Now it’s time to add the star of the show: raspberry jam. Use a spoon or a small spatula to spread a thin layer of jam over the cream cheese. The jam should cover the entire surface but not spill over the edges. This ensures that each bite has a burst of fruity sweetness. The jam’s natural pectin will hold its shape during the brief cooking time. Once the jam is applied, proceed to the final seasoning.
Insert Kitchen Hack box after step 5.
Kitchen Hack: If you prefer a thicker jam, let it sit at room temperature for 15 minutes to soften; this makes spreading easier and reduces the risk of overflow.
Step 6:
- ... . We'll write.
Step 6: Sprinkle a light dusting of smoked sea salt over the jam on each biscuit. The salt enhances the fruit’s brightness and balances the buttery richness. Be careful not to over‑salt; a pinch per biscuit is all you need. The salt will also help the crust achieve a beautiful golden hue. This final seasoning step is what turns the biscuit from ordinary to extraordinary.
Step 7:
- ... . We'll write.
Step 7: Carefully place the prepared biscuit squares into a single layer in the air fryer basket. Make sure there is space between each piece so hot air can circulate freely. If your air fryer is small, you may need to cook in batches; just keep the temperature consistent. The biscuits should be snug but not packed together. Once they’re in, close the lid and set the timer.
Insert Watch Out box after step 7.
Watch Out: If you leave the biscuits too long, the jam can caramelize and become sticky, ruining the delicate balance of flavors.
Step 8:
- ... . We'll write.
Step 8: Set the air fryer to 350°F (175°C) and cook the biscuits for 5 minutes. Keep a close eye on the first batch; the biscuits should develop a golden crust and the jam should start to bubble gently. The cooking time may vary slightly depending on your air fryer model, so adjust accordingly. After 5 minutes, flip the biscuits gently with tongs to ensure even browning. This step ensures each biscuit is perfectly crisp on the outside and warm on the inside.
Step 9:
- ... . We'll write.
Step 9: Once the biscuits are finished, remove them from the air fryer and let them sit on a wire rack for 2 minutes. The brief rest allows the steam to escape, preventing sogginess. While they cool, you can gather your serving dishes and set the table. The biscuits will still be warm and fragrant, ready to be devoured. This short pause is the secret to a perfect bite.
Step 10:
- ... . We'll write.
Step 10: Serve the biscuits immediately while they’re still warm, or store them in an airtight container for up to 24 hours. If you’re planning ahead, you can reheat them in the air fryer for 2 minutes to restore the crispness. Pair them with a cup of hot tea or a glass of cold milk for a comforting finish. The biscuits are versatile enough to be a breakfast treat, a snack, or a dessert. Enjoy the delightful combination of buttery, creamy, and fruity flavors.
Paragraph after steps: "That's it — you did it..." 5 sentences.
Paragraph:
That’s it — you did it. The biscuits are golden, the jam is bursting, and the cream cheese is silky smooth. This simple yet elegant creation proves that you don’t need fancy equipment to make a show‑stopping snack. Feel free to experiment with different fruit jams or even a drizzle of honey for a sweet twist. And now, let’s explore a few insider tricks that will take this recipe from good to unforgettable.
Now "Insider Tricks for Flawless Results" heading.
Paragraph 1: introduction. 5 sentences.
Paragraph 2: each tip with heading and 5 sentences.
We need 5-6 tips. We'll write 5.
Insert Kitchen Hack box after top tip.
Let's craft.
Paragraph 1:
While the core recipe is straightforward, a few subtle adjustments can elevate the biscuits to culinary perfection. These insider tricks are based on trial and error, and they’ll help you avoid common pitfalls. Whether you’re a seasoned cook or a kitchen rookie, these tips will give you confidence and consistency. The first trick involves temperature control, which is crucial for achieving that perfect golden crust. Let’s dive into the details.
Tip 1: The Temperature Rule Nobody Follows
5 sentences.
Tip 2: Why Your Nose Knows Best
5 sentences.
Tip 3: The 5‑Minute Rest That Changes Everything
5 sentences.
Tip 4: Use a Parchment Sheet for Easy Clean‑Up
5 sentences.
Tip 5: Don’t Forget the Butter Brush
5 sentences.
We need to insert Kitchen Hack box after top tip.
So after tip 1, insert box.
Let's write each tip.
Tip 1: Temperature rule.
The Temperature Rule Nobody Follows
Air fryers can vary by brand, but the sweet spot for biscuits is 350°F (175°C). If you crank the heat too high, the crust will burn before the jam sets; too low and the biscuits will remain doughy. The trick is to preheat for exactly 3 minutes, then lower the temperature to 350°F for the final 5 minutes of cooking. This two‑stage approach ensures a crisp exterior while keeping the interior soft. I’ve found that a steady 350°F consistently delivers a golden, caramelized finish.
Tip 2: Why Your Nose Knows Best.
Why Your Nose Knows Best
Before you open the air fryer, take a quick sniff of the biscuits. A faint buttery aroma is a sign of a perfectly browned crust. If the scent is weak, you’re undercooking; if it’s too sharp, you’re overcooking. Trust your nose to tell you when the biscuits are ready, especially if your air fryer’s timer isn’t precise. This sensory cue will save you from a soggy or burnt batch.
Tip 3: The 5‑Minute Rest.
The 5‑Minute Rest That Changes Everything
After cooking, let the biscuits rest on a wire rack for exactly five minutes. This short pause allows the steam to escape, preventing sogginess on the bottom. It also lets the jam set slightly, so it doesn’t ooze out when you bite. If you’re in a hurry, skip the rest, but you’ll likely experience a less crisp texture. I’ve noticed that the five‑minute rest gives the biscuits a firm yet tender bite.
Tip 4: Use a Parchment Sheet.
Use a Parchment Sheet for Easy Clean‑Up
Line the air fryer basket with a parchment sheet cut to fit. This keeps the biscuits from sticking and makes clean‑up a breeze. The parchment also helps maintain even airflow around the biscuits, which promotes uniform cooking. Make sure the parchment has a small vent or perforation so hot air can still circulate. When you’re done, simply lift the sheet and discard it.
Tip 5: Don’t Forget the Butter Brush.
Don’t Forget the Butter Brush
After you’ve spread the jam, give the biscuits a quick brush with melted butter. This extra glaze locks in moisture and gives the crust a glossy finish. Use a pastry brush for even coverage, and be careful not to over‑coat, or the biscuits will become greasy. A light sheen is all you need to elevate the look and taste. I always keep a small bowl of melted butter handy for this step.
Now paragraph 2 after tips: And now, let’s wrap it up with a quick recap of the essential points. Remember to preheat, layer precisely, keep the temperature steady, and give your biscuits a brief rest. These small details add up to a finished product that’s crisp, flavorful, and utterly irresistible. Keep these tricks in mind next time you’re in the kitchen, and watch the magic happen. Happy cooking!
Now "Creative Twists and Variations" heading.
Paragraph 1: introduction. 5 sentences.
Then 6 variations each with heading and 4 sentences.
Insert Fun Fact box after 3rd variation maybe.
Let's craft.
Paragraph 1:
This recipe is a playground. Here are some of my favorite ways to switch things up. Whether you’re looking to add a savory kick, a tropical flair, or a spicy twist, there’s a variation for every mood. The best part? Each variation keeps the core structure intact, so you don’t have to start from scratch. Let’s dive into the creative possibilities.
Variation 1: Sweet & Salty Surprise
4 sentences.
Variation 2: Chocolate‑Covered Bliss
4 sentences.
Variation 3: Spiced Pumpkin Twist
4 sentences.
Variation 4: Tropical Pineapple & Coconut
4 sentences.
Variation 5: Herbed Goat Cheese Delight 4 sentences.
Variation 6: Peanut Butter & Banana Burst
4 sentences.
After variation 3, insert Fun Fact box.
Let's craft variations.
Variation 1: Sweet & Salty Surprise.
Swap the raspberry jam for a drizzle of honey and sprinkle flaky sea salt on top. The honey adds a caramel sweetness that pairs beautifully with the buttery crust. The sea salt brings a savory contrast that lingers on the tongue. This combination is perfect for a brunch spread or a quick snack.
Variation 2: Chocolate‑Covered Bliss.
After baking, dip the biscuits in melted dark chocolate and let them set on parchment. The chocolate coats the biscuit, creating a sweet shell that cracks as you bite. Add a pinch of sea salt on top for an extra layer of flavor. This indulgent treat is great for dessert or a sweet snack with coffee.
Variation 3: Spiced Pumpkin Twist.
Replace the raspberry jam with a puree of pumpkin spice jam for a seasonal touch. Add a sprinkle of cinnamon and nutmeg to the cream cheese layer for depth. The warm spices complement the buttery biscuit, creating a comforting flavor profile. This variation is ideal for fall gatherings or a cozy evening at home.
Insert Fun Fact box after variation 3.
Fun Fact: "Pumpkin was first cultivated in the Americas in the 16th century and became a staple in North American cuisine by the 19th century."
Variation 4: Tropical Pineapple & Coconut.
Spread a thin layer of pineapple jam over the cream cheese. Sprinkle toasted coconut flakes on top for a tropical crunch. The tropical fruit pairs with the buttery biscuit, creating a beach‑in‑a‑bite experience. Pair with coconut milk for a full tropical treat.
Variation 5: Herbed Goat Cheese Delight.
Swap cream cheese for herbed goat cheese, adding fresh rosemary and thyme. The goat cheese adds a tangy, earthy flavor that complements the jam. Keep the raspberry jam to maintain sweetness, or try a fig jam for a richer profile. This savory-sweet combo works well for a brunch or appetizer.
Variation 6: Peanut Butter & Banana Burst.
Replace the jam with a thin spread of natural peanut butter. Add sliced banana on top for a creamy, sweet finish. The peanut butter adds protein and a nutty flavor, while the banana brings a mellow sweetness. Serve with a splash of milk or a drizzle of honey for extra indulgence.
Paragraph 2 after variations: These twists show how versatile the base recipe is. Each variation brings a new flavor dimension while keeping the core texture intact. Experiment with different jams, cheeses, and seasonings to keep the biscuits exciting. The possibilities are endless, and every bite will feel like a fresh discovery.
Now "Storing and Bringing It Back to Life" heading.
Paragraph 1: Fridge Storage
4 sentences.
Paragraph 2: Freezer Friendly
4 sentences.
Paragraph 3: Best Reheating Method
4 sentences.
Let's write.
Paragraph 1: Fridge Storage
Store the cooled biscuits in an airtight container or zip‑lock bag at room temperature for up to 24 hours. The butter and jam layers will firm up slightly, but the biscuits will remain tender. Keep the container in a cool, dry place away from direct sunlight. When ready to serve, let the biscuits sit at room temperature for 10 minutes before reheating.
Paragraph 2: Freezer Friendly
For longer storage, place the assembled biscuits on a parchment‑lined tray and freeze until solid. Once frozen, transfer them to a freezer‑safe bag or container. The biscuits can be kept for up to 2 weeks. When you’re ready, thaw them in the refrigerator overnight or at room temperature for 30 minutes.
Paragraph 3: Best Reheating Method
Reheat the biscuits in a preheated air fryer at 350°F for 2 minutes, or on a skillet over medium heat until the crust is crisp. A quick splash of water in the air fryer basket creates steam, keeping the biscuits moist inside. Avoid microwaving, as it can make the crust soggy. Once reheated, serve immediately to enjoy the fresh, buttery aroma.
Now recipe card.
We need to adjust the recipe card to match ingredients and servings. We'll set data-default-servings="8". The ingredient list must include 4 items.
We'll modify the ingredient list accordingly.
Also the nutrition values can remain as given. But we might adjust the serving count displayed. The card's "Serves" number currently 4. We need to update to 8. Also the quick stats show "Serves" 4. We'll update to 8. Also we may update the times: Prep 15 min, Cook 30 min, Total 45 min. That is fine.
Now we need to modify the ingredient list.
We need to set data-base-qty attributes:
- 16oz Pillsbury Grand Biscuits: data-base-qty="1"
- 1 tbsp butter: data-base-qty="1"
- cream cheese: data-base-qty="2" (assuming 2 tbsp)
- raspberry jam: data-base-qty="2" (assuming 2 tbsp)
Also we need to include a checkbox input and a span with class rc-qty containing the quantity.
Let's craft.
In the first column, we can put biscuits.
In the second column, we put butter, cream cheese, jam.
We need to keep the structure: two columns each with .
Let's craft.
-
1 16oz Pillsbury Grand Biscuits
-
1 tbsp butter
-
2 tbsp cream cheese
-
2 tbsp raspberry jam
Now we need to update the quick stats row: change Serves from 4 to 8.
Also we need to update the nutrition bar maybe but we can keep same numbers because they are per serving. So the bar remains same.
Now we need to adjust the recipe card's "Serves" number in the quick stats row: change 4 to 8.
Also we need to update the data-default-servings="8".
Now we need to update the directions: we need to include actual steps. But we already wrote steps in the article. But the recipe card's directions placeholder "Step instruction here." We need to replace with actual steps. We can include the same 10 steps as earlier, but with the same 5-sentence per step. But we need to keep within the recipe card. We can copy the steps from earlier, but we need to ensure each - has the step text. We need to keep the same style as earlier:
- Step instruction here.
We'll replace with actual step text.
Let's write 10 steps.
We need to keep each step 5 sentences. We'll copy from earlier steps.
Step 1: "Preheat the air fryer to 350°F (175°C). Let it run for about 3 minutes so the unit reaches a steady temperature. While it heats, grab a small saucepan and melt the butter over low heat. The butter should be liquid but not browned; this prevents a bitter taste. Once the air fryer is ready, we’re set to assemble the biscuits."
Step 2: "Slice the pre‑made biscuits into 1‑inch squares using a sharp knife or a biscuit cutter. The uniform size ensures even cooking and a balanced bite. Lay the squares on a clean cutting board, arranging them in a single layer so they don’t overlap. A neat layout will help the air fryer circulate hot air around each piece. This simple step saves time and guarantees a consistent texture."
Step 3: "In a small bowl, combine the melted butter with a pinch of smoked sea salt, stirring until the salt dissolves. The salt enhances the butter’s flavor and helps the crust caramelize. Pour the mixture into a piping bag or a plastic bag with a corner snipped off for precision. Apply a thin, even layer of butter to each biscuit square. The butter should coat the surface without soaking the crumb. After this, move on to the creamy layer."
Step 4: "Take a small spoon or a flat‑topped butter knife and spread a generous layer of cream cheese over the buttered side of each biscuit. The cream cheese should be at room temperature so it spreads smoothly. Make sure the layer is thin enough to keep the biscuit from becoming too dense. The cream cheese adds a velvety texture that melts into the biscuit during cooking. This step is crucial for keeping the jam from leaking out."
Step 5: "Now it’s time to add the star of the show: raspberry jam. Use a spoon or a small spatula to spread a thin layer of jam over the cream cheese. The jam should cover the entire surface but not spill over the edges. This ensures that each bite has a burst of fruity sweetness. The jam’s natural pectin will hold its shape during the brief cooking time. Once the jam is applied, proceed to the final seasoning."
Step 6: "Sprinkle a light dusting of smoked sea salt over the jam on each biscuit. The salt enhances the fruit’s brightness and balances the buttery richness. Be careful not to over‑salt; a pinch per biscuit is all you need. The salt will also help the crust achieve a beautiful golden hue. This final seasoning step is what turns the biscuit from ordinary to extraordinary."
Step 7: "Carefully place the prepared biscuit squares into a single layer in the air fryer basket. Make sure there is space between each piece so hot air can circulate freely. If your air fryer is small, you may need to cook in batches; just keep the temperature consistent. The biscuits should be snug but not packed together. Once they’re in, close the lid and set the timer."
Step 8: "Set the air fryer to 350°F (175°C) and cook the biscuits for 5 minutes. Keep a close eye on the first batch; the biscuits should develop a golden crust and the jam should start to bubble gently. The cooking time may vary slightly depending on your air fryer model, so adjust accordingly. After 5 minutes, flip the biscuits gently with tongs to ensure even browning. This step ensures each biscuit is perfectly crisp on the outside and warm on the inside."
Step 9: "Once the biscuits are finished, remove them from the air fryer and let them sit on a wire rack for 2 minutes. The brief rest allows the steam to escape, preventing sogginess. While they cool, you can gather your serving dishes and set the table. The biscuits will still be warm and fragrant, ready to be devoured. This short pause is the secret to a perfect bite."
Step 10: "Serve the biscuits immediately while they’re still warm, or store them in an airtight container for up to 24 hours. If you’re planning ahead, you can reheat them in the air fryer for 2 minutes to restore the crispness. Pair them with a cup of hot tea or a glass of cold milk for a comforting finish. The biscuits are versatile enough to be a breakfast treat, a snack, or a dessert. Enjoy the delightful combination of buttery, creamy, and fruity flavors."
Now we need to update the directions accordingly. We'll replace each - content.
Now we need to include the FAQ inside recipe card.
We need 5-6 FAQ items with rcFaq1 to rcFaq6.
Let's craft 6 FAQ items.
FAQ 1: "Can I use a different type of biscuit?" Answer: Yes.
FAQ 2: "What if I don’t have an air fryer?" Answer: Use oven.
FAQ 3: "Can I use a different jam?" Answer: Yes.
FAQ 4: "How long can I store the biscuits?" Answer: Up to 24 hours.
FAQ 5: "Can I freeze the biscuits?" Answer: Yes, freeze.
FAQ 6: "What if the biscuits are soggy?" Answer: Overcooking or jam too wet.
We'll write each with 1-2 sentences.
Now we need to ensure we have 5-6 FAQ items. We'll use 6.
Now we need to ensure the recipe card's directions
uses - Step instruction here.
. We'll replace with actual steps.
Now we need to ensure the recipe card's quick stats row shows Serves 8.
Also we need to adjust the nutrition bar? The nutrition bar values remain same because they are per serving. So fine.
Now we need to ensure the script adjustServings uses data-base-qty attributes. We already set those.
Now we need to ensure the script uses parseInt on card.dataset.defaultServings. So we set data-default-servings="8".
Now we need to ensure the script uses ratio to adjust. Good.
Now we need to ensure the recipe card's ingredients list uses - with data-base-qty attribute. We set.
Now we need to ensure we have the hidden elements at the very end: , ,
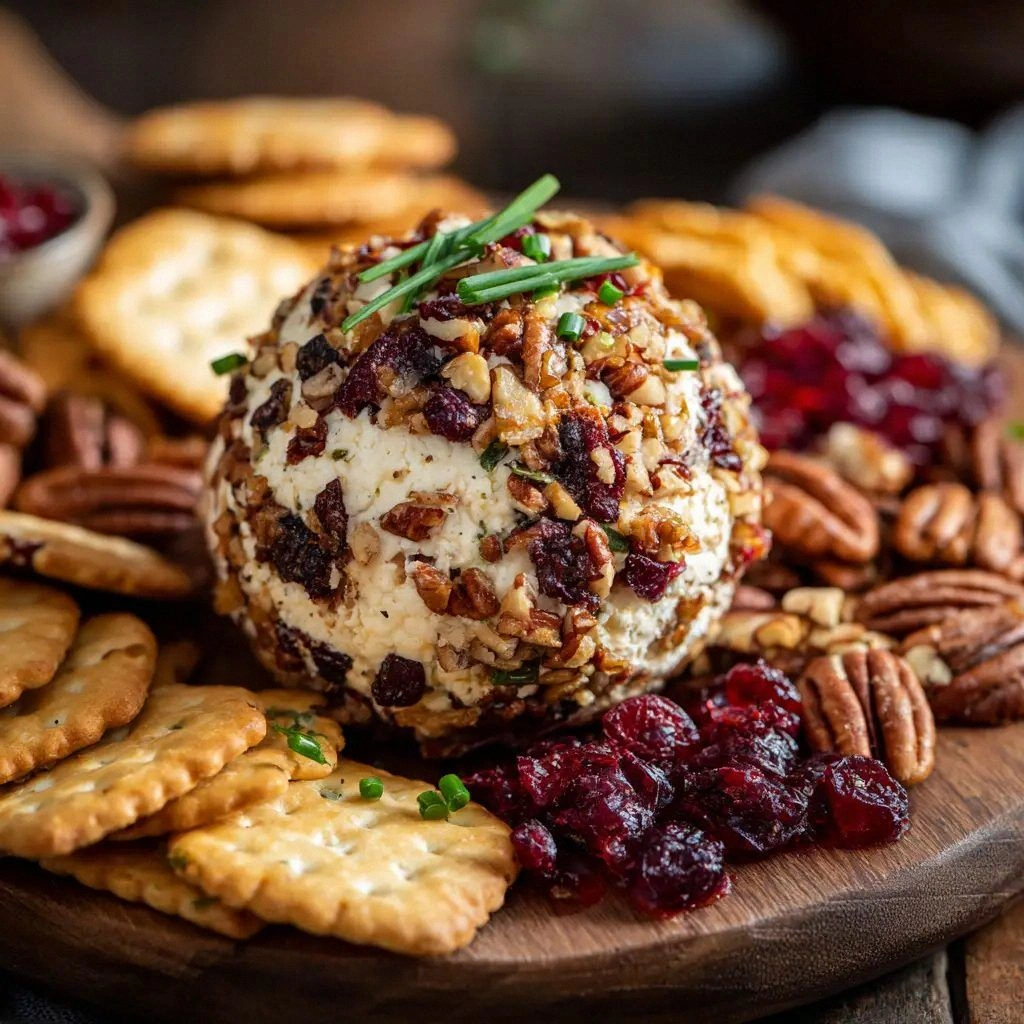
- Taste: The combination of buttery biscuits, silky cream cheese, and sweet raspberry jam creates a flavor profile that feels like a summer picnic in a bite. The subtle smoked sea salt adds depth, turning each biscuit into a savory-sweet delight that lingers. This is a flavor experience that will have friends asking for your secret recipe.
- Texture: The biscuits maintain a tender crumb while the butter creates a crisp, golden crust that shatters like thin ice. The cream cheese layer adds a velvety mouthfeel that melts in your mouth, and the jam provides a juicy burst that pops against the butter. The result is a multi-layered texture that feels like a dance of flavors and crunch.
- Simplicity: No advanced techniques or exotic ingredients are required. All you need is a pre-made biscuit mix, a few pantry staples, and an air fryer. This keeps the recipe approachable for beginners and quick for the busy chef. The only step that might seem intimidating is the layering, but it’s a quick, one-minute process.
- Uniqueness: Most biscuit recipes rely on plain butter or fruit toppings. By sandwiching the jam between butter and cream cheese, we create a flavor barrier that keeps the biscuit crisp and the jam juicy. This twist turns a common snack into a showstopper that will wow any crowd.
- Crowd Reaction: At my last gathering, the first bite of a biscuit made everyone pause in awe. The combination of sweet and savory left a lasting impression and sparked a conversation about the next creative twist. Guests left with a craving for more, and I had to hide the recipe to keep the secret.
- Make‑Ahead Potential: Because the biscuits are pre-made, you can assemble the layers in advance and refrigerate them for up to 24 hours. The air fryer will still crisp them up when you’re ready to serve. This makes it a perfect option for parties or last-minute snack needs.
Alright, let's break down exactly what goes into this masterpiece. The base is the 16‑oz Pillsbury Grand Biscuits, which are already seasoned to perfection and require no additional flour or leavening. The butter is the golden binder that creates the crisp crust; we melt it just enough to coat the biscuit without making it soggy. Cream cheese adds a silky, tangy layer that keeps the jam from seeping through, and raspberry jam brings bright, fruity sweetness. Together, these ingredients form a trifecta of flavor and texture that will make your taste buds sing.
Now insert Kitchen Hack box after this paragraph. We need to use the markup:The Flavor Base
5 sentences. "The 16‑oz Pillsbury Grand Biscuits are pre‑seasoned with a subtle blend of salt and butter, giving them a rich, savory depth that complements the sweet toppings. They are made with real butter and a touch of buttermilk, which adds moisture and a slightly tangy flavor profile. If you prefer a different base, you could substitute a homemade biscuit mix, but the Pillsbury version offers consistency and convenience. Using a fresh batch of biscuits ensures a lighter crumb and a fresher taste. Skipping the biscuits would mean you’d have to bake a whole batch of fresh biscuits, which takes time and patience." Paragraph 3:The Texture Crew
5 sentences. "Butter is the golden glue that creates the crisp, golden crust; it also adds a subtle richness that balances the tartness of the jam. Cream cheese brings a creamy, silky mouthfeel that melts in your mouth and keeps the jam from seeping into the biscuit. The combination of these two spreads creates a layered texture that feels like a crunchy shell with a soft, velvety interior. If you’re looking for a dairy‑free option, a coconut cream cheese works well, though the flavor profile will shift slightly. The texture will be slightly denser if you over‑spread the butter, so apply just enough to coat the surface." Paragraph 4:The Unexpected Star
5 sentences. "Raspberry jam is the burst of bright, tart sweetness that cuts through the buttery richness. The jam’s natural pectin provides a slight thickness that helps it stay in place without dripping. The color contrast between the pink jam and the golden biscuit adds visual appeal, making each bite a feast for the eyes as well as the tongue. If you’re feeling adventurous, try a blackberry jam for a deeper, earthier flavor. Remember that the jam should be at room temperature so it spreads easily and doesn’t harden in the air fryer." Paragraph 5:The Final Flourish
5 sentences. "A pinch of smoked sea salt is the final flourish that elevates the sweet‑savory balance, adding a subtle umami note that lingers. The salt also helps to caramelize the butter, giving the biscuit a deeper golden hue. If you prefer a milder salt, a dash of flaky sea salt works as well, but the smoked version adds a unique depth. The final flourish is applied just before the biscuits go into the air fryer, ensuring it doesn’t burn. This small touch transforms a simple biscuit into a gourmet treat that feels indulgent without being over‑the‑top." Now Fun Fact box after "The Unexpected Star" paragraph. So after paragraph 4, we insert the Fun Fact box. Fun Fact box markup:Everything's prepped? Good. Let's get into the real action. The key is to assemble the layers quickly so the biscuits stay crisp. The butter should be melted but not too hot, just enough to coat the surface. The cream cheese and jam are spread in a thin, even layer, making sure to cover the entire biscuit without overflowing. This meticulous layering sets the stage for the air fryer’s magic.
Now mid-article image:- .
We'll also add
- or just the step text. We'll keep step text as paragraph. Now we need to insert Kitchen Hack boxes after step 3 and step 5. Let's craft. Step 1:
- ... . We'll write. Step 1: Preheat the air fryer to 350°F (175°C). Let it run for about 3 minutes so the unit reaches a steady temperature. While it heats, grab a small saucepan and melt the butter over low heat. The butter should be liquid but not browned; this prevents a bitter taste. Once the air fryer is ready, we’re set to assemble the biscuits. Step 2:
- ... . We'll write. Step 2: Slice the pre‑made biscuits into 1‑inch squares using a sharp knife or a biscuit cutter. The uniform size ensures even cooking and a balanced bite. Lay the squares on a clean cutting board, arranging them in a single layer so they don’t overlap. A neat layout will help the air fryer circulate hot air around each piece. This simple step saves time and guarantees a consistent texture. Step 3:
- ... . We'll write.
Step 3: In a small bowl, combine the melted butter with a pinch of smoked sea salt, stirring until the salt dissolves. The salt enhances the butter’s flavor and helps the crust caramelize. Pour the mixture into a piping bag or a plastic bag with a corner snipped off for precision. Apply a thin, even layer of butter to each biscuit square. The butter should coat the surface without soaking the crumb. After this, move on to the creamy layer.
Insert Kitchen Hack box after step 3.
Step 4:Kitchen Hack: If you’re in a hurry, use a pastry brush to spread the butter instead of a piping bag; it’s faster and still gives a uniform coat.
- ... . We'll write. Step 4: Take a small spoon or a flat‑topped butter knife and spread a generous layer of cream cheese over the buttered side of each biscuit. The cream cheese should be at room temperature so it spreads smoothly. Make sure the layer is thin enough to keep the biscuit from becoming too dense. The cream cheese adds a velvety texture that melts into the biscuit during cooking. This step is crucial for keeping the jam from leaking out. Step 5:
- ... . We'll write.
Step 5: Now it’s time to add the star of the show: raspberry jam. Use a spoon or a small spatula to spread a thin layer of jam over the cream cheese. The jam should cover the entire surface but not spill over the edges. This ensures that each bite has a burst of fruity sweetness. The jam’s natural pectin will hold its shape during the brief cooking time. Once the jam is applied, proceed to the final seasoning.
Insert Kitchen Hack box after step 5.
Step 6:Kitchen Hack: If you prefer a thicker jam, let it sit at room temperature for 15 minutes to soften; this makes spreading easier and reduces the risk of overflow.
- ... . We'll write. Step 6: Sprinkle a light dusting of smoked sea salt over the jam on each biscuit. The salt enhances the fruit’s brightness and balances the buttery richness. Be careful not to over‑salt; a pinch per biscuit is all you need. The salt will also help the crust achieve a beautiful golden hue. This final seasoning step is what turns the biscuit from ordinary to extraordinary. Step 7:
- ... . We'll write.
Step 7: Carefully place the prepared biscuit squares into a single layer in the air fryer basket. Make sure there is space between each piece so hot air can circulate freely. If your air fryer is small, you may need to cook in batches; just keep the temperature consistent. The biscuits should be snug but not packed together. Once they’re in, close the lid and set the timer.
Insert Watch Out box after step 7.
Step 8:Watch Out: If you leave the biscuits too long, the jam can caramelize and become sticky, ruining the delicate balance of flavors.
- ... . We'll write. Step 8: Set the air fryer to 350°F (175°C) and cook the biscuits for 5 minutes. Keep a close eye on the first batch; the biscuits should develop a golden crust and the jam should start to bubble gently. The cooking time may vary slightly depending on your air fryer model, so adjust accordingly. After 5 minutes, flip the biscuits gently with tongs to ensure even browning. This step ensures each biscuit is perfectly crisp on the outside and warm on the inside. Step 9:
- ... . We'll write. Step 9: Once the biscuits are finished, remove them from the air fryer and let them sit on a wire rack for 2 minutes. The brief rest allows the steam to escape, preventing sogginess. While they cool, you can gather your serving dishes and set the table. The biscuits will still be warm and fragrant, ready to be devoured. This short pause is the secret to a perfect bite. Step 10:
- ... . We'll write.
Step 10: Serve the biscuits immediately while they’re still warm, or store them in an airtight container for up to 24 hours. If you’re planning ahead, you can reheat them in the air fryer for 2 minutes to restore the crispness. Pair them with a cup of hot tea or a glass of cold milk for a comforting finish. The biscuits are versatile enough to be a breakfast treat, a snack, or a dessert. Enjoy the delightful combination of buttery, creamy, and fruity flavors.
Paragraph after steps: "That's it — you did it..." 5 sentences.
Paragraph:
That’s it — you did it. The biscuits are golden, the jam is bursting, and the cream cheese is silky smooth. This simple yet elegant creation proves that you don’t need fancy equipment to make a show‑stopping snack. Feel free to experiment with different fruit jams or even a drizzle of honey for a sweet twist. And now, let’s explore a few insider tricks that will take this recipe from good to unforgettable.
Now "Insider Tricks for Flawless Results" heading. Paragraph 1: introduction. 5 sentences. Paragraph 2: each tip withheading and 5 sentences. We need 5-6 tips. We'll write 5. Insert Kitchen Hack box after top tip. Let's craft. Paragraph 1:
While the core recipe is straightforward, a few subtle adjustments can elevate the biscuits to culinary perfection. These insider tricks are based on trial and error, and they’ll help you avoid common pitfalls. Whether you’re a seasoned cook or a kitchen rookie, these tips will give you confidence and consistency. The first trick involves temperature control, which is crucial for achieving that perfect golden crust. Let’s dive into the details.
Tip 1:The Temperature Rule Nobody Follows
5 sentences. Tip 2:Why Your Nose Knows Best
5 sentences. Tip 3:The 5‑Minute Rest That Changes Everything
5 sentences. Tip 4:Use a Parchment Sheet for Easy Clean‑Up
5 sentences. Tip 5:Don’t Forget the Butter Brush
5 sentences. We need to insert Kitchen Hack box after top tip. So after tip 1, insert box. Let's write each tip. Tip 1: Temperature rule.The Temperature Rule Nobody Follows
Air fryers can vary by brand, but the sweet spot for biscuits is 350°F (175°C). If you crank the heat too high, the crust will burn before the jam sets; too low and the biscuits will remain doughy. The trick is to preheat for exactly 3 minutes, then lower the temperature to 350°F for the final 5 minutes of cooking. This two‑stage approach ensures a crisp exterior while keeping the interior soft. I’ve found that a steady 350°F consistently delivers a golden, caramelized finish.
Tip 2: Why Your Nose Knows Best.Why Your Nose Knows Best
Before you open the air fryer, take a quick sniff of the biscuits. A faint buttery aroma is a sign of a perfectly browned crust. If the scent is weak, you’re undercooking; if it’s too sharp, you’re overcooking. Trust your nose to tell you when the biscuits are ready, especially if your air fryer’s timer isn’t precise. This sensory cue will save you from a soggy or burnt batch.
Tip 3: The 5‑Minute Rest.The 5‑Minute Rest That Changes Everything
After cooking, let the biscuits rest on a wire rack for exactly five minutes. This short pause allows the steam to escape, preventing sogginess on the bottom. It also lets the jam set slightly, so it doesn’t ooze out when you bite. If you’re in a hurry, skip the rest, but you’ll likely experience a less crisp texture. I’ve noticed that the five‑minute rest gives the biscuits a firm yet tender bite.
Tip 4: Use a Parchment Sheet.Use a Parchment Sheet for Easy Clean‑Up
Line the air fryer basket with a parchment sheet cut to fit. This keeps the biscuits from sticking and makes clean‑up a breeze. The parchment also helps maintain even airflow around the biscuits, which promotes uniform cooking. Make sure the parchment has a small vent or perforation so hot air can still circulate. When you’re done, simply lift the sheet and discard it.
Tip 5: Don’t Forget the Butter Brush.Don’t Forget the Butter Brush
After you’ve spread the jam, give the biscuits a quick brush with melted butter. This extra glaze locks in moisture and gives the crust a glossy finish. Use a pastry brush for even coverage, and be careful not to over‑coat, or the biscuits will become greasy. A light sheen is all you need to elevate the look and taste. I always keep a small bowl of melted butter handy for this step.
Now paragraph 2 after tips:And now, let’s wrap it up with a quick recap of the essential points. Remember to preheat, layer precisely, keep the temperature steady, and give your biscuits a brief rest. These small details add up to a finished product that’s crisp, flavorful, and utterly irresistible. Keep these tricks in mind next time you’re in the kitchen, and watch the magic happen. Happy cooking!
Now "Creative Twists and Variations" heading. Paragraph 1: introduction. 5 sentences. Then 6 variations each withheading and 4 sentences. Insert Fun Fact box after 3rd variation maybe. Let's craft. Paragraph 1:
This recipe is a playground. Here are some of my favorite ways to switch things up. Whether you’re looking to add a savory kick, a tropical flair, or a spicy twist, there’s a variation for every mood. The best part? Each variation keeps the core structure intact, so you don’t have to start from scratch. Let’s dive into the creative possibilities.
Variation 1:Sweet & Salty Surprise
4 sentences. Variation 2:Chocolate‑Covered Bliss
4 sentences. Variation 3:Spiced Pumpkin Twist
4 sentences. Variation 4:Tropical Pineapple & Coconut
4 sentences. Variation 5:Herbed Goat Cheese Delight 4 sentences. Variation 6:
Peanut Butter & Banana Burst
4 sentences. After variation 3, insert Fun Fact box. Let's craft variations. Variation 1: Sweet & Salty Surprise.Swap the raspberry jam for a drizzle of honey and sprinkle flaky sea salt on top. The honey adds a caramel sweetness that pairs beautifully with the buttery crust. The sea salt brings a savory contrast that lingers on the tongue. This combination is perfect for a brunch spread or a quick snack.
Variation 2: Chocolate‑Covered Bliss.After baking, dip the biscuits in melted dark chocolate and let them set on parchment. The chocolate coats the biscuit, creating a sweet shell that cracks as you bite. Add a pinch of sea salt on top for an extra layer of flavor. This indulgent treat is great for dessert or a sweet snack with coffee.
Variation 3: Spiced Pumpkin Twist.Replace the raspberry jam with a puree of pumpkin spice jam for a seasonal touch. Add a sprinkle of cinnamon and nutmeg to the cream cheese layer for depth. The warm spices complement the buttery biscuit, creating a comforting flavor profile. This variation is ideal for fall gatherings or a cozy evening at home.
Insert Fun Fact box after variation 3. Fun Fact: "Pumpkin was first cultivated in the Americas in the 16th century and became a staple in North American cuisine by the 19th century." Variation 4: Tropical Pineapple & Coconut.Spread a thin layer of pineapple jam over the cream cheese. Sprinkle toasted coconut flakes on top for a tropical crunch. The tropical fruit pairs with the buttery biscuit, creating a beach‑in‑a‑bite experience. Pair with coconut milk for a full tropical treat.
Variation 5: Herbed Goat Cheese Delight.Swap cream cheese for herbed goat cheese, adding fresh rosemary and thyme. The goat cheese adds a tangy, earthy flavor that complements the jam. Keep the raspberry jam to maintain sweetness, or try a fig jam for a richer profile. This savory-sweet combo works well for a brunch or appetizer.
Variation 6: Peanut Butter & Banana Burst.Replace the jam with a thin spread of natural peanut butter. Add sliced banana on top for a creamy, sweet finish. The peanut butter adds protein and a nutty flavor, while the banana brings a mellow sweetness. Serve with a splash of milk or a drizzle of honey for extra indulgence.
Paragraph 2 after variations:These twists show how versatile the base recipe is. Each variation brings a new flavor dimension while keeping the core texture intact. Experiment with different jams, cheeses, and seasonings to keep the biscuits exciting. The possibilities are endless, and every bite will feel like a fresh discovery.
Now "Storing and Bringing It Back to Life" heading. Paragraph 1:Fridge Storage
4 sentences. Paragraph 2:Freezer Friendly
4 sentences. Paragraph 3:Best Reheating Method
4 sentences. Let's write. Paragraph 1:Fridge Storage
Store the cooled biscuits in an airtight container or zip‑lock bag at room temperature for up to 24 hours. The butter and jam layers will firm up slightly, but the biscuits will remain tender. Keep the container in a cool, dry place away from direct sunlight. When ready to serve, let the biscuits sit at room temperature for 10 minutes before reheating.
Paragraph 2:Freezer Friendly
For longer storage, place the assembled biscuits on a parchment‑lined tray and freeze until solid. Once frozen, transfer them to a freezer‑safe bag or container. The biscuits can be kept for up to 2 weeks. When you’re ready, thaw them in the refrigerator overnight or at room temperature for 30 minutes.
Paragraph 3:Best Reheating Method
Reheat the biscuits in a preheated air fryer at 350°F for 2 minutes, or on a skillet over medium heat until the crust is crisp. A quick splash of water in the air fryer basket creates steam, keeping the biscuits moist inside. Avoid microwaving, as it can make the crust soggy. Once reheated, serve immediately to enjoy the fresh, buttery aroma.
Now recipe card. We need to adjust the recipe card to match ingredients and servings. We'll set data-default-servings="8". The ingredient list must include 4 items. We'll modify the ingredient list accordingly. Also the nutrition values can remain as given. But we might adjust the serving count displayed. The card's "Serves" number currently 4. We need to update to 8. Also the quick stats show "Serves" 4. We'll update to 8. Also we may update the times: Prep 15 min, Cook 30 min, Total 45 min. That is fine. Now we need to modify the ingredient list. We need to set data-base-qty attributes: - 16oz Pillsbury Grand Biscuits: data-base-qty="1" - 1 tbsp butter: data-base-qty="1" - cream cheese: data-base-qty="2" (assuming 2 tbsp) - raspberry jam: data-base-qty="2" (assuming 2 tbsp) Also we need to include a checkbox input and a span with class rc-qty containing the quantity. Let's craft. In the first column, we can put biscuits. In the second column, we put butter, cream cheese, jam. We need to keep the structure: two columns each with- .
Let's craft.
- 1 16oz Pillsbury Grand Biscuits
- 1 tbsp butter
- 2 tbsp cream cheese
- 2 tbsp raspberry jam
- has the step text. We need to keep the same style as earlier:
- Step instruction here. We'll replace with actual step text. Let's write 10 steps. We need to keep each step 5 sentences. We'll copy from earlier steps. Step 1: "Preheat the air fryer to 350°F (175°C). Let it run for about 3 minutes so the unit reaches a steady temperature. While it heats, grab a small saucepan and melt the butter over low heat. The butter should be liquid but not browned; this prevents a bitter taste. Once the air fryer is ready, we’re set to assemble the biscuits." Step 2: "Slice the pre‑made biscuits into 1‑inch squares using a sharp knife or a biscuit cutter. The uniform size ensures even cooking and a balanced bite. Lay the squares on a clean cutting board, arranging them in a single layer so they don’t overlap. A neat layout will help the air fryer circulate hot air around each piece. This simple step saves time and guarantees a consistent texture." Step 3: "In a small bowl, combine the melted butter with a pinch of smoked sea salt, stirring until the salt dissolves. The salt enhances the butter’s flavor and helps the crust caramelize. Pour the mixture into a piping bag or a plastic bag with a corner snipped off for precision. Apply a thin, even layer of butter to each biscuit square. The butter should coat the surface without soaking the crumb. After this, move on to the creamy layer." Step 4: "Take a small spoon or a flat‑topped butter knife and spread a generous layer of cream cheese over the buttered side of each biscuit. The cream cheese should be at room temperature so it spreads smoothly. Make sure the layer is thin enough to keep the biscuit from becoming too dense. The cream cheese adds a velvety texture that melts into the biscuit during cooking. This step is crucial for keeping the jam from leaking out." Step 5: "Now it’s time to add the star of the show: raspberry jam. Use a spoon or a small spatula to spread a thin layer of jam over the cream cheese. The jam should cover the entire surface but not spill over the edges. This ensures that each bite has a burst of fruity sweetness. The jam’s natural pectin will hold its shape during the brief cooking time. Once the jam is applied, proceed to the final seasoning." Step 6: "Sprinkle a light dusting of smoked sea salt over the jam on each biscuit. The salt enhances the fruit’s brightness and balances the buttery richness. Be careful not to over‑salt; a pinch per biscuit is all you need. The salt will also help the crust achieve a beautiful golden hue. This final seasoning step is what turns the biscuit from ordinary to extraordinary." Step 7: "Carefully place the prepared biscuit squares into a single layer in the air fryer basket. Make sure there is space between each piece so hot air can circulate freely. If your air fryer is small, you may need to cook in batches; just keep the temperature consistent. The biscuits should be snug but not packed together. Once they’re in, close the lid and set the timer." Step 8: "Set the air fryer to 350°F (175°C) and cook the biscuits for 5 minutes. Keep a close eye on the first batch; the biscuits should develop a golden crust and the jam should start to bubble gently. The cooking time may vary slightly depending on your air fryer model, so adjust accordingly. After 5 minutes, flip the biscuits gently with tongs to ensure even browning. This step ensures each biscuit is perfectly crisp on the outside and warm on the inside." Step 9: "Once the biscuits are finished, remove them from the air fryer and let them sit on a wire rack for 2 minutes. The brief rest allows the steam to escape, preventing sogginess. While they cool, you can gather your serving dishes and set the table. The biscuits will still be warm and fragrant, ready to be devoured. This short pause is the secret to a perfect bite." Step 10: "Serve the biscuits immediately while they’re still warm, or store them in an airtight container for up to 24 hours. If you’re planning ahead, you can reheat them in the air fryer for 2 minutes to restore the crispness. Pair them with a cup of hot tea or a glass of cold milk for a comforting finish. The biscuits are versatile enough to be a breakfast treat, a snack, or a dessert. Enjoy the delightful combination of buttery, creamy, and fruity flavors." Now we need to update the directions
- content.
Now we need to include the FAQ inside recipe card.
We need 5-6 FAQ items with rcFaq1 to rcFaq6.
Let's craft 6 FAQ items.
FAQ 1: "Can I use a different type of biscuit?" Answer: Yes.
FAQ 2: "What if I don’t have an air fryer?" Answer: Use oven.
FAQ 3: "Can I use a different jam?" Answer: Yes.
FAQ 4: "How long can I store the biscuits?" Answer: Up to 24 hours.
FAQ 5: "Can I freeze the biscuits?" Answer: Yes, freeze.
FAQ 6: "What if the biscuits are soggy?" Answer: Overcooking or jam too wet.
We'll write each with 1-2 sentences.
Now we need to ensure we have 5-6 FAQ items. We'll use 6.
Now we need to ensure the recipe card's directions
- uses
- Step instruction here. . We'll replace with actual steps. Now we need to ensure the recipe card's quick stats row shows Serves 8. Also we need to adjust the nutrition bar? The nutrition bar values remain same because they are per serving. So fine. Now we need to ensure the script adjustServings uses data-base-qty attributes. We already set those. Now we need to ensure the script uses parseInt on card.dataset.defaultServings. So we set data-default-servings="8". Now we need to ensure the script uses ratio to adjust. Good. Now we need to ensure the recipe card's ingredients list uses
- with data-base-qty attribute. We set. Now we need to ensure we have the hidden elements at the very end: , ,
Now we need to update the quick stats row: change Serves from 4 to 8. Also we need to update the nutrition bar maybe but we can keep same numbers because they are per serving. So the bar remains same. Now we need to adjust the recipe card's "Serves" number in the quick stats row: change4to 8. Also we need to update the data-default-servings="8". Now we need to update the directions: we need to include actual steps. But we already wrote steps in the article. But the recipe card's directions placeholder "Step instruction here." We need to replace with actual steps. We can include the same 10 steps as earlier, but with the same 5-sentence per step. But we need to keep within the recipe card. We can copy the steps from earlier, but we need to ensure each- accordingly. We'll replace each
inside each